Search This Blog

Tuesday 31 December 2013

Laying the hearth

As hoped, I did win the auction on Ebay for a rather large black slate hearth. It's 1200mm long, almost 850mm deep and 45mm thick so quite a big lump of slate. Whilst not the cheapest option, at £112 it's also a fair deal. I was looking at using 25mm thick slate slabs, but I'm glad I managed to get the thicker slab now it's in.

There's thankfully nothing wrong with it, the lady just ordered the wrong size. Just as thankfully, it's just about perfect for my recess. I say just about, as I did have to take 10mm off the rear section to get it to fit. But it turns out that cutting slate is actually quite easy with a 9" saw. Very dusty as slate is a mud stone, but easy.

The first thing to do was to lay the slab on the floor and use it as a template for cutting the carpet. Ideally, you'd just roll the carpet out the way all together, but that meant emptying half the lounge and since it was 6pm, I didn't much fancy that. So I just worked round it.


With the floor clear I could lay the hearth in place and make sure it fitted just as I wanted. Which is just as well, as I had forgotten to include the grout lines when measuring up. So the slab was a perfect fit if there were no gaps. However, by the time there was a 10mm gap between the two sections, and a 10mm gap to the chimney breast, the front slab was too far out. Which wasn't a major issue, it just meant lugging it back outside and cutting it down a touch. And I do mean lugging it. I could just about lift the slab on my own, but not in a controlled way, that's what mates are for.

So once it was cut down, the two sections were laid in place to ensure a good fit. As always, measure twice, cut once. I think it looks rather good!


Now the hearth is a good fit, with the right size gaps for grouting, the new carpet gripper rails were cut and nailed into place. The hearth will sit 10mm or so up from the floor so any carpet can be slid under it to keep the edge neat and tidy.

With the mortar mixed (in the dark), it was time to be brave and lay the hearth. The rear section was laid and levelled first, with the front done second. However, I just couldn't get the front to drop enough to match the height of the rear section, despite standing my 15St 7Lb on it. Rather than lift and redo the mortar for the front, the rear piece was lifted out and raised up by a couple of mm. Thankfully, the bed under the front was stiff enough to take my weight to do this quickly.

So this was the hearth as of this morning. It sounds dry, as there's a good solid knock to it but I'll be leaving it at least another day to be sure before I sort the edges out.


And that's the main bits of the recess done. There's the boxing in at the top to do and the plastering to do or get done but those are cosmetic things rather than anything structural. The only issue this gives me is with the grouting along the chimney breast. I have a choice of either grouting it now, and then plastering down to it later, or the other way round and leave the grouting for later. I'm currently thinking about doing the grouting first as that will then give the plaster a good clean edge to run to. It also gives me something I can do now, rather than waiting which I'm not very good at.

Saturday 28 December 2013

Just about done building!

Since Christmas Eve I have managed to get most of the "building work" side of the fireplace recess done. The lintel was levelled and mortared in, and then the gap above it bricked back in too. Turns out it's fairly messy fitting lintels as you end up trying to push mortar into small holes or slots only to miss with a reasonable amount of it. Or at least, that's how I ended up doing. But it's in and was then left overnight to go off.


With the lintel dry, I could now make a start on raking out any loose mortar and re-pointing what I felt needed doing in the recess. My aim wasn't to make it look brand new. The house is too old for that, but not old enough to go for a full rustic or aged effect either. So if the mortar was sound but lumpy it stayed. If it was loose or so dry it crumbled it was raked out and replaced. Once the pointing was done I had a good chunk of mortar left over, so I added some ballast I had left over and laid it into the bottom of the fireplace to bring the level up. It's not totally level, but it doesn't need to be, as the hearth will sit on a 5-10mm bed of mortar which will take up any unevenness.


And then I had to wait overnight again for the mortar to go off before I could make a start on cleaning the bricks and remaining mortar. Thankfully, most of it could be done with just a wire brush. I had heard horror stories about trying to clean soot from bricks, but apparently foaming bathroom cleaner is the way to go. So with Mr Muscle in hand, I set too. Turns out that a rag and a small garden spray bottle of water is just as effective, and much cheaper! The below photos show the finished article not long after I had done the cleaning, so the upper sections are still damp and appear darker than the rest. I'm hoping they'll even out once dry.


And that is about it for now. I'm currently looking about for a hearth, and I may have found one that someone has had cut to size, but then realised they'd ordered it wrong. Thankfully, it's just about perfect for what I need. The only other thing I need to do is to cut and fit the concrete boards to cover over the bricks that step in from the vertical line under the lintel. For now I'm planning on leaving this until I get the flue liner, but The Boss may decide before then that she wants it all to look a bit tidier. Fitting the boards will close off the chimney temporarily, so should also stop any draughts.

One final thing, a quick photo of Daddy's little helper, as he has been supervising throughout.


All being well, the next update should involve the fitting of the hearth.

Thursday 26 December 2013

Fireplace opened up at last!

Since I've got some time off over Christmas, I've been getting on a bit more with opening up the fireplace.

The firs thing to do was to remove the plaster up to roughly the height I need to fit a lintel at. This is easy work, but dusty.


With the top opened up I could then remove the bricks that don't form part of the gather for the chimney up the point I need. With the top done, I could then knock the bottom of the opening out and see what I'm left with. The sooty marks show where the lintel will be, giving me a height of about 950mm within the opening, which should be big enough to give plenty of space round the stove for one of the stove fans I like. OK, they're not cheap and maybe a bit of a placebo when it comes to actually doing much, but I like them.


So at this point I've got the builder's opening to the height I need and as wide as it goes. The height is not such as issue as there's more than enough to clear any stove I would be likely to fit. The possible issue is the width. Building Control don't state any minimum distance, but some stoves require a minimum of 6" or 150mm clearance to each side. With a 2'/600mm wide opening that only leaves 1'/300mm for the stove. Which is not enough. So that means I need to do one of two things.

Option one is to open the recess up by at least a brick's width to each side. Whilst not the hardest job in the world, it would mean corbelling bricks back in or fitting lintels front to back to keep the chimney supported. Not really what I want to be doing if I can avoid it. The other option is to find a stove that I can fit in the existing hole.Guess which way I'll be going.

I feel I should point out at this stage for anyone that ever follows this that the distances I am talking about are those to non-combustible surfaces only. Bricks, plaster and the concrete Hardiebacker board I'll be using are all such materials. IF you intend to use plasterboard, wooden (oak usually) mantel pieces etc, then those distances are different as they are classed as combustible. Please read Approved Document J for more information on what's required if you live in England or Wales. I believe the regs are different in Scotland.

Thankfully, some stove manufacturers don't state any distances, so it's up to my common sense and the 2-3"/50-75mm side clearance that my local BCO wants to see. Hell, any less and I doubt I'd be any to shift the 65-70kgs of stove into place anyway! So I'm looking for anything up to 50omm or so wide. There are a few good looking stoves out there that can be fitted with no minimum suggested distances and fit the width I'm looking at. The problem I'm facing is that the ones I like vary in price from £220 to about £1200!! And since I'm paying for it, my tight side is coming into effect, but it's being balanced by my desire to have a good looking stove too. And the more expensive ones do tend to look a little more "professional" perhaps. The main contender so far is the Newton 5kW, which I've found for £700. This seems like a good, midrange stove and is I suspect what I'll end up getting. It's also DEFRA approved and will accpet a 5" flue, so fitting it should be dead simple as it's also only 400mm wide.

But before I can go ahead and fit anything, I need to fit a lintel above the recess. I was hoping to come across one in the wall, and they may well be higher up, but that's not good enough so I need to fit one. And the below photo shows where it will sit. Thankfully, for a 600mm opening, a 900mm lintel is perfect as a lintel should have 150mm seating on either end. That can be cut down to 100mm in some circumstances, but I don't want to risk anything. It would also mean cutting a lintel down so it's just more hassle all round really to do so.


The only other thing I've done so far is to cut off and close up the old gas pipe. Since the existing fireplace sits below floor level I will be filling it in with concrete to both raise it up and seal off the gas pipe permanently. The white plastic pipe is still in place, but only because by the time I got round to it on Christmas Eve it was time to tidy up.

For those wondering, this has appeared to take so long to do as I can only work for a few hours at a time before the Boss gets annoyed at the noise and dust and I have to stop. All the work that has been done so far could have probably been done in a day if I were in a position to just bash away at it and not have to stop and tidy up. The next tasks are to actually fit the lintel and then close up above it. Once that's done I can make a start on cleaning up the brickwork and then begin raking out the old mortar in the recess so I can set to with the pointing. That's not something I looking forward to doing, but it needs sorting as the existing brickwork is too manky to leave as is.

Thursday 19 December 2013

Further fire place bashing

Apologies for there being such large gaps between my postings, but it's silly season at work and I've not had time.

Whilst I've not gotten much done, I have made a slight start on opening up the inside of the builders opening. It's turns out that the brick built gather isn't the original one as the bricks behind it are soot blackened. Thankfully for me this mainly means that they fall out easier! This photo shows the current view up the chimney where I've removed the bricks so far.


The other thing the photo shows is what may be the bottom of the structural gather on the left hand side where there are soot stained bricks. Until my partner's finished child minding for Christmas, I'm unable to pull the face of the chimney apart, so I don't know for sure what I'm finding as yet. But I do know the right hand side is straight forward, and half way down at this point too. Once I can open up the bottom of the opening I expect work to progress much faster. Working through a hole the size of a single block restricts things somewhat!


Oh, on an unrelated note, I've managed to find another complete Record 74 vice, so once I get back out into the garage I can start making plans for my build bench at last!

Wednesday 27 November 2013

Finding the fireplace, and thoughts on stove fitting

Whilst not really Workshop related, it's fairly manly/man-cave related so I'm putting this entry in anyway. And it's my blog, so if you don't like it, then that's too bad.

A while back I removed a decorative flame effect gas fire from the lounge with the help of a gas fitter from work (thanks Darren). As nice as it was, it didn't give out much heat but the casing and glass still got hot so it was no use during the day with little ones about as my partner is a child minder and burning other people kids is somewhat frowned upon. Burning your own is also frowned upon, but that's unlikely to directly lead to a lose of business. Anyway, I digress. The fire was pulled out and Ebay'd and it was left at that for the time being as there was no point making loads of mess to hide the end of the gas pipe if something else was going to happen shortly.

And we've now decided on seeing about fitting, or getting fitted, a multi-fuel stove. So it was time to begin looking into these things. And it appears not all that hard to do if you're a bit handy with the DIY. OK, Building Control have to sign off on the work, but the work itself isn't hard as long as you buy the right quality parts. And I figure if I can build The Workshop and do everything in it, then this has got to be within reach.

But first things first. I have a flat chimney breast to break into and have a nose about at. And whilst I was quite surprised to find at least 1.5" thick plaster on the wall, I was happy enough to only have a few large concrete blocks filling the builders opening. I've only taken one out as I need to ensure I can cover the hole up in a vaguely neat way for now.


So with a hole big enough to get my head in I did just that and had a nose up the chimney. A neighbour had said it would be pot lined, which would make fitting a liner a bit of a pain in the arse. Thankfully, it appears he was wrong, or may have been talking about the other chimney these houses have. They used to have a solid fuel boiler in the kitchen with a smaller chimney. This is what this one looks like at the back:


A little way up the chimney:


And then as straight up the chimney as I could aim the camera:


And this seems to be your run of the mill brick built chimney. I'll need to see about removing the bricks that form the infill shaping needed for the open fire that was originally in here as it's not needed and could fall in if left. Which is good as it means a 5" liner should drop down it a treat once done.

The next thing is to open the rest of the wall up so I can see if the stove we'd like, a Charnwood C4, will fit in the existing recess or if I'll need to get a bit more structural with it and open it up.

I really hope it fits.

Racking up, tidying up under way

Although this happened a few days ago, I've been too busy on a training course at work to get online. Not that anything of much excitement has happened mind you. I've got the racking up and spaced so that I can still get to the light switch and made a fair start on clearing the main rear section of the loft. The garage now looks like this:


So all my hard work is starting to pay off and the place is getting more organised. I just need to get through all the boxes of parts I've got and Ebay what I no longer need. Oh, and sell my lovely big blue bench as it's the wrong size and won't fit anywhere once I'm ready to re-start work on the Sprite. This is a bit of a shame as I've had the bench for nearly 10 years now, but I don't see the point of cutting it up to make it shorter if someone else can make better use of it as is.

Tuesday 19 November 2013

New feet

Yay. The postie bought me a bag of shiny new feet this morning. So not only have BigDug sent me the 16 feet I was missing for free, they've done it in less than 24 hours too! I shall be off outside later to get the rest of my shelving sorted I think.

Monday 18 November 2013

Finished floor and new shelving

Well the second coat of paint is done and dried. And I'm quite pleased with how it's gone. It did take while to go off as I only have a small fan heater in there at present, and it needs at least 24 hours at 20C. The only thing that could be better is that due to having put it on a touch thick, well at least 50% thicker than expected, there are a few roller marks that have been left. But having been walking about in there for a few days, I no longer notice them so it can't be too bad!


And now the floor has dried I can make a start on clearing the loft and sorting out all my stuff. And it's not going to be a particularly quick task I suspect! But one thing that should help is an Ebay purchase from a few months back. I managed to acquire 5 sets of Big Dug shelving for £95, so they'll be going up along the wall next to the side door. They'd all be up already, but I realised I'd only got one set of feet for them. Not sure what happened to the rest, but I don't have them. So I rang Big Dug this morning to get a price for 16 feet only for the nice man to say that they'd be sending them to me for free as a good will gesture. I think this is amazing service, as although the bits probably don't even cost a few pennies to make, sending them to me takes time and effort. And the shelves seem nice and solid once I've screwed them to the wall too, so all round a good job!


Monday 11 November 2013

More painting, less watching it dry

Since I'm currently on call at work, this Saturday was spent driving round fixing stuff. But since Sunday was quiet, I did manage to get the second coat of floor paint down. Whilst I did a better job of evening it out over the entire floor, it did mean putting it on thick all over. And although I don't have any pics yet, I'm not sure all the roller marks are going to disappear. But I am sure it's water proofed the floor as I've had to leave the garage door up a touch so the paint doesn't stick it down. This then lest the rain in, but it just pools on the surface, just as I had hoped. I'll grab a photo or two once it's dry enough for me to walk about on. And once it is that dry, I can finally get my shelving set up and start organising everything.

Oh, and if anyone wants to donate either a Record 74 or 75 vice that would be great, as the second one I got from Ebay was bent and wouldn't shut.

Wednesday 6 November 2013

Painting. And then watching it dry.

Since I have only heard horror stories of cheap floor paint in workshops, I spent a while looking at the proper epoxy floor paints that have a more industrial purpose. And I found one that Watco sell that is suitable for my needs. It's also normally £110 + VAT and delivery! Thankfully, they seem to be selling off their stocks of it, so £40 got me a 4.5 litre tin of the stuff. Well it's two tins that make 4.5 litres, but you get the idea.

And it turns out like this.


Which I'm quite happy with, as I didn't know it would be shiny. It's still drying in the photo, as it takes 24 hours at 20C to dry, and it's not that warm here. This was taken after about 20 hours, so it might be dry by this time tomorrow.

The only real issue I have had with it is that 4.5 litres is good for up to 30 square meters of floor. And once you get to the end of a 21 square meter floor, you feel bad about throwing expensive paint away. Or you end up pouring the remaining paint on the floor and just putting it on a bit thickly instead. How good an idea this is remains to be seen!

The only other issue with a shiny floor is that I can now see all the little imperfections where the floor's not flat. But since most are where the shell will sit, I won't have to see them so I won't mind!

Tuesday 5 November 2013

Progress?

Due to various work and family commitments, I've not really been able to get much done in the workshop of late. And the bits I could do have been hampered by the fact that 95% of my stuff is just wedged into the loft space so I can sort the floor. I could have primed the vice, but I can't find the box of paint. I could've finished the wiring, but my brother's run off with my tub of cable clips.

What I have managed to do in the mean time though has been worth the effort. After much waiting and having to do other things, I've managed to get the last coat of self-levelling compound down!

This wouldn't have been necessary if the concrete slab had been flat and smooth in the first place. But it was no where near. That's the problem with using a friend of a friend set up. If things don't go to plan, you're a bit stumped for any come back. Next time, if/when there's a next time, I'll be getting it done properly by someone else. It'll be much quicker and probably cheaper too. Either way, the slab was wonky and needed levelling. Most of this has been done, but a final coat is required. To do this, the floor must be clear. And that means moving the shell. But it's November and the weather's rubbish. And as much as just putting on the drive is the easy option, it also leaves it exposed, which is something I really want to avoid if at all possible.

And thankfully, it is possible to avoid:


Now, I'm not 100% sure what Mr HSE would have to say about this set up, but I can imagine it's full of expletives! But since I'm happy with it, and it's my private garage, I don't much care what Mr HSE would say.

So with the shell in the air, my work bench sheeted up on the drive and some other bits in The Boss's shed, I could make a start. I'm using Instarmac's product HD Top for the floor for no reason other than their technical and sales team, Lisa in particular, have been amazing to deal with, despite me being a private customer and not the large companies they usually deal with. The other reason is I know all the stuff is designed to work together so it shouldn't go wrong. Well, as long as you don't over water the stuff and then have it go soft as well as uneven on the floor. But we'll chalk that up to experience and not do it again!

The first thing to do is to prime the floor. This bit's easy as the smallest tub of acrylic gunk is good for at least 133 square metres of floor and I've only got 21. You just mix it as instructed, bung it on the floor and push it about with a brush and a roller. Wait for it to dry and go clear and then repeat. Simples.

The hard bit, especially when working on your own as it turns out, is the levelling compound. The bit that's hard is mixing it quickly enough to get a bucket of it poured and trowelled before the previous stuff is starting to go hard. Because it has a short pot life you need to keep a wet flowing edge to the stuff so the buckets can mix on the floor as you go. But once each bucket is poured you need to go over it with a spiked roller to pull all the air bubbles out before you can mix the next batch. All of which takes precious time. Overall, I'm quite pleased with how the stuff went down but there are one or two spots which could've been better as I can be a bit of a perfectionist at times.

So this is what it looks like now that I've rubbed the high spots off. It's nice and smooth and ready for painting which I hope to do later today.


The staining in the bottom of the photo was from the rain we had overnight. The dam keeping the compound in also kept the rain in. But the only effect it has is to discolour the surface. And since it's being painted tile red, it won't matter.


The only other thing I've done is to remove the boarding from across the front edge now it's all dry. I had hoped it wouldn't crack the leading edge, but it has a little. To cover this, I'm going to go with a suggestion from The Boss, which is to put a stainless steel angle piece across the leading edge once it's been painted. I'm going to cut the floor back to allow me to fit the angle flush to floor so I can still sweep the floor easily.

Monday 21 October 2013

Now for a quick update on my most recent thing in the workshop. I'm only doing this now as I'm waiting for pay day to arrive so I can afford some more self levelling compound for the floor. I need to sort the floor and paint it before I can arrange the shelves. Once that's done I can clear the loft. Then I can finish the wiring. Then I can tile the corner above the sink. And then, finally, I might actually get back to the Sprite.

Maybe.

But I digress.

The first photo I put up was of the cleaned up static jaw body of a Record Autovice 74, or just Record 74 as the later ones have cast on them. The first I have is the later type and I have an early one on the way. Ah, Ebay to my rescue yet again.

When the vice first turned up it looked like this, not too bad but it could be better. And since I can't do much in the garage right now, I may as well take it apart and clean it.


So this is the same vice broken down to its components, and then sat next to it's big brother a Record 75. Which is a big heavy lump of a vice. But bomb proof and considerably older than I am, and I'm thirty now.


The vice is currently in bits, being cleaned back to bare castings so I can etch prime the entire thing before giving it a new coat of red enamel. There's virtually no slop on the screw thread so all I need to do is get some new jaws and their screws once it's painted and it'll be good to go. And then I get to do it all again for the second one just so I can have a matching pair on my planned workbench!
And speaking of the Sprite, here's my plans for it, what I started with, and where I'm at now.

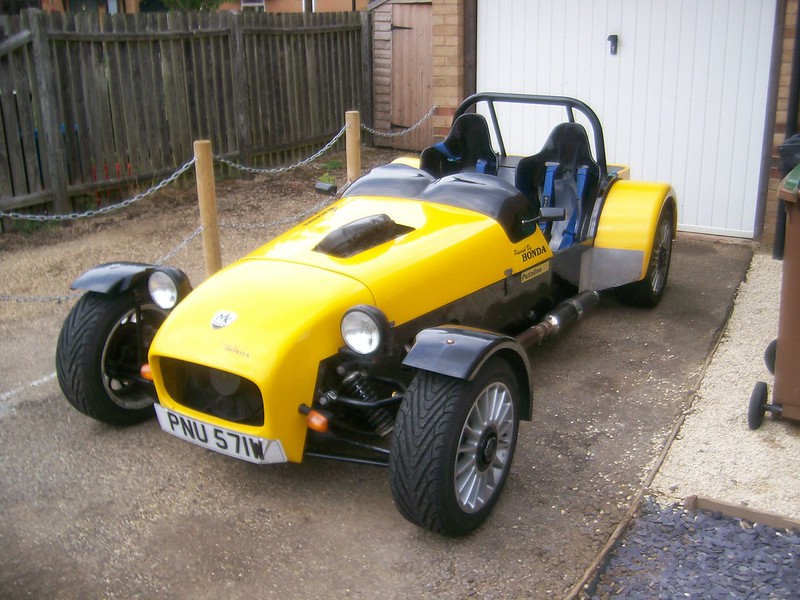
The original plan was to build a replacement for my old MK Indy 7 clone kit car. I owned this when I was married and I loved it! 500kgs, 160 BHP and an 11,000 RPM rev limit due to having a Honda Blackbird engine makes for quite an intoxicating drive.


However, with a divorce to pay for and some outstanding debts to clear, I had to sell it. Which was a real shame as I loved having my little toy car. But now she's off in the Alps hopefully having a lot of fun. So the aim of making something at least as quick but more practical came about. More practical because owning a 7 is fun, and I've done a full weekly shop and even fetched 7' tree stakes in it but having a heater and a boot would be nice so I can go touring in it and maybe even persuade my partner to come along occasionally. But not often though. She tells me off too much for that......

So the search started for ideas. I didn't have any one thing in mind as I was open to just about any sort of project, but I was leaning very quickly towards something small and light as that's how I like my toy cars. It makes them cheaper to run and look after and parts tend to last longer. They're also a more engaging drive. And they fit in garages with space to work on them too!

One day I got a call from my partner saying a bloke at work had been told my his Mrs to get rid of the car he'd not really been working on for the past 4 years. Following a few questions, he didn't really know much about what the car was and he thought it might be an MG Midget. Since he only wanted £100 for the car and the boxes of bits, I figured it was worth a look. Upon closer inspection, it turned out the car was an 1969 Austin Healey Sprite, not a Midget, and it was complete but had seen better days. It also isn't registered in the UK as it's a left hand drive US market car. This also means it had spent most of it's life either in garages in the UK or in Florida where it's nice and dry. Whilst I hadn't planned on a full re-build, it seemed like a good challenge so £100 soon changed hands and the car was trailered home.


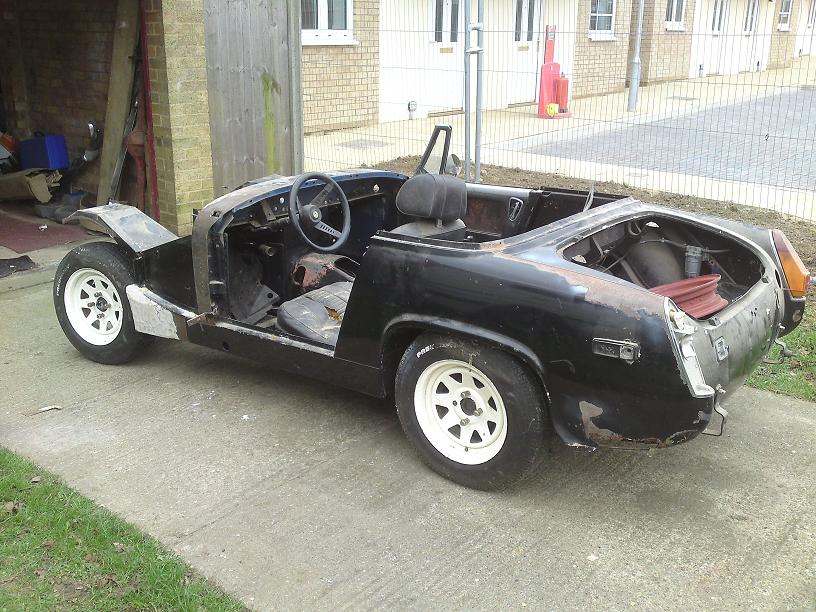
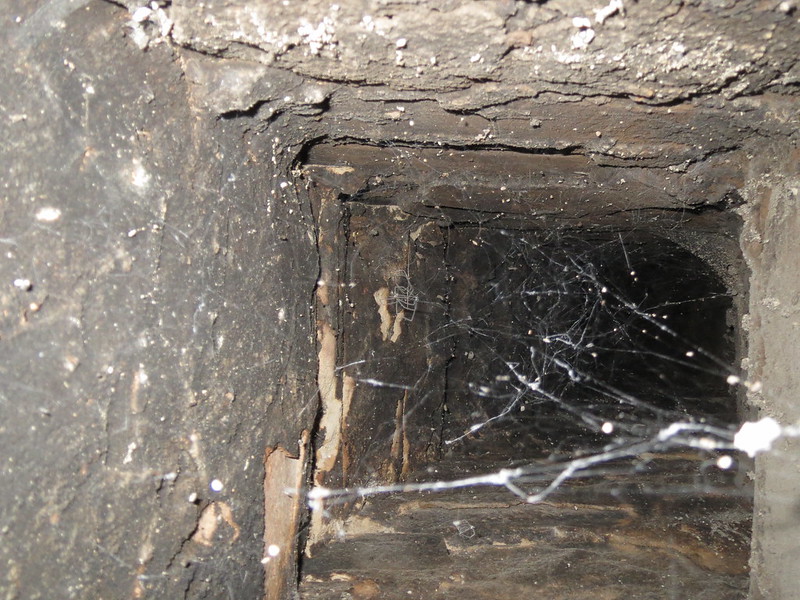
Upon closer inspection, and initial strip down, there was a bit more rust than I had hoped but less than I feared. Some fool had also tried to fit some form of arch extensions to the sills on both sides by brazing on steel plates and then covering them in 1/2" of filler! But overall the shell only needed what seemed easy work and a plan was hatched to change the engine and up the power.

From researching what can be done to these little cars, it soon became obvious that the engine of choice is Rover's K series engine. It's a lightweight, all alloy engine that is very light and comes in 1.4, 1.6, 1.8 and 1.8VVC versions ranging from 110 bhp up to 190 bhp for Lotus's VHPD version.


So off I went to Ebay, looking for a decent 1.8 VVC engine. I even bought one along with the better alloy inlet manifold and ECU. But then I had a thought. To beat the MK Indy, I wanted more than the 300 bhp/ton that it had. And in a 750 kgs car, that means having 225 bhp. Which as it turns out is quite a bit for a usable N/A K series. It's doable, but means spending quite a bit more money than I had in mind. So the K series got sold.

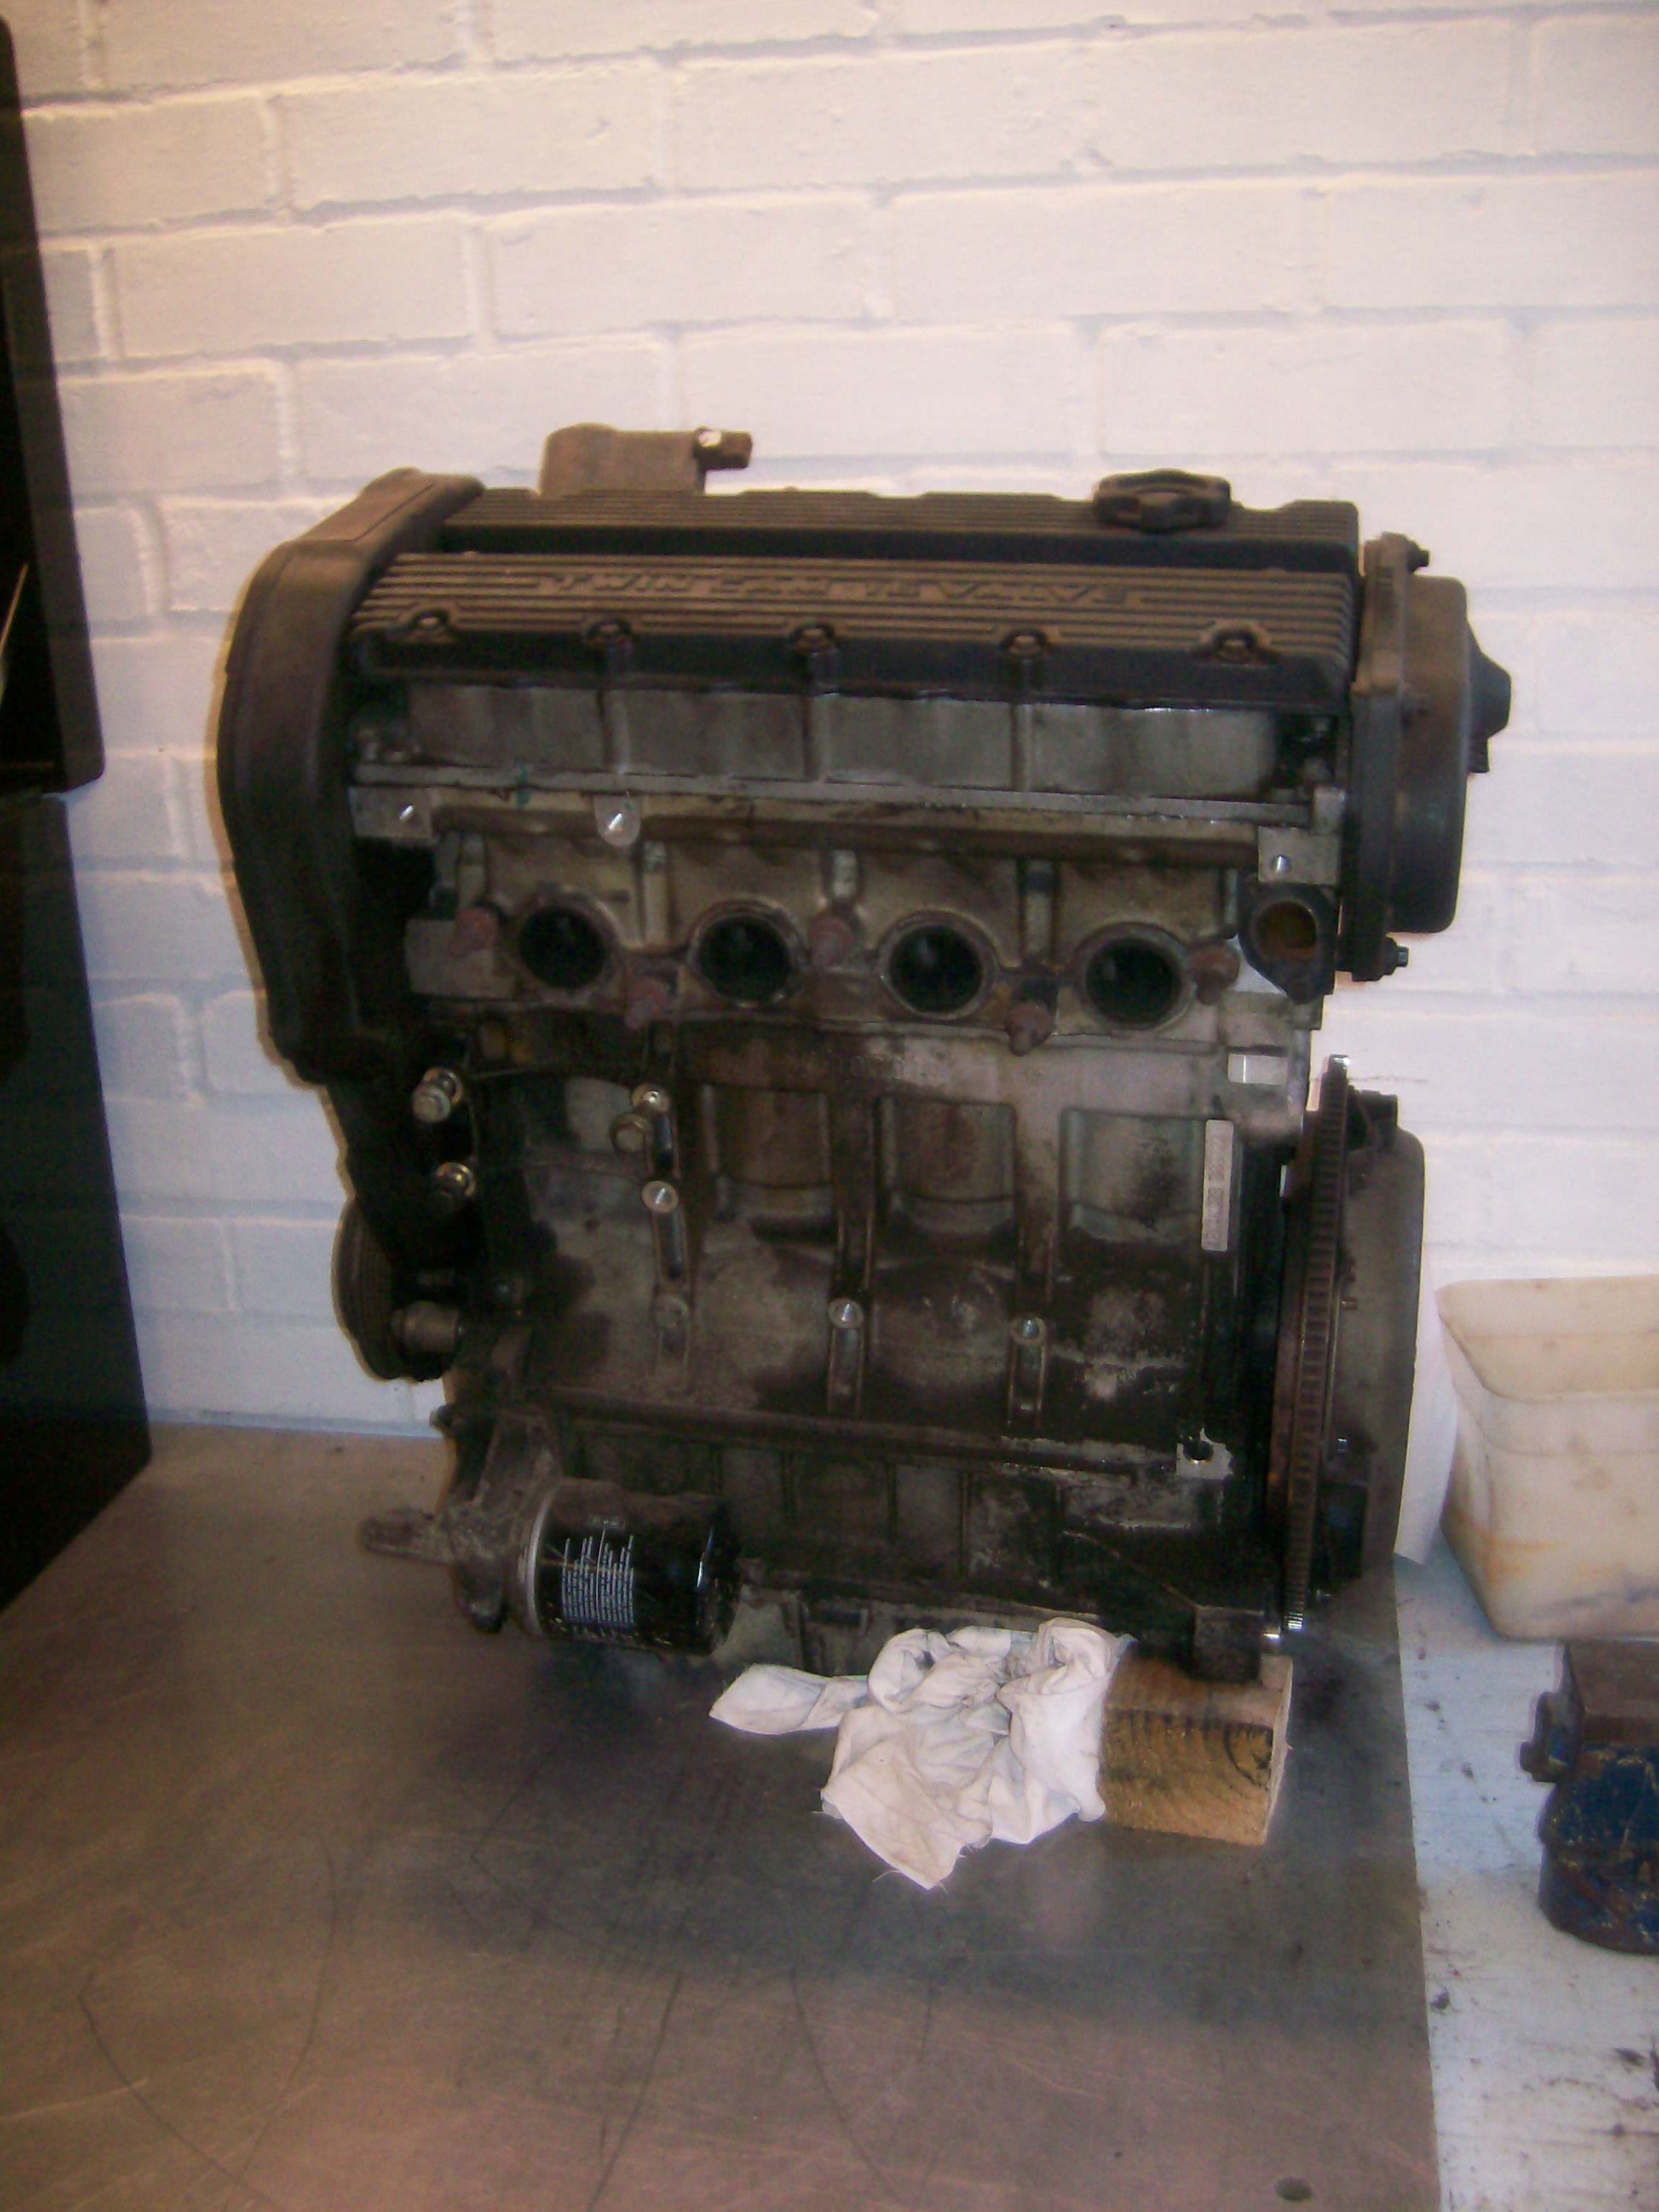
So a re-think was in order. I've always wanted, but never had a V engined car. So a bit more research dug up Mazda's KL 2.5L V6. It's tiny for a V6, all alloy and 160 bhp in stock form. But with the addition of individual throttle bodies, or ITBs, it'll make 205bhp, along with a good dollop of torque. It's also a nice revvy thing, with a factory limit of 7200 rpm which can be safely raised to 8,000 rpm. Now this was starting to look more like it. With a hike in compression, easily done with JDM spec pistons, and maybe some reground cams, a nice 225bhp should be achievable. OK, it's a bit bigger than the K series, but given all the work I had planned, what was a little bit more?!


Now, when taking a 40 year old car and quadrupling the power it has, there are a few other things you need to consider. Can the shell handle it? Will the brakes stand even a bit of a chance of stopping it? Will the tiny little back axle last for more than 30 secs? Is the front suspension any good? Is this a good idea, and has anyone else done it for hints and tips?

And for the Sprite, the answer is mostly no to those questions! The shell could cope, but I decided to reinforce it anyway in several places. The brakes? Not even worth considering. So it's MGB 10.75" discs with 4 pot Wilwood callipers at the front and 9" discs at the rear. The back axle? A standard A series can snap one, so the V6 would mash it in moments. A full De-Dion set up from the back of a Caterham Superlight should do the trick though. The front suspension? Dubious at best and needs greasing more than I want so it's going to be replaced with a double A arm coil over set up. It might have inboard coil overs to aid with packaging and ride height adjustments, but that's not for definite yet. As for it being a good idea, yes it is. No-one else I know of has done this to a Sprite before but I do know of one other chap fitting the same V6 as he's been asking me for advice. So at least one person thinks I know what I'm doing!!

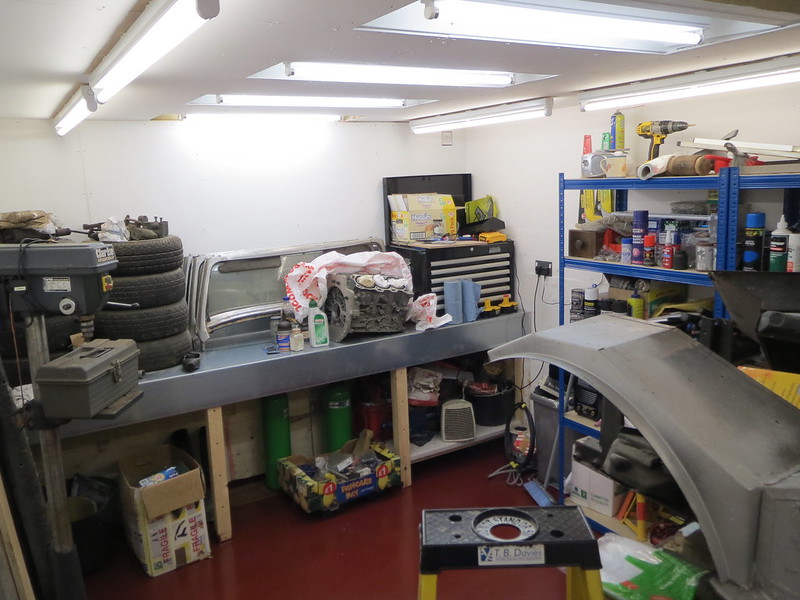
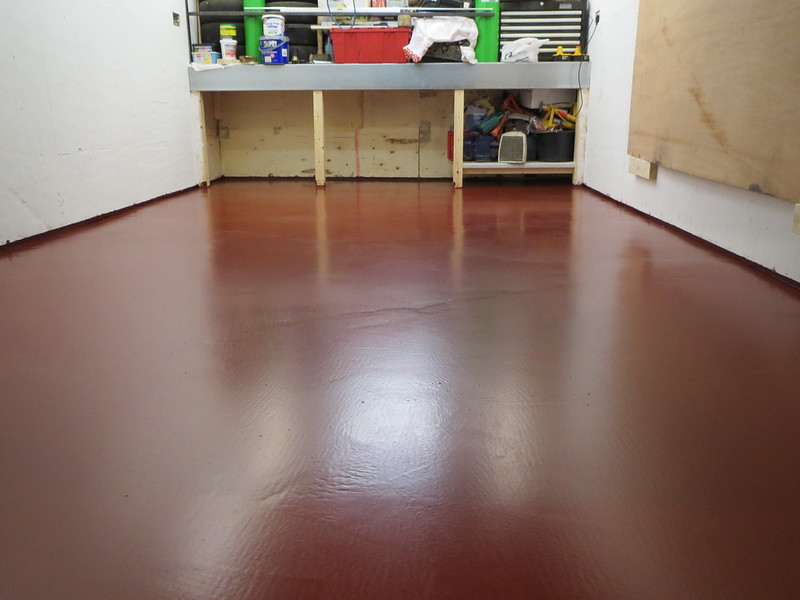
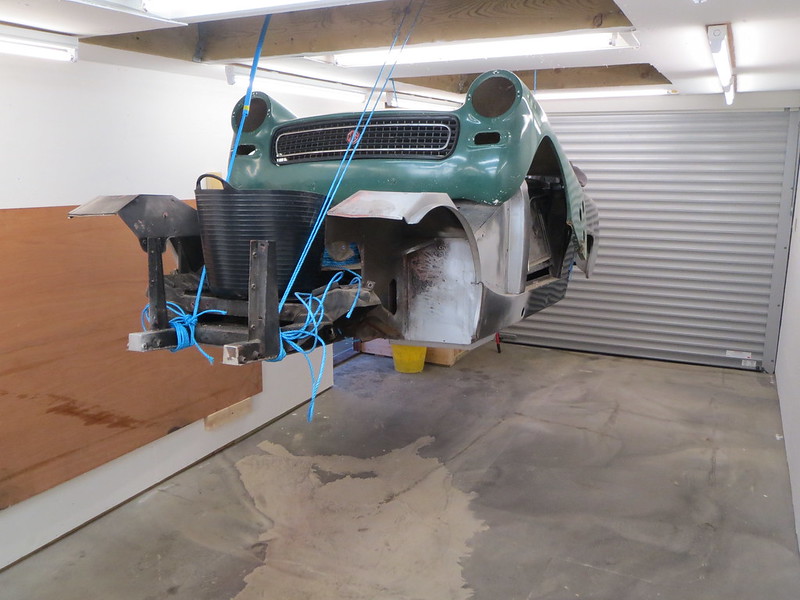
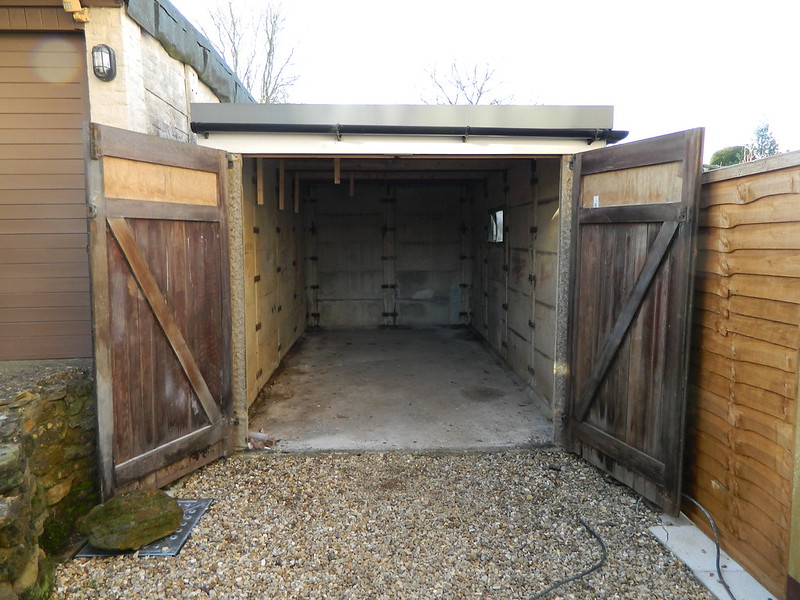
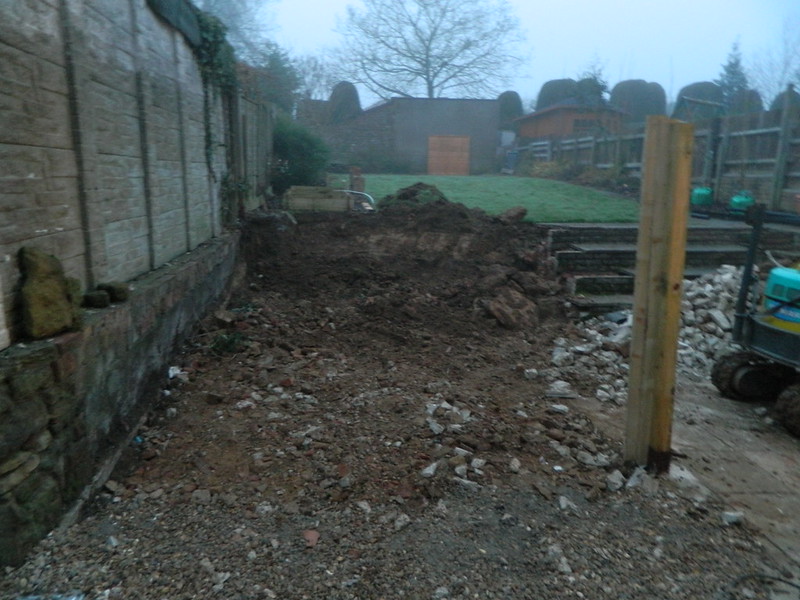
So that's the plan, but where am I now? Well the shell's pretty much done. There's some minor work to do on the front suspension mountings and I have to re-build the transmission tunnel to fit the MX-5 gearbox I'm using but that's all done. The rear brakes are sorted as Caterham have done all that work for me as part of the De-Dion set up which is now complete. The front end will be built as a whole, so that's still to do. I've got a vague plan in my head for that, but that's all at this point. The shell's currently sat in the garage awaiting the completed workshop so I can set to again with making the engine and gearbox mounts.


As promised yesterday, here's a brief overview of what I've been up to of late and where I am with it all.

I suppose the most sensible place to start is with the workshop itself. We moved to our new house back in December last year. The house is much bigger than our old place as I had the misfortune to be diagnosed with malignant melanoma, an aggressive form of skin cancer. I am very, very glad to say that I am 18 months clear of this now, so hopefully I'll just be left with some cool scars. They'd be cooler if the story behind them was a bit more of the gun fighting action man type, but beggars can't be choosers. This was the scaring a few days after I left hospital.


Either way, my critical illness insurance paid out, cleared the mortgage and left me with a little to play with. So we did the sensible thing and looked at moving to a bigger house with a new mortgage! There was also the tiny matter of our son, Noah, being born to consider as well and we wanted to give him a big garden to run about in. The old place was a good starter home and we'd done a lot of work to it, but it was time to move to somewhere bigger and in a nicer village. My only condition on moving was that the house either came with a bigger garage or had the space to allow me to build one.

The new house had this when we moved in on the Friday:


And by the end of the Wednesday it looked like this:


I didn't want to waste any time as I knew the weather would turn at some point and halt any work. So a few months go past, a lot of materials turn up and a lot of sweat goes into my first ever building project. Thankfully, I think it turned out OK:


The inside still isn't finished as I have been rather busy at work recently, but it's almost there. The lighting's done, the wiring's almost finished and I've just got a final coat of self-levelling compound to go down on the floor and then I can finally put all my shelving up and get the place organised. It'll be good to have it all done so I can start making a mess again and get back to working on my Sprite.

Sunday 20 October 2013

Firstly, welcome and thank you whom ever you are for taking the time to find and then actually read this!

As the description says, I have/had a few build diaries on a few different websites for various things I get up to in my spare time. Most, if not all, of these things revolve around either '69 Austin Healey Sprite (doesn't that sound posh! It's not really.), the new workshop I have almost finished building or working on stuff within the workshop. This may be things like repairing a mate's beetle's bonnet that I promised I'd help with this winter or it may be fixing the other half's car heater which I did this afternoon.

Please do not take much of what I say seriously. That's just about the worst thing anyone could do. Whilst I do endeavour to be as accurate and technical as I can be, don't be put off by the odd "I just hit it with the big hammer 'cos I was angry" type posts and comments. Also, just because I have dome a thing, that does not mean I did it properly, safely or in a way I would ever advise anyone else to do. Basically, copy me at your own risk!

That'll do for now. I'll be back shortly with a big update to kick things off as to where my projects are so you have half a clue of what I'm going on about.

Just as a little teaser, this is what I've been playing with this weekend.