Friday, 7 February 2014
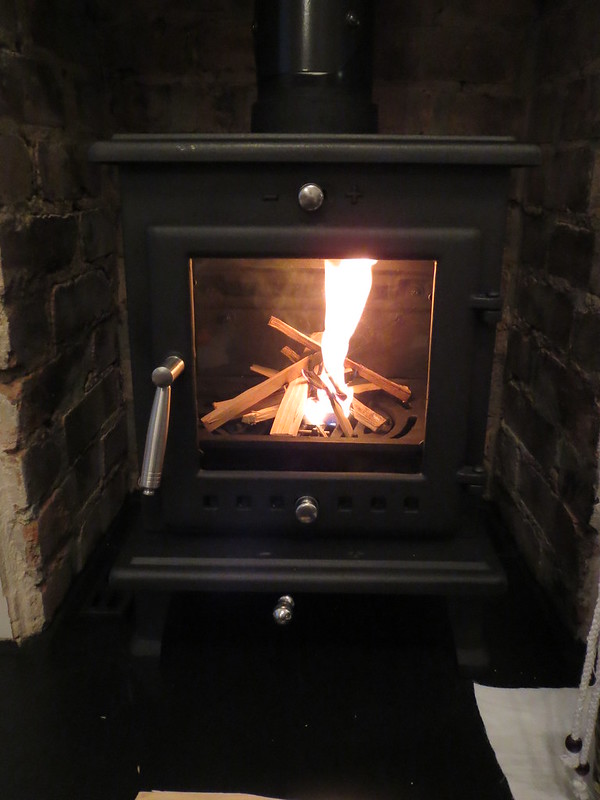
Airwash system
Just a quick video really that shows the effect of the airwash system on a smoke bomb. The system draws fresh in from a top vent and then across the glass. This keeps the smoke from touching the glass, keeping it cleaner for longer. This video also shows the draw on the cold flue that I've got.
Plastering is much harder than I thought!
It's been a while, but with the Mrs recuperating and me being busy at work, I've just not had the time to get anything done other than fire cement the vitreous pipework and get the stove tempered with a series of increasing fires. For someone who is a self-confessed firebug, this was difficult to do!
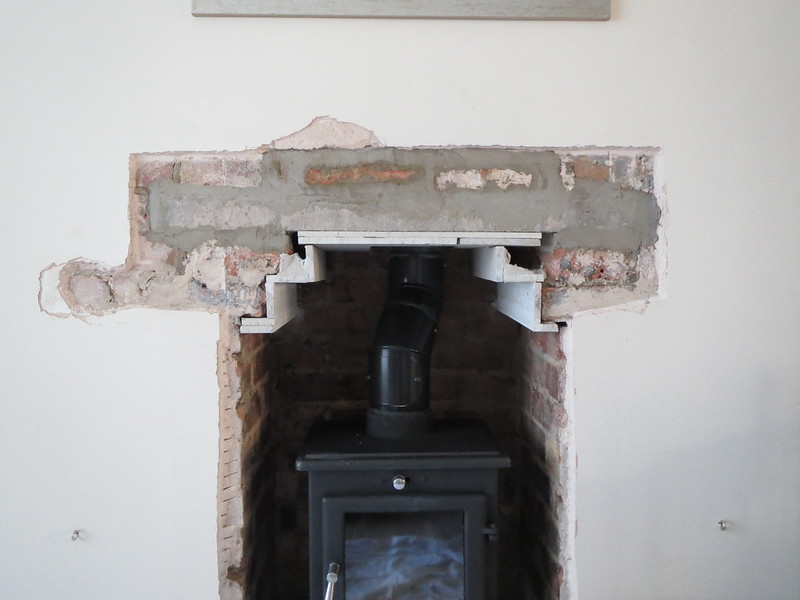
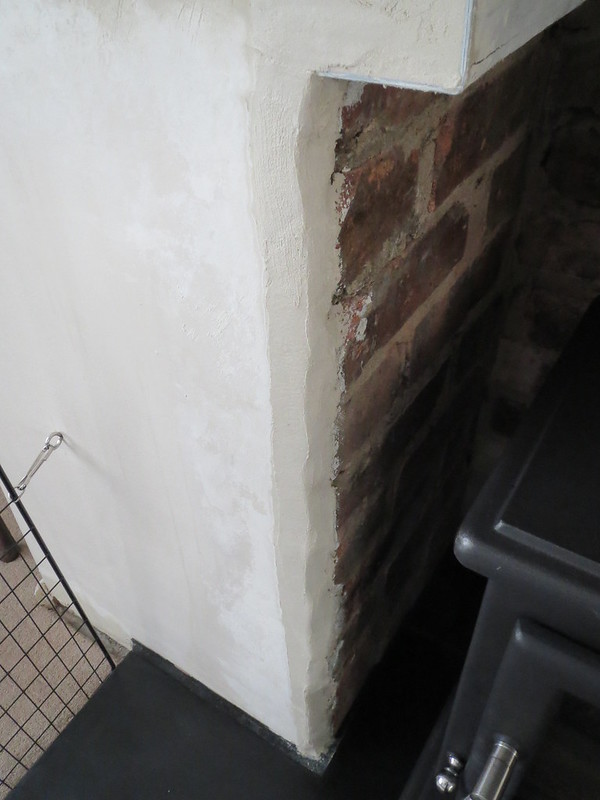
Last weekend though, I did get the Sunday morning to have a go at the plastering. And it's something I've never done before, so I was a little apprehensive. I started off by removing a few loose/hollow sounding bits around the edge of the existing hole:
Then the wall was given two coat of watered down PVA. It maybe should have been just one coat, but it seemed to dry out fairly quickly, and the instructions on the bag of plaster said to wet the wall, so I did. Given that I've never plastered before, and this is a repair patch rather than an entire section of wall, I opted for Wickes One Coat plaster. It mixed easily, but seemed a funny colour. I'm used to plaster being a dark brown/tan sort of colour and this stuff was grey. Not that the colour matters, it just wasn't what I had expected.
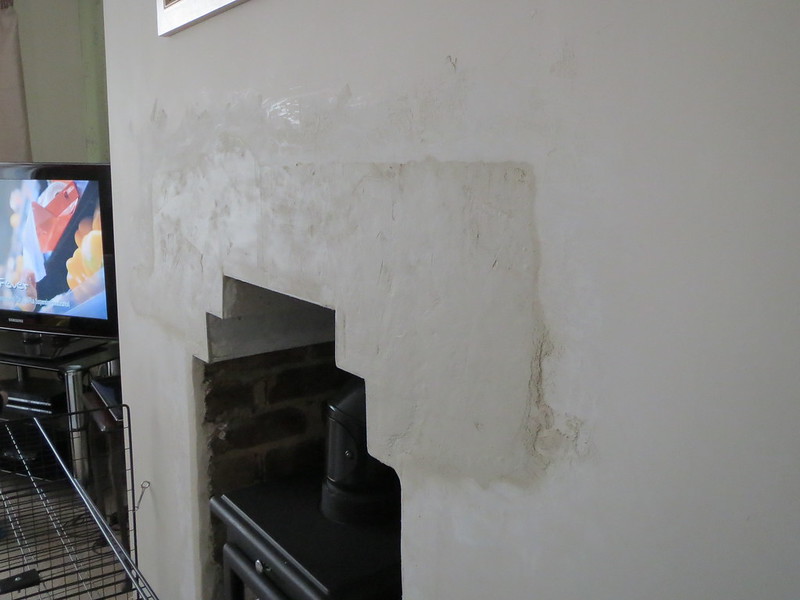
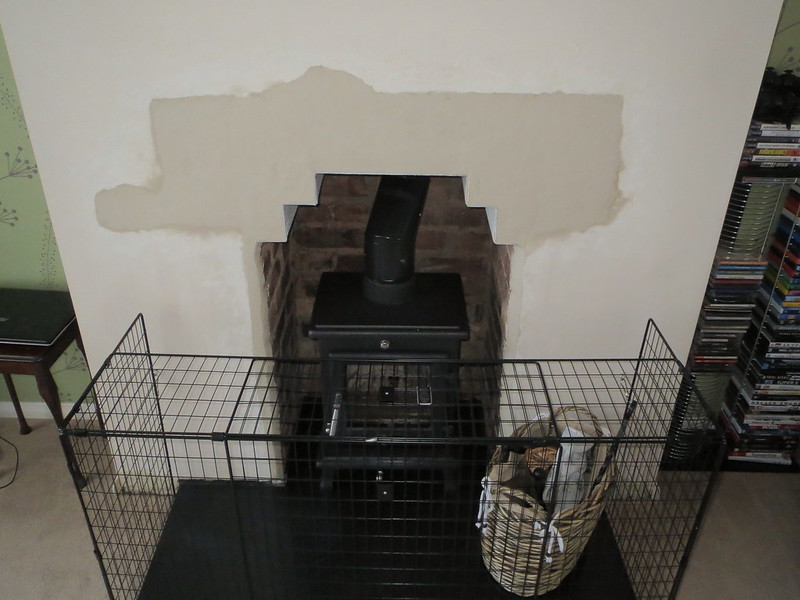
So with the plaster mixed and poured into a bucket, I started with the edge bead around the cement board. This gives edge a hard metal finish that is also straight. Cutting and sticking the stuff in place with plaster was a bit of a fiddle due to the short sections needed, but it was done. I should have taken a photo, but forgot. With the plaster glue drying, I set to with filling the big hole in, starting on the left. To begin with, it seemed fairly easy to do. And building up the depth was going well until I got to the right hand edge and discovered the wall had what now seemed a massive bow in the existing plaster which I hadn't noticed before. I only realised this was the problem when I was struggling to match the levels. I could move the trowel one way and level the plaster, only to go across it again and score it quite deeply. However, I decided to persevere and sand smooth what was left once the plaster had dried. Whilst this photo is of the finished (well as finished as it's going to be for now) plaster, it shows the bow quite well.
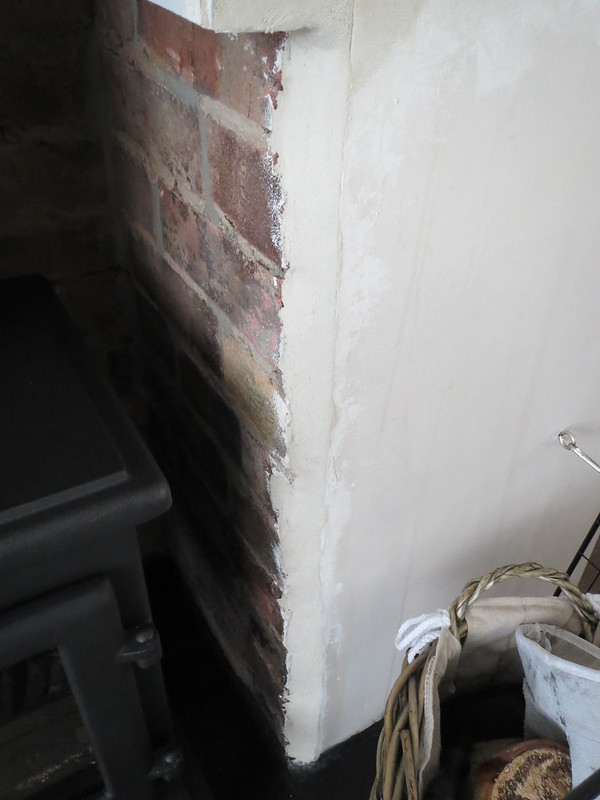
With the top bit mostly done and now drying off a little, I made a start on the two narrow sections either side of the recess. Given that the bricks aren't straight, an edge stop bead would look a bit odd and just point out how uneven the brick work is. So I made the decision to attempt a hand formed angle. I doubt this was wise on my first go, but I figure I can always sand it back should I need to. There will be a certain amount of sanding and tidying to do anyway to clean the bricks, so a little more is no real hardship to ensure a smooth surface.
Once the corners were done, the top was given a smoothing over as best I could. This is clearly the bit that takes the skill. I was getting drag marks and bits sticking all over the place, no matter how wet I made the surface. But I did the best I could, and the rest will need sanding back to see how much filler I need! OK, it may have been better to pay someone to do this bit properly, but I'm glad of the experience if nothing else.
And with that it was left to dry. 5 days later and it's almost finished, so I can get the stove lit again. Whilst the surface finish isn't great, I hope to fix that this weekend with some sanding and filling. I also hope to get the metal closure plate sections done, the CO detector properly mounted and then find a pen that writes on metal so I can fix the information plate in place. All of this needs doing as the BCO calls on Thursday to hopefully sign off on it all!
Last weekend though, I did get the Sunday morning to have a go at the plastering. And it's something I've never done before, so I was a little apprehensive. I started off by removing a few loose/hollow sounding bits around the edge of the existing hole:
Then the wall was given two coat of watered down PVA. It maybe should have been just one coat, but it seemed to dry out fairly quickly, and the instructions on the bag of plaster said to wet the wall, so I did. Given that I've never plastered before, and this is a repair patch rather than an entire section of wall, I opted for Wickes One Coat plaster. It mixed easily, but seemed a funny colour. I'm used to plaster being a dark brown/tan sort of colour and this stuff was grey. Not that the colour matters, it just wasn't what I had expected.
So with the plaster mixed and poured into a bucket, I started with the edge bead around the cement board. This gives edge a hard metal finish that is also straight. Cutting and sticking the stuff in place with plaster was a bit of a fiddle due to the short sections needed, but it was done. I should have taken a photo, but forgot. With the plaster glue drying, I set to with filling the big hole in, starting on the left. To begin with, it seemed fairly easy to do. And building up the depth was going well until I got to the right hand edge and discovered the wall had what now seemed a massive bow in the existing plaster which I hadn't noticed before. I only realised this was the problem when I was struggling to match the levels. I could move the trowel one way and level the plaster, only to go across it again and score it quite deeply. However, I decided to persevere and sand smooth what was left once the plaster had dried. Whilst this photo is of the finished (well as finished as it's going to be for now) plaster, it shows the bow quite well.
With the top bit mostly done and now drying off a little, I made a start on the two narrow sections either side of the recess. Given that the bricks aren't straight, an edge stop bead would look a bit odd and just point out how uneven the brick work is. So I made the decision to attempt a hand formed angle. I doubt this was wise on my first go, but I figure I can always sand it back should I need to. There will be a certain amount of sanding and tidying to do anyway to clean the bricks, so a little more is no real hardship to ensure a smooth surface.
Once the corners were done, the top was given a smoothing over as best I could. This is clearly the bit that takes the skill. I was getting drag marks and bits sticking all over the place, no matter how wet I made the surface. But I did the best I could, and the rest will need sanding back to see how much filler I need! OK, it may have been better to pay someone to do this bit properly, but I'm glad of the experience if nothing else.
And with that it was left to dry. 5 days later and it's almost finished, so I can get the stove lit again. Whilst the surface finish isn't great, I hope to fix that this weekend with some sanding and filling. I also hope to get the metal closure plate sections done, the CO detector properly mounted and then find a pen that writes on metal so I can fix the information plate in place. All of this needs doing as the BCO calls on Thursday to hopefully sign off on it all!
Subscribe to:
Posts (Atom)