Search This Blog

Wednesday 27 November 2013

Finding the fireplace, and thoughts on stove fitting

Whilst not really Workshop related, it's fairly manly/man-cave related so I'm putting this entry in anyway. And it's my blog, so if you don't like it, then that's too bad.

A while back I removed a decorative flame effect gas fire from the lounge with the help of a gas fitter from work (thanks Darren). As nice as it was, it didn't give out much heat but the casing and glass still got hot so it was no use during the day with little ones about as my partner is a child minder and burning other people kids is somewhat frowned upon. Burning your own is also frowned upon, but that's unlikely to directly lead to a lose of business. Anyway, I digress. The fire was pulled out and Ebay'd and it was left at that for the time being as there was no point making loads of mess to hide the end of the gas pipe if something else was going to happen shortly.

And we've now decided on seeing about fitting, or getting fitted, a multi-fuel stove. So it was time to begin looking into these things. And it appears not all that hard to do if you're a bit handy with the DIY. OK, Building Control have to sign off on the work, but the work itself isn't hard as long as you buy the right quality parts. And I figure if I can build The Workshop and do everything in it, then this has got to be within reach.

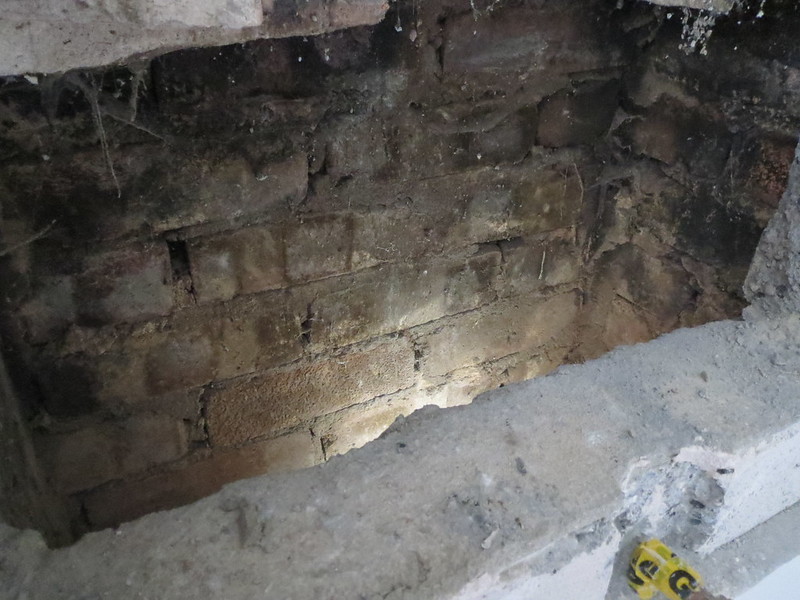
But first things first. I have a flat chimney breast to break into and have a nose about at. And whilst I was quite surprised to find at least 1.5" thick plaster on the wall, I was happy enough to only have a few large concrete blocks filling the builders opening. I've only taken one out as I need to ensure I can cover the hole up in a vaguely neat way for now.


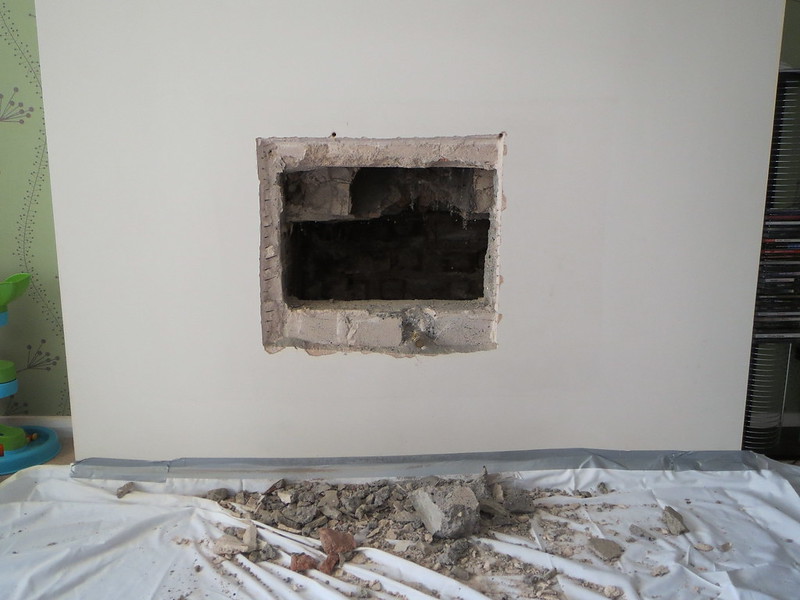
So with a hole big enough to get my head in I did just that and had a nose up the chimney. A neighbour had said it would be pot lined, which would make fitting a liner a bit of a pain in the arse. Thankfully, it appears he was wrong, or may have been talking about the other chimney these houses have. They used to have a solid fuel boiler in the kitchen with a smaller chimney. This is what this one looks like at the back:


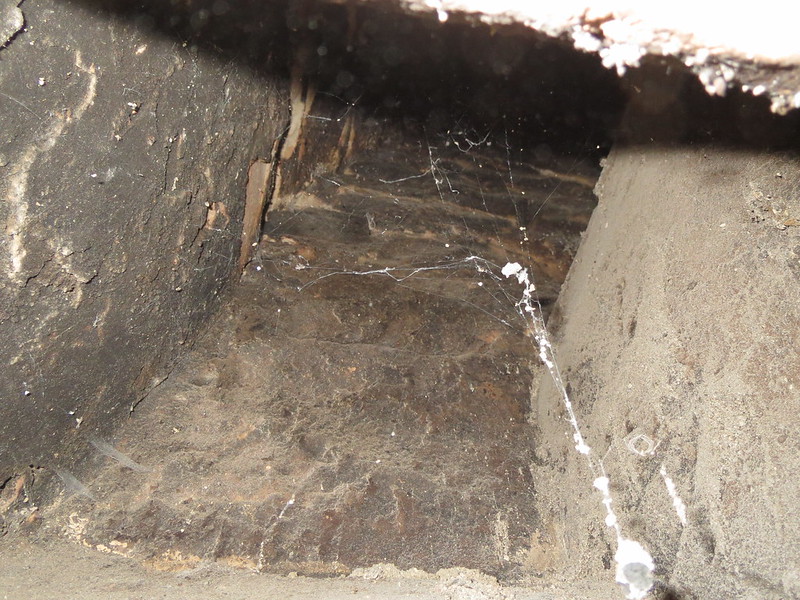
A little way up the chimney:


And then as straight up the chimney as I could aim the camera:


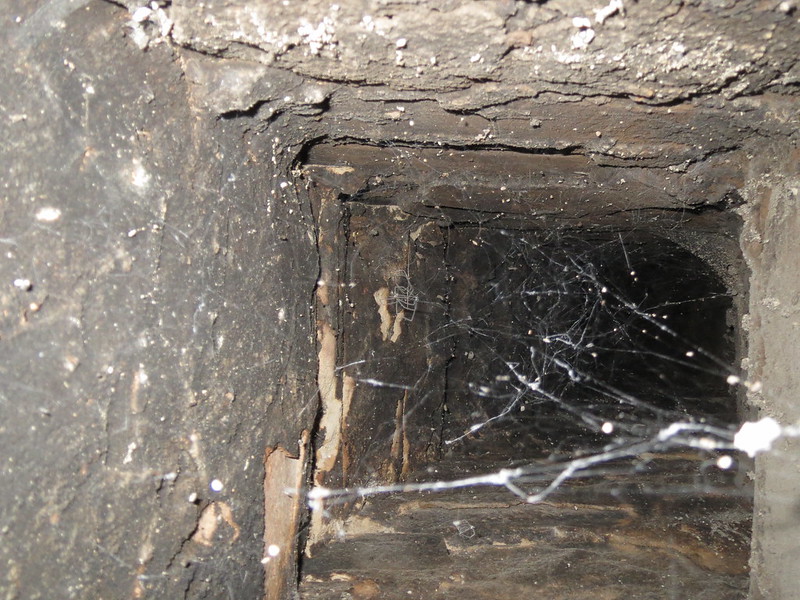
And this seems to be your run of the mill brick built chimney. I'll need to see about removing the bricks that form the infill shaping needed for the open fire that was originally in here as it's not needed and could fall in if left. Which is good as it means a 5" liner should drop down it a treat once done.

The next thing is to open the rest of the wall up so I can see if the stove we'd like, a Charnwood C4, will fit in the existing recess or if I'll need to get a bit more structural with it and open it up.

I really hope it fits.

Racking up, tidying up under way

Although this happened a few days ago, I've been too busy on a training course at work to get online. Not that anything of much excitement has happened mind you. I've got the racking up and spaced so that I can still get to the light switch and made a fair start on clearing the main rear section of the loft. The garage now looks like this:


So all my hard work is starting to pay off and the place is getting more organised. I just need to get through all the boxes of parts I've got and Ebay what I no longer need. Oh, and sell my lovely big blue bench as it's the wrong size and won't fit anywhere once I'm ready to re-start work on the Sprite. This is a bit of a shame as I've had the bench for nearly 10 years now, but I don't see the point of cutting it up to make it shorter if someone else can make better use of it as is.

Tuesday 19 November 2013

New feet

Yay. The postie bought me a bag of shiny new feet this morning. So not only have BigDug sent me the 16 feet I was missing for free, they've done it in less than 24 hours too! I shall be off outside later to get the rest of my shelving sorted I think.

Monday 18 November 2013

Finished floor and new shelving

Well the second coat of paint is done and dried. And I'm quite pleased with how it's gone. It did take while to go off as I only have a small fan heater in there at present, and it needs at least 24 hours at 20C. The only thing that could be better is that due to having put it on a touch thick, well at least 50% thicker than expected, there are a few roller marks that have been left. But having been walking about in there for a few days, I no longer notice them so it can't be too bad!


And now the floor has dried I can make a start on clearing the loft and sorting out all my stuff. And it's not going to be a particularly quick task I suspect! But one thing that should help is an Ebay purchase from a few months back. I managed to acquire 5 sets of Big Dug shelving for £95, so they'll be going up along the wall next to the side door. They'd all be up already, but I realised I'd only got one set of feet for them. Not sure what happened to the rest, but I don't have them. So I rang Big Dug this morning to get a price for 16 feet only for the nice man to say that they'd be sending them to me for free as a good will gesture. I think this is amazing service, as although the bits probably don't even cost a few pennies to make, sending them to me takes time and effort. And the shelves seem nice and solid once I've screwed them to the wall too, so all round a good job!


Monday 11 November 2013

More painting, less watching it dry

Since I'm currently on call at work, this Saturday was spent driving round fixing stuff. But since Sunday was quiet, I did manage to get the second coat of floor paint down. Whilst I did a better job of evening it out over the entire floor, it did mean putting it on thick all over. And although I don't have any pics yet, I'm not sure all the roller marks are going to disappear. But I am sure it's water proofed the floor as I've had to leave the garage door up a touch so the paint doesn't stick it down. This then lest the rain in, but it just pools on the surface, just as I had hoped. I'll grab a photo or two once it's dry enough for me to walk about on. And once it is that dry, I can finally get my shelving set up and start organising everything.

Oh, and if anyone wants to donate either a Record 74 or 75 vice that would be great, as the second one I got from Ebay was bent and wouldn't shut.

Wednesday 6 November 2013

Painting. And then watching it dry.

Since I have only heard horror stories of cheap floor paint in workshops, I spent a while looking at the proper epoxy floor paints that have a more industrial purpose. And I found one that Watco sell that is suitable for my needs. It's also normally £110 + VAT and delivery! Thankfully, they seem to be selling off their stocks of it, so £40 got me a 4.5 litre tin of the stuff. Well it's two tins that make 4.5 litres, but you get the idea.

And it turns out like this.


Which I'm quite happy with, as I didn't know it would be shiny. It's still drying in the photo, as it takes 24 hours at 20C to dry, and it's not that warm here. This was taken after about 20 hours, so it might be dry by this time tomorrow.

The only real issue I have had with it is that 4.5 litres is good for up to 30 square meters of floor. And once you get to the end of a 21 square meter floor, you feel bad about throwing expensive paint away. Or you end up pouring the remaining paint on the floor and just putting it on a bit thickly instead. How good an idea this is remains to be seen!

The only other issue with a shiny floor is that I can now see all the little imperfections where the floor's not flat. But since most are where the shell will sit, I won't have to see them so I won't mind!

Tuesday 5 November 2013

Progress?

Due to various work and family commitments, I've not really been able to get much done in the workshop of late. And the bits I could do have been hampered by the fact that 95% of my stuff is just wedged into the loft space so I can sort the floor. I could have primed the vice, but I can't find the box of paint. I could've finished the wiring, but my brother's run off with my tub of cable clips.

What I have managed to do in the mean time though has been worth the effort. After much waiting and having to do other things, I've managed to get the last coat of self-levelling compound down!

This wouldn't have been necessary if the concrete slab had been flat and smooth in the first place. But it was no where near. That's the problem with using a friend of a friend set up. If things don't go to plan, you're a bit stumped for any come back. Next time, if/when there's a next time, I'll be getting it done properly by someone else. It'll be much quicker and probably cheaper too. Either way, the slab was wonky and needed levelling. Most of this has been done, but a final coat is required. To do this, the floor must be clear. And that means moving the shell. But it's November and the weather's rubbish. And as much as just putting on the drive is the easy option, it also leaves it exposed, which is something I really want to avoid if at all possible.

And thankfully, it is possible to avoid:


Now, I'm not 100% sure what Mr HSE would have to say about this set up, but I can imagine it's full of expletives! But since I'm happy with it, and it's my private garage, I don't much care what Mr HSE would say.

So with the shell in the air, my work bench sheeted up on the drive and some other bits in The Boss's shed, I could make a start. I'm using Instarmac's product HD Top for the floor for no reason other than their technical and sales team, Lisa in particular, have been amazing to deal with, despite me being a private customer and not the large companies they usually deal with. The other reason is I know all the stuff is designed to work together so it shouldn't go wrong. Well, as long as you don't over water the stuff and then have it go soft as well as uneven on the floor. But we'll chalk that up to experience and not do it again!

The first thing to do is to prime the floor. This bit's easy as the smallest tub of acrylic gunk is good for at least 133 square metres of floor and I've only got 21. You just mix it as instructed, bung it on the floor and push it about with a brush and a roller. Wait for it to dry and go clear and then repeat. Simples.

The hard bit, especially when working on your own as it turns out, is the levelling compound. The bit that's hard is mixing it quickly enough to get a bucket of it poured and trowelled before the previous stuff is starting to go hard. Because it has a short pot life you need to keep a wet flowing edge to the stuff so the buckets can mix on the floor as you go. But once each bucket is poured you need to go over it with a spiked roller to pull all the air bubbles out before you can mix the next batch. All of which takes precious time. Overall, I'm quite pleased with how the stuff went down but there are one or two spots which could've been better as I can be a bit of a perfectionist at times.

So this is what it looks like now that I've rubbed the high spots off. It's nice and smooth and ready for painting which I hope to do later today.


The staining in the bottom of the photo was from the rain we had overnight. The dam keeping the compound in also kept the rain in. But the only effect it has is to discolour the surface. And since it's being painted tile red, it won't matter.


The only other thing I've done is to remove the boarding from across the front edge now it's all dry. I had hoped it wouldn't crack the leading edge, but it has a little. To cover this, I'm going to go with a suggestion from The Boss, which is to put a stainless steel angle piece across the leading edge once it's been painted. I'm going to cut the floor back to allow me to fit the angle flush to floor so I can still sweep the floor easily.