Rather than go through and explain what I've been up to, I'm just going to list everything I've done and all the photos I've taken in the last three weeks. Typing it all out would take ages!
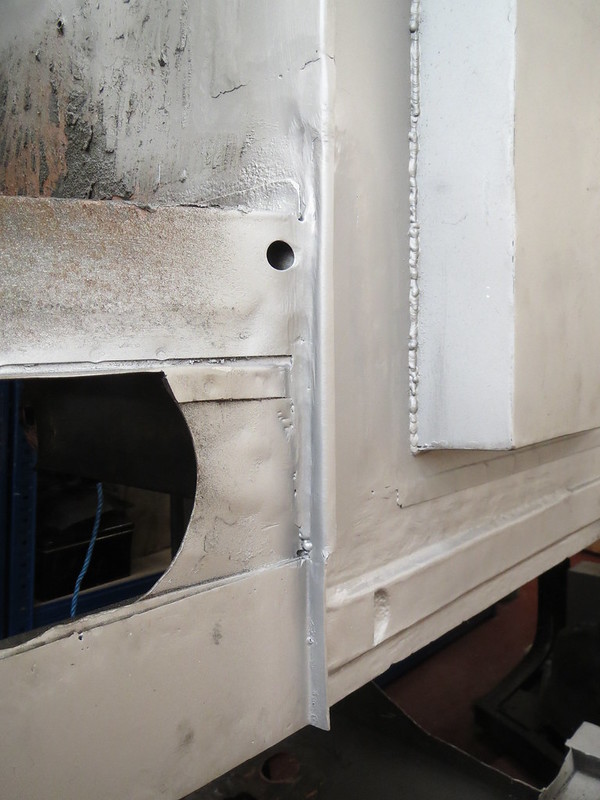
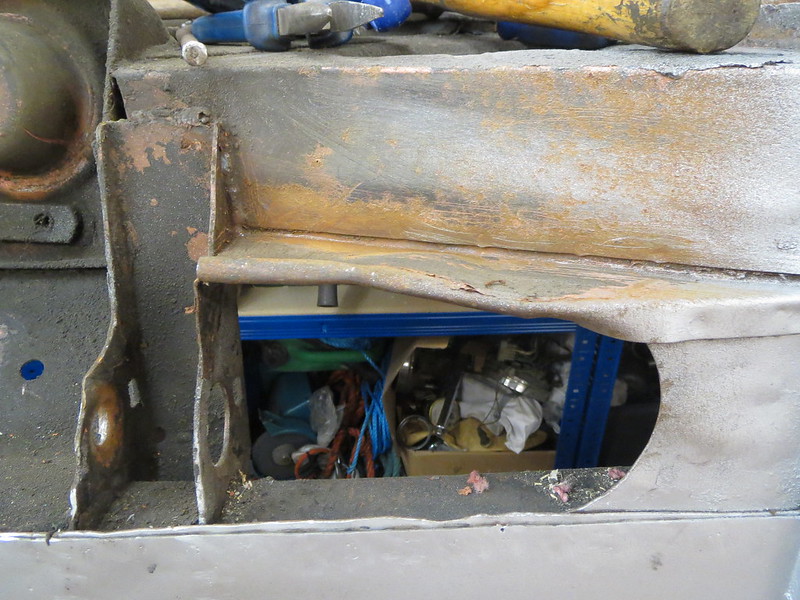
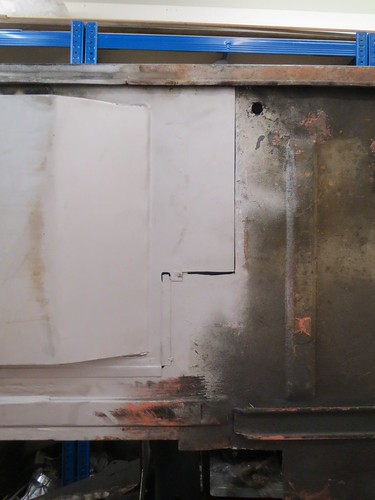
The splash panel has been cut back and hammered flat(er). Since it's not a structural panel, I'm not bothered about the loss of the folded section.
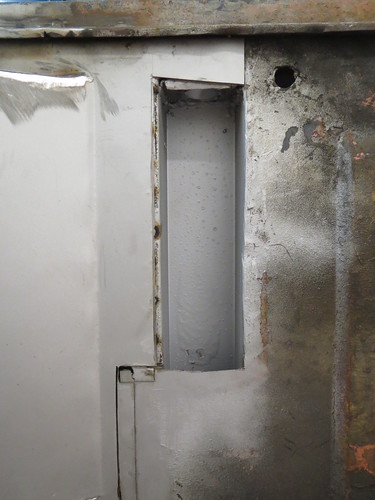
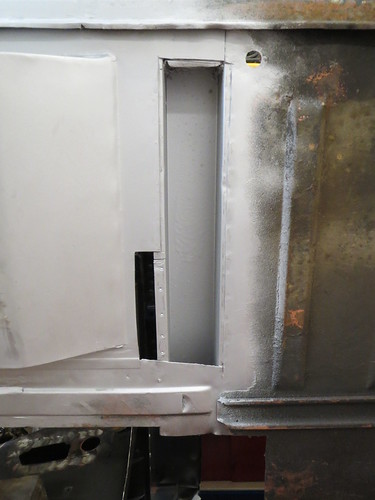
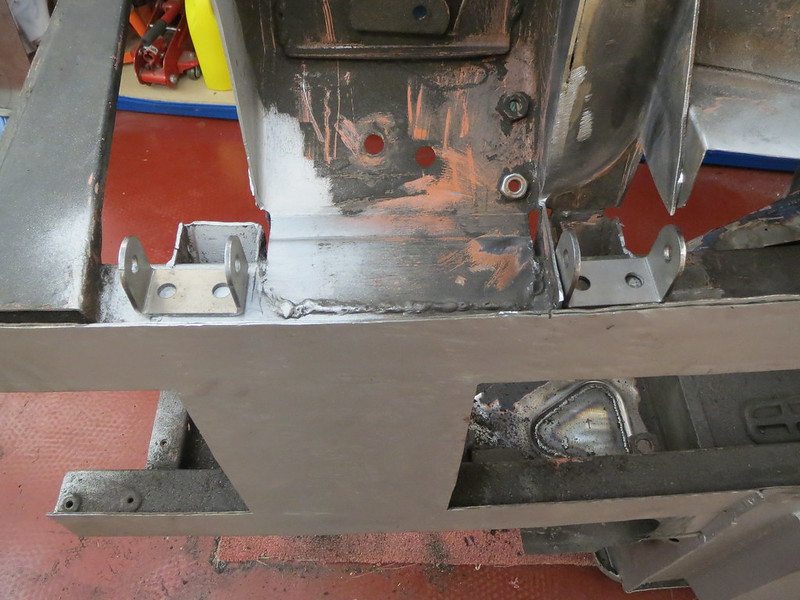
The front suspension mounts are cleaned back and ready for the next stage. The brackets are just sat in place so I could get a feel for what things will look like.
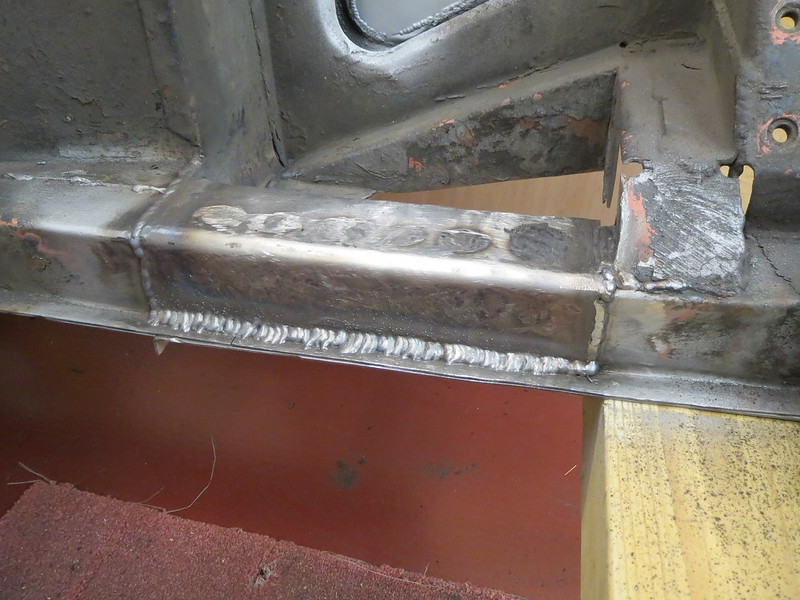
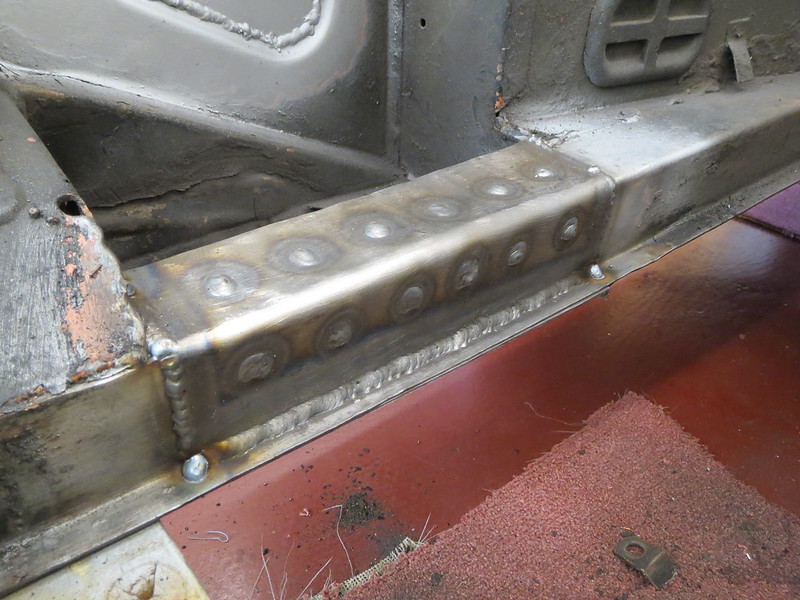
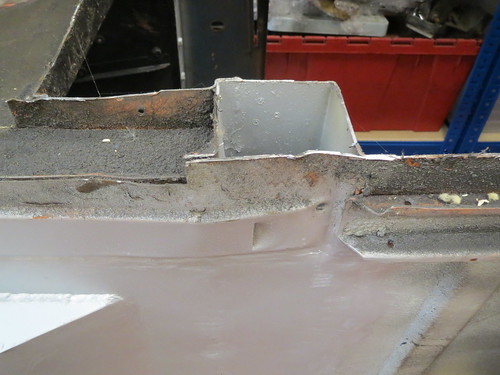
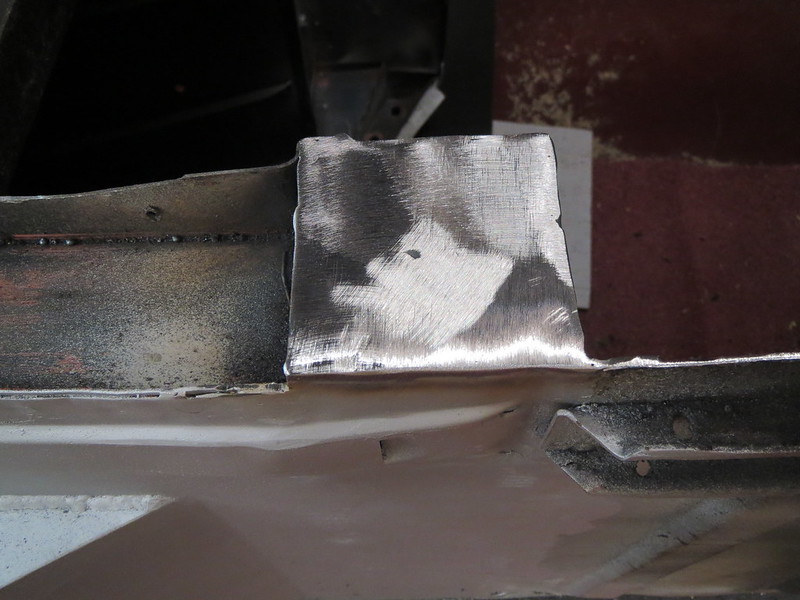
The end I can get to for the cross member has been capped off.
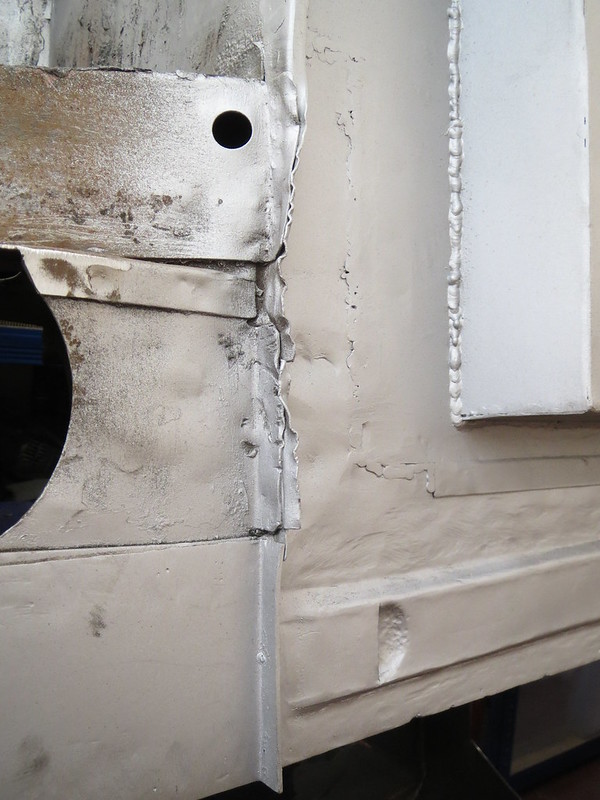
A wonky patch on the passenger footwell has been replaced. I've no idea why I left this in place previously!
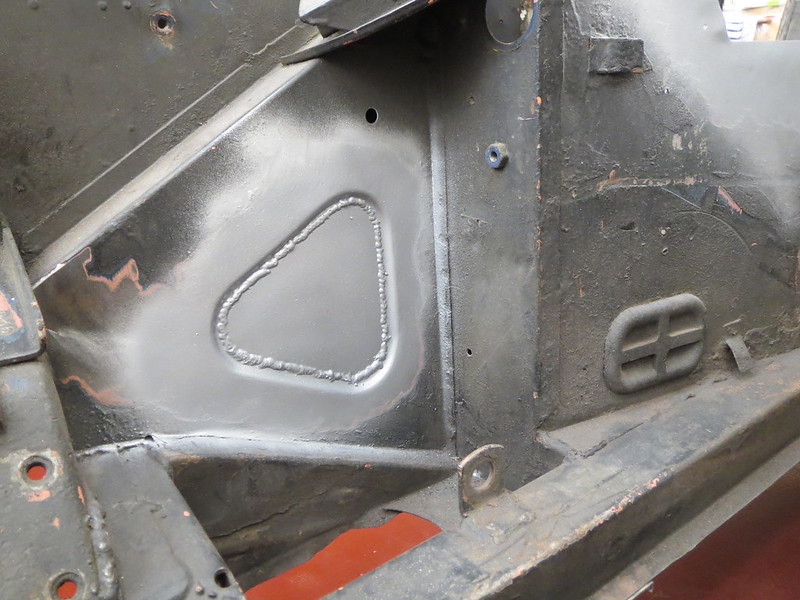
I've made a start on closing in the front panels to help stiffen the front end. The other two triangles will be done when the cars the right way up.
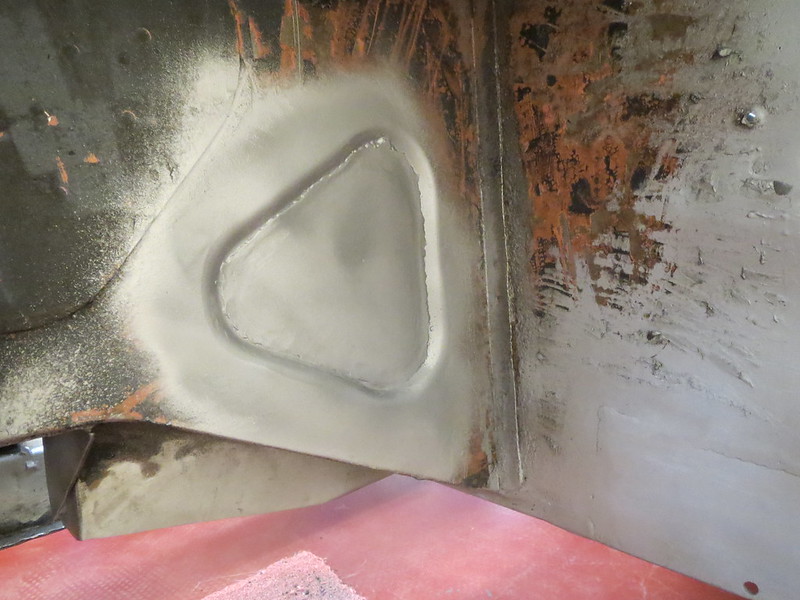
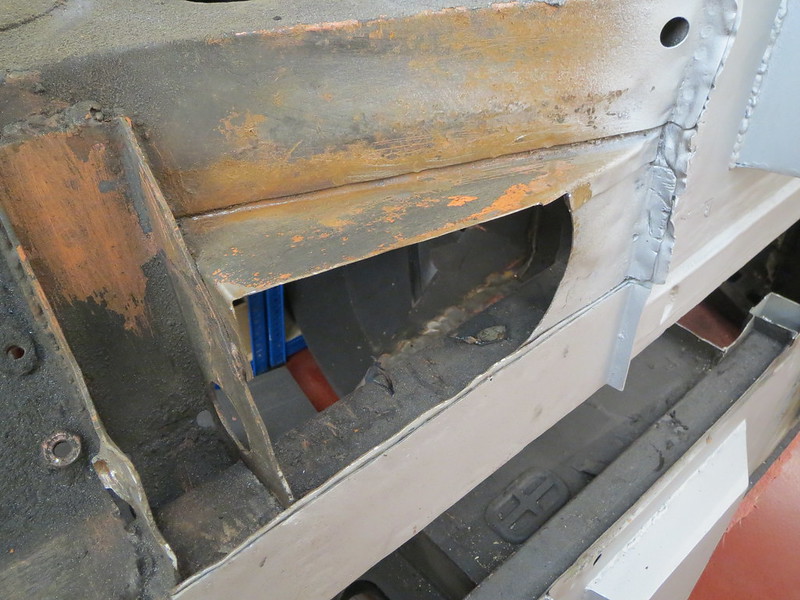
The remains of the heater tray have been cut out at last, and the area cleaned of paint and underseal. There will be a new tray going in once the engine's on it's mounts.
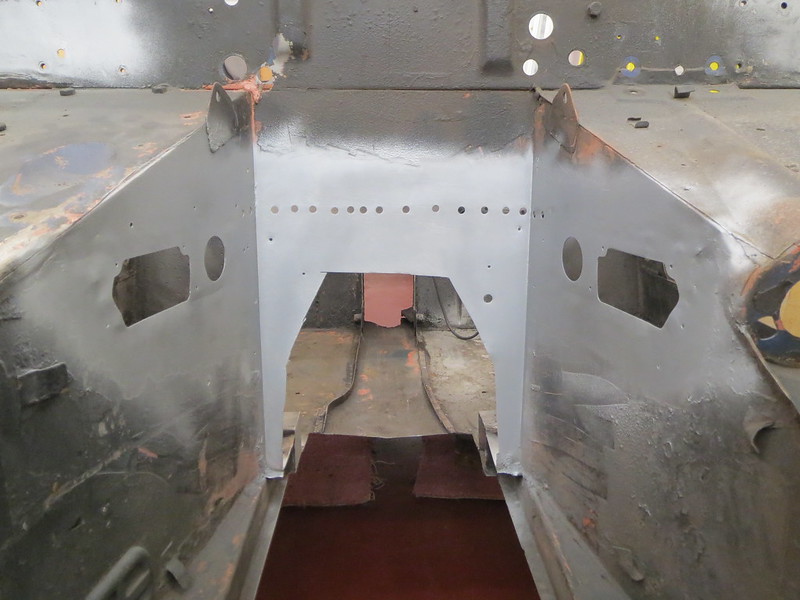
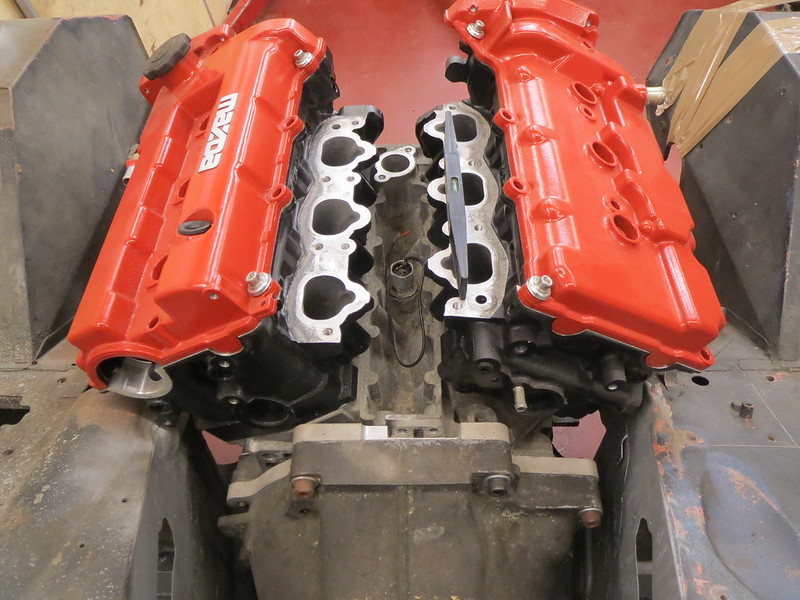
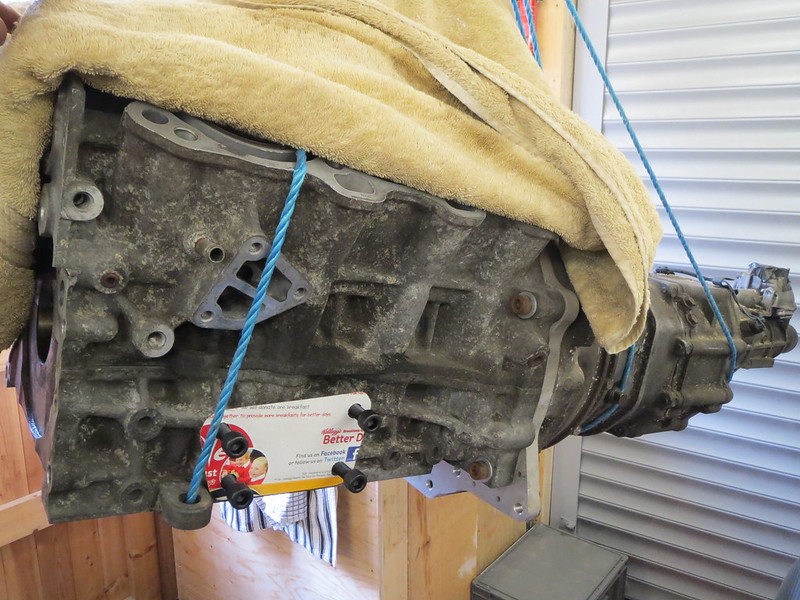
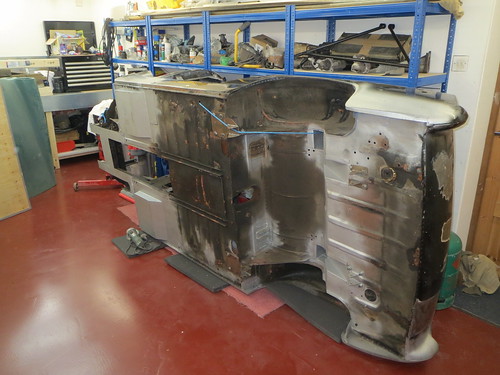
The shell was now the right way up again and looking something like a car too. So I've moved on with getting the engine mounted.
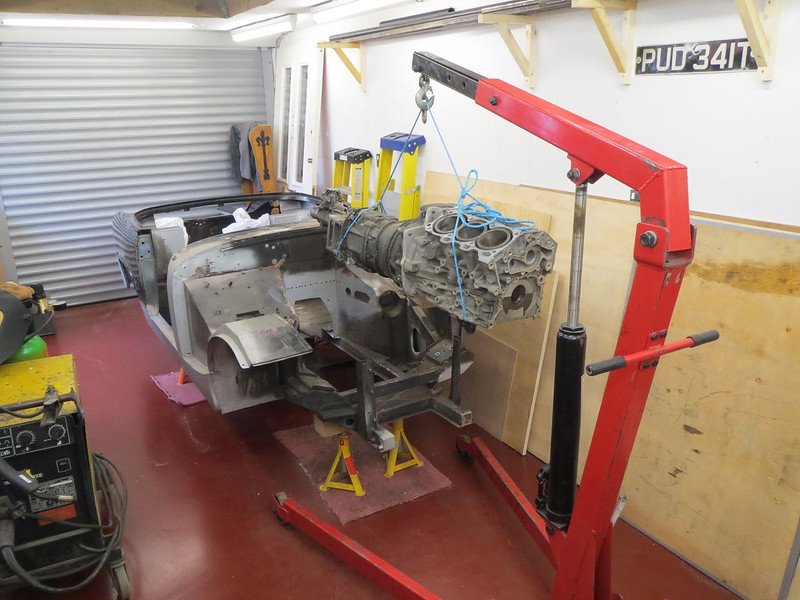
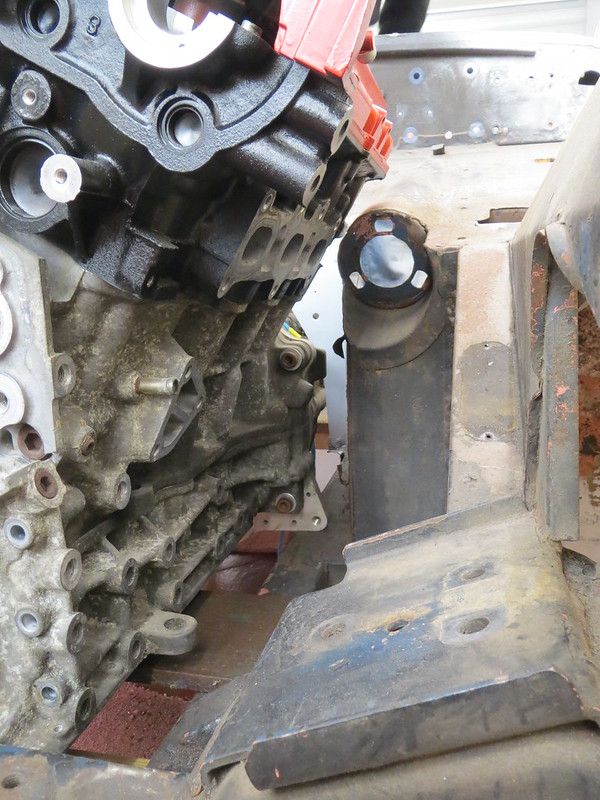
There's not a lot of room around the engine once I mocked up the steering column! Somehow I've got to fit 3-1 manifolds, the steering column and an alternator in there somewhere!!
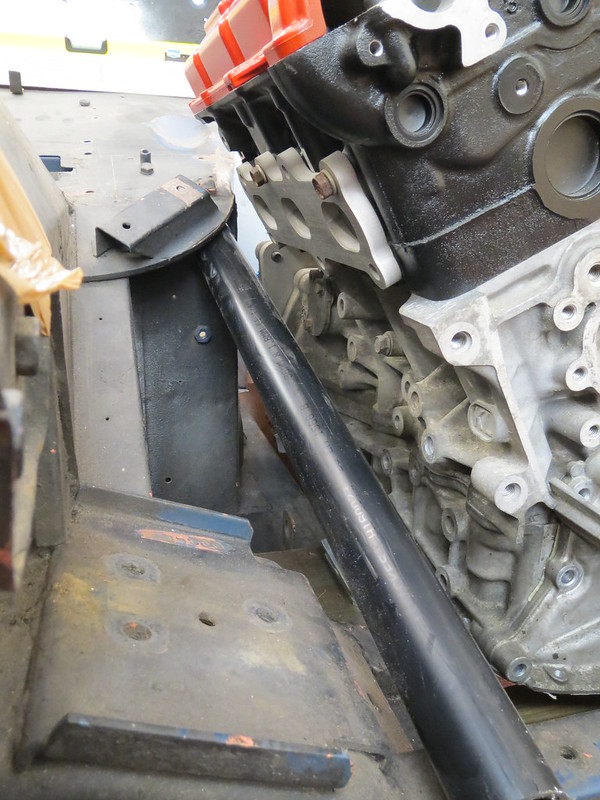
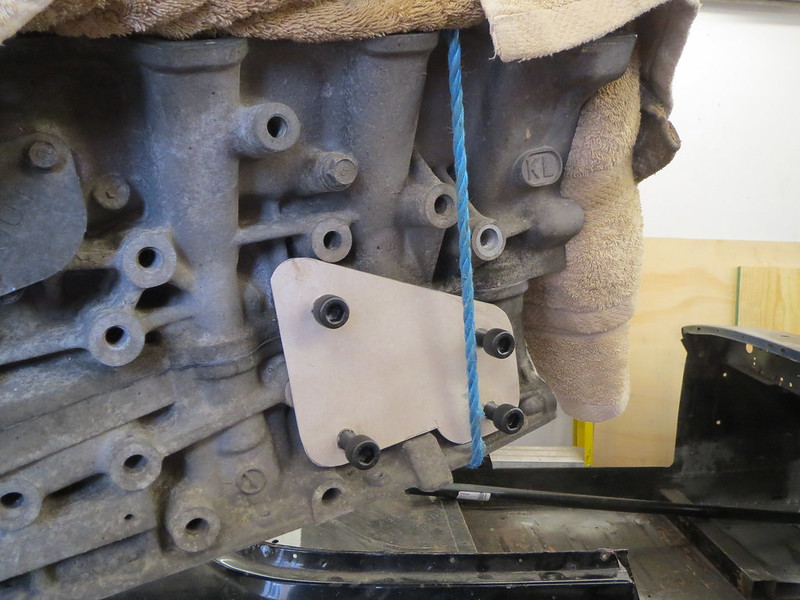
So the next thing to do was to start on the front engine mounts. The gearbox mount will be done next. The front rails were strengthened with 2mm thick plates to help take the weight and to add a little more to the general strength of the shell.
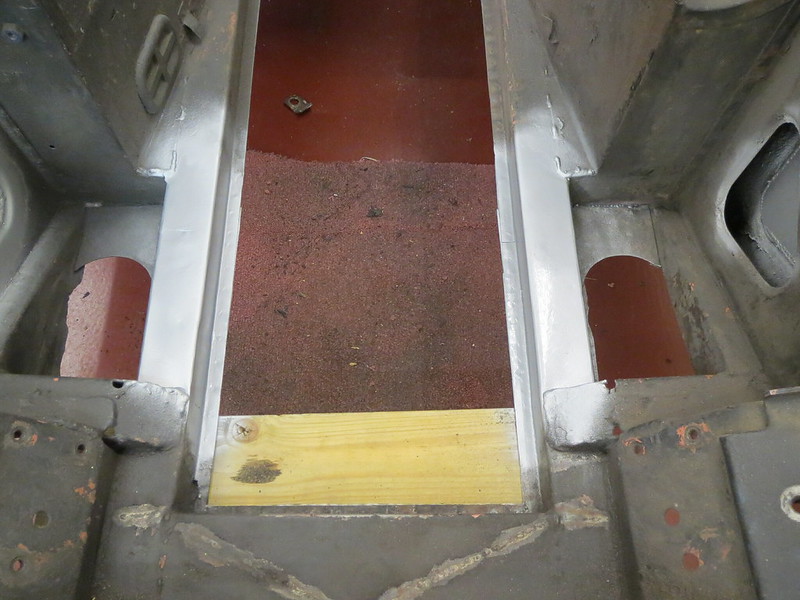
I only got as far as making card templates for the engine side of the mounts, so that's what I'll be starting with today. The chassis side of the mounts will be 3mm plates welded to the new rail plates. This way the mounts are kept small, and with a hard plastic bush in them. They're the same things as I intend to use on the suspension, so if I find the mounts too hard, or that they transfer too much vibration I can get softer ones without having to alter anything else.
Following on from a few projects that have been scattered to the winds on various websites, I thought it might be about time I put all the various bits and bobs I do in one place. Welcome the The Workshop.
Search This Blog
Wednesday, 7 May 2014
Tuesday, 15 April 2014
Quick check over? Not likely......
So with the floor finished, I thought I'd better just cast my eye over the car before I capped the cross member and rolled it the right way up.
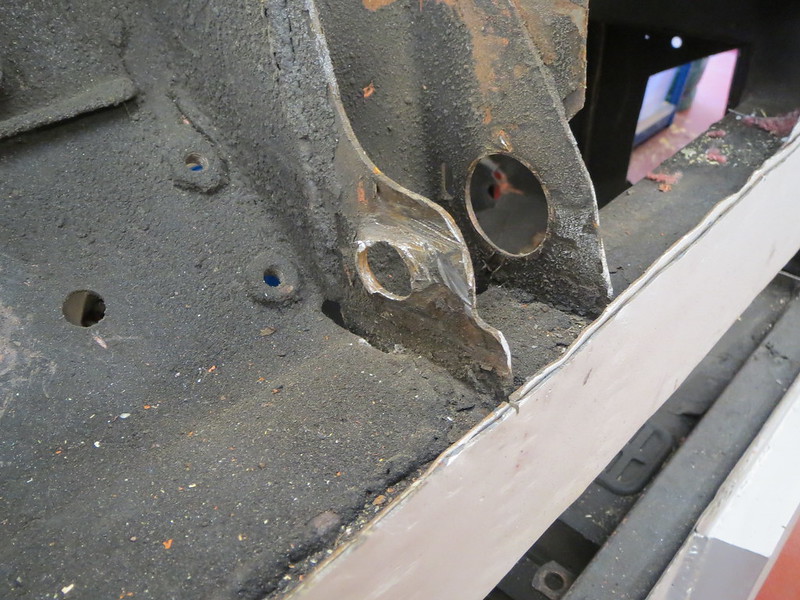
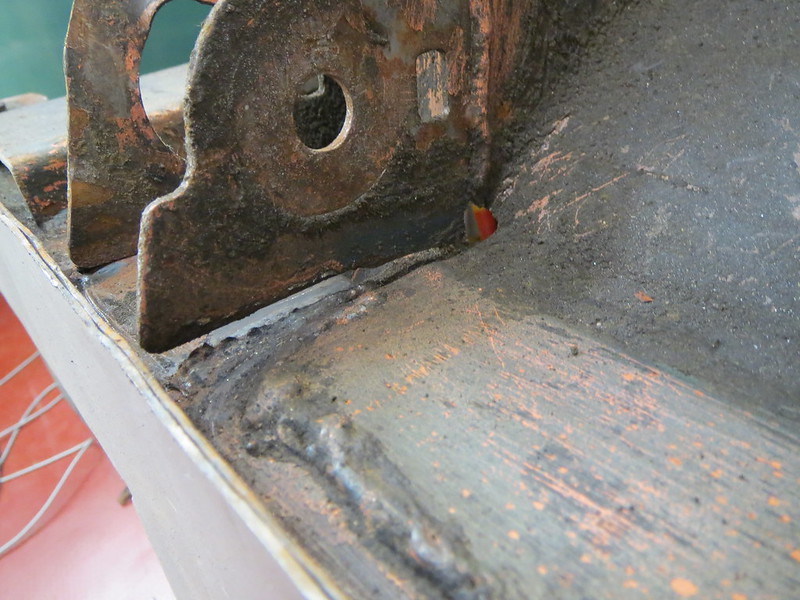
Turns out it was just as well I checked the front end, as I hadn't spotted how bad a splash panel and the wishbone mounts are.
I knew the rear mount was bashed about, as I'd done that getting the old wishbone out. But I hadn't realised that the front mount was about to part company with the chassis rail. The splash panel is nothing to worry about, as it doesn't do much. So I cut the folded over bit off, and hammered the rest flat. I'll tidy the edge up a bit more another day.
Since the front mount is so bad, I've started to cut the entire thing off outboard of the chassis rail. The inboard bit will stay and form the basis of a new mount. Both mounts were always destined to be cut about, but I hadn't intended doing anything more than making room for the new mounts. Whilst this is more work, it's probably going to give me stronger mounts at the end of it all.
Turns out it was just as well I checked the front end, as I hadn't spotted how bad a splash panel and the wishbone mounts are.
I knew the rear mount was bashed about, as I'd done that getting the old wishbone out. But I hadn't realised that the front mount was about to part company with the chassis rail. The splash panel is nothing to worry about, as it doesn't do much. So I cut the folded over bit off, and hammered the rest flat. I'll tidy the edge up a bit more another day.
Since the front mount is so bad, I've started to cut the entire thing off outboard of the chassis rail. The inboard bit will stay and form the basis of a new mount. Both mounts were always destined to be cut about, but I hadn't intended doing anything more than making room for the new mounts. Whilst this is more work, it's probably going to give me stronger mounts at the end of it all.
Sunday, 13 April 2014
Floor finished
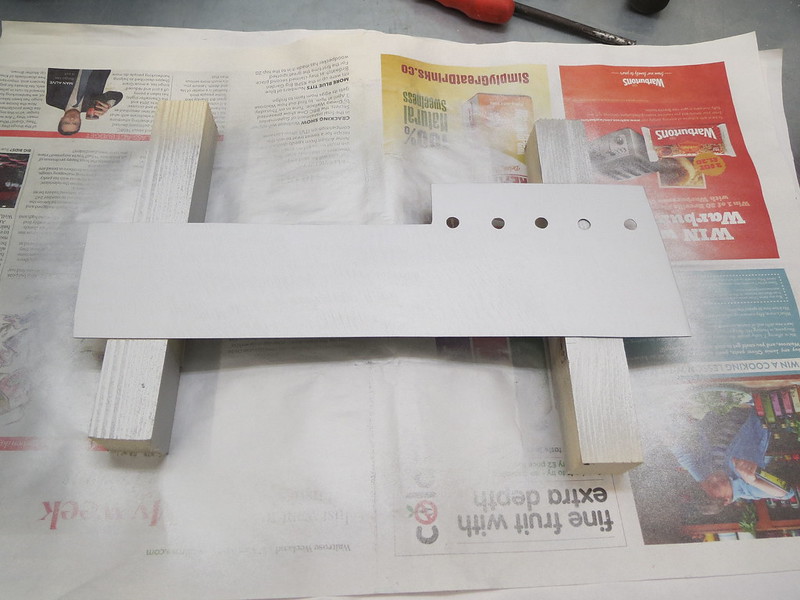
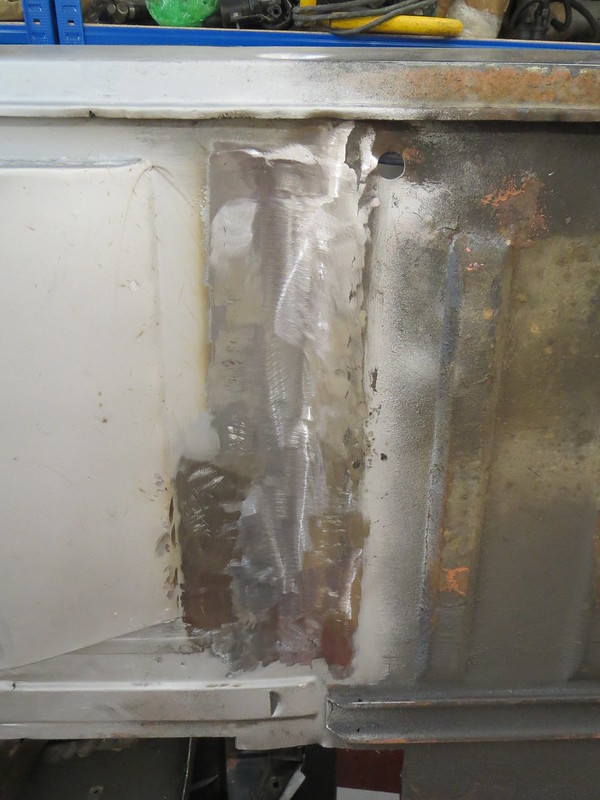
For making the patch, I did my usual trick of using a cereal box to make a template, before transferring the shape to steel sheet. This is the result:
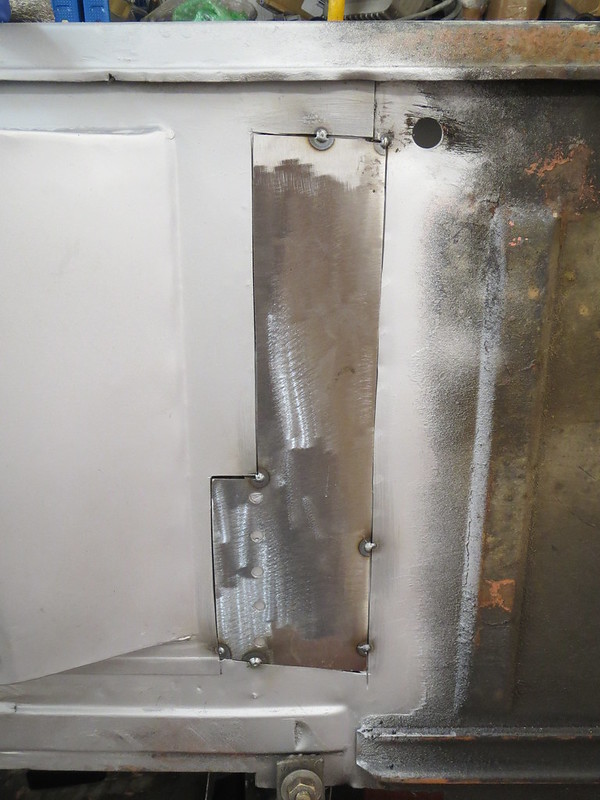
Once the primer's dry, it gets tacked in place, ready for any final shaping and then welding:
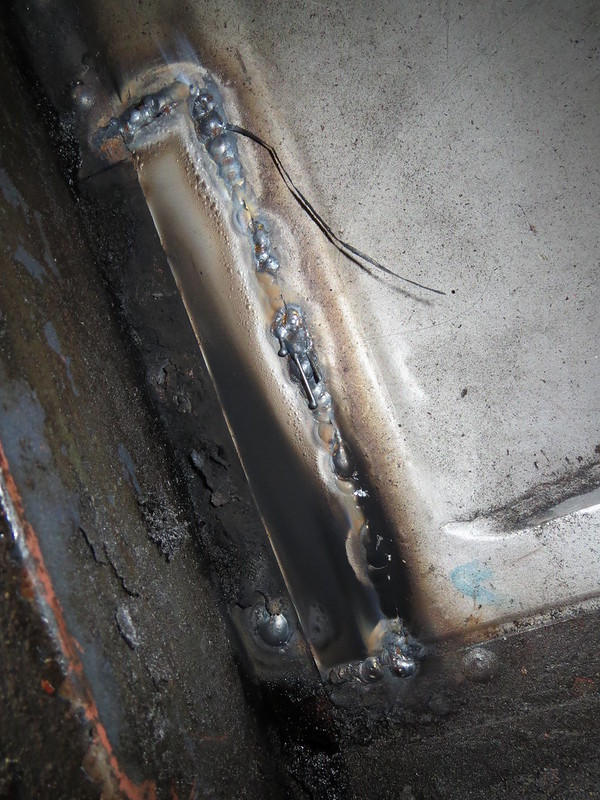
Then I set to with the welder and got it all stuck in. However, I got a bit carried away and forgot to take any photos of the front of the welding, so this one of the back is all I have. This shows what the back looks like when you manage to burn a hole or two in the steel and have to go back later on. That's why some bits look cleaner than others, and why there's bits of wire hanging off it. The black soot is where the car sets on fire.
So once I'd cleaned the underside up with a grinder, it looked rather good considering it's been over 2 years since I picked a welder up!
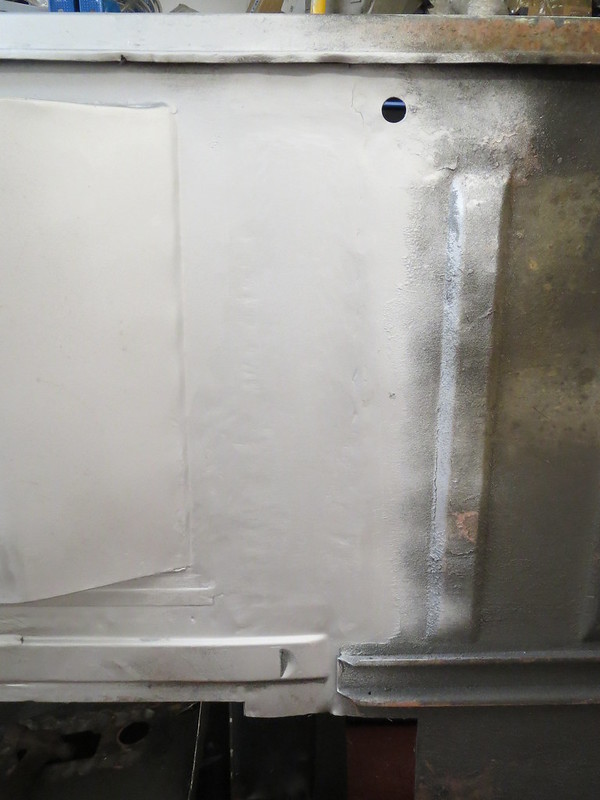
And once painted in more than a coat of primer, you'll not know it's there at all:
The plan now is to check the rest of the bottom of the car over for anything else I may have missed, then cap the exposed cross member that I can to get to before rolling the car back the right way up. Once that's done, I think I'll get on with fitting the engine and making the new transmission tunnel.
Tuesday, 8 April 2014
Wooo, working on the car at last!!
It's been a while since I've had anything worth updating, but I am now in a position to start working on the Sprite again.
Now that my son has a new summer house to play in, and I've done all the other things The Boss expects doing at a moments notice, I've been able to tidy the garage up a bit and get the Sprite on it's side ready to finish off some welding.
I thought I'd finished under the car and was going to get on with fitting the engine, but it turns out that I'd forgotten about finishing off the passenger's side footwell. I'd not done the welding under the cross member, and I where I had plug welded one edge of it in, I now know this will need seam welding. MOT rules mean that any patches that were not originally plug welded must be seam welded. And since the patch stops 2" short of the original plug welds, I have to seam weld it instead. If I'd known this at the time, I'd have just made the footwell a touch bigger and saved myself a fair bit of effort. But it's too late for that now!!
As you can see, there's a large section that's not welded in yet. Rather than try filling the gaps up, this bit was cut out to see what I had under there with the plan of putting a new patch in.
The plan was to cut back to the existing flanges on the cross member so that I can seam weld the patch in easily. This makes the welding much quicker, and will help make the cross member stronger too. Since I've had to cut the central section of it out, this can only be a good thing.
Once I'd had a closer look and a think about it, I ended up with a bigger hole to save having odd bits of welding and different bits of steel for the cross member. This is the hole in the usual zinc primer and ready for it's patch.
Another thing I've spotted is that I must've put the car down on a stand wrong at some point, as the open ends of both cross members are bent in! Whilst not the end of the world, it's something else to straighten before I can cap them off.
I'm hoping to be able to get the patch cut and at least tacked in this evening, so more to follow soon!
Now that my son has a new summer house to play in, and I've done all the other things The Boss expects doing at a moments notice, I've been able to tidy the garage up a bit and get the Sprite on it's side ready to finish off some welding.
I thought I'd finished under the car and was going to get on with fitting the engine, but it turns out that I'd forgotten about finishing off the passenger's side footwell. I'd not done the welding under the cross member, and I where I had plug welded one edge of it in, I now know this will need seam welding. MOT rules mean that any patches that were not originally plug welded must be seam welded. And since the patch stops 2" short of the original plug welds, I have to seam weld it instead. If I'd known this at the time, I'd have just made the footwell a touch bigger and saved myself a fair bit of effort. But it's too late for that now!!
As you can see, there's a large section that's not welded in yet. Rather than try filling the gaps up, this bit was cut out to see what I had under there with the plan of putting a new patch in.
The plan was to cut back to the existing flanges on the cross member so that I can seam weld the patch in easily. This makes the welding much quicker, and will help make the cross member stronger too. Since I've had to cut the central section of it out, this can only be a good thing.
Once I'd had a closer look and a think about it, I ended up with a bigger hole to save having odd bits of welding and different bits of steel for the cross member. This is the hole in the usual zinc primer and ready for it's patch.
Another thing I've spotted is that I must've put the car down on a stand wrong at some point, as the open ends of both cross members are bent in! Whilst not the end of the world, it's something else to straighten before I can cap them off.
I'm hoping to be able to get the patch cut and at least tacked in this evening, so more to follow soon!
Sunday, 16 February 2014
Final touches and the BCO inspection
Now that I had done the plastering, well sort of done the plastering anyway, I could do the few final touches that were needed. There were nothing big, just fitting the CO detector at the right height, finding a pen to write on the information plate and then putting it up to the fuse board and making the two plates to close the chimney off.
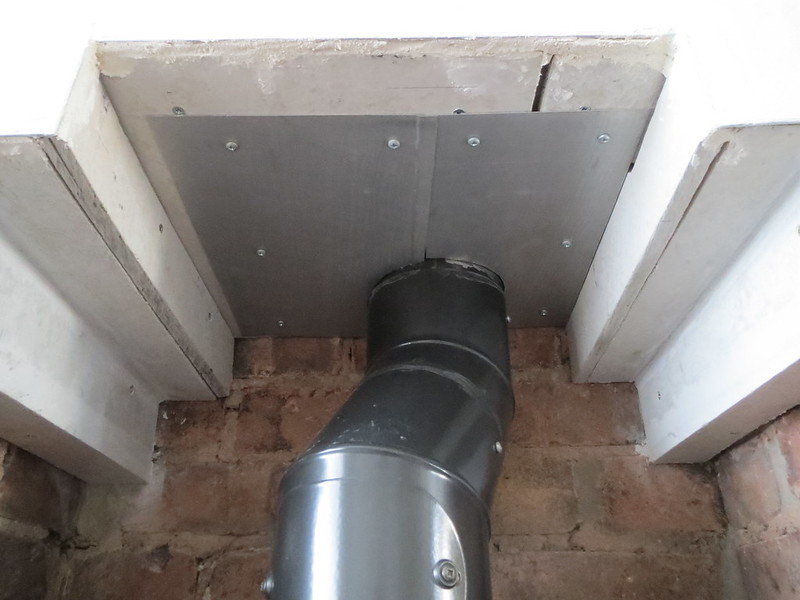
The chimney plates were a little fiddly as I had decided to make them myself from stuff I had knocking about in the garage. The metal I used was going to be a pair of wheel arch guards for my old 7 style kit car, but I ended up using something else. It also means that they're titanium as that's what a mate had spare at work.
The plates were meant to overlap perfectly, but I must have made a slight error on marking out, and made the left hand plate with a wrong angle on it. Not that it matters as you can't see it and they're only there to ensure the hot air rises into the room and not straight up the chimney. Since I sealed the cowl to the chimney pot, there are even any noticeable draughts anyway. But it's something the BCO needs to see so now it's done. The gaps around the edges and between the sections of cement board were later caulked up. Now there's a skim of filler over the plaster, I just need to sand it all flat a final time, and it's ready for paint.
Oh, and the BCO has signed off on it all now too! Which is good, but for my £230 I've had the BCO here for maybe a total of 15 minutes across both visits! Hardly value for money, but it is still cheaper than paying a HETAS certified person to do it.
With the stove done, I've had a bit of time to faff about in the garage, and I've finally wired in the ring main. I've only been trying to get it done for the last 4-5 months! Not that it matters, as we've got the estate agents coming round on Wednesday to value the house. Looks like I'll be looking for a new place on my own soon. :(
The chimney plates were a little fiddly as I had decided to make them myself from stuff I had knocking about in the garage. The metal I used was going to be a pair of wheel arch guards for my old 7 style kit car, but I ended up using something else. It also means that they're titanium as that's what a mate had spare at work.
The plates were meant to overlap perfectly, but I must have made a slight error on marking out, and made the left hand plate with a wrong angle on it. Not that it matters as you can't see it and they're only there to ensure the hot air rises into the room and not straight up the chimney. Since I sealed the cowl to the chimney pot, there are even any noticeable draughts anyway. But it's something the BCO needs to see so now it's done. The gaps around the edges and between the sections of cement board were later caulked up. Now there's a skim of filler over the plaster, I just need to sand it all flat a final time, and it's ready for paint.
Oh, and the BCO has signed off on it all now too! Which is good, but for my £230 I've had the BCO here for maybe a total of 15 minutes across both visits! Hardly value for money, but it is still cheaper than paying a HETAS certified person to do it.
With the stove done, I've had a bit of time to faff about in the garage, and I've finally wired in the ring main. I've only been trying to get it done for the last 4-5 months! Not that it matters, as we've got the estate agents coming round on Wednesday to value the house. Looks like I'll be looking for a new place on my own soon. :(
Friday, 7 February 2014
Airwash system
Just a quick video really that shows the effect of the airwash system on a smoke bomb. The system draws fresh in from a top vent and then across the glass. This keeps the smoke from touching the glass, keeping it cleaner for longer. This video also shows the draw on the cold flue that I've got.
Plastering is much harder than I thought!
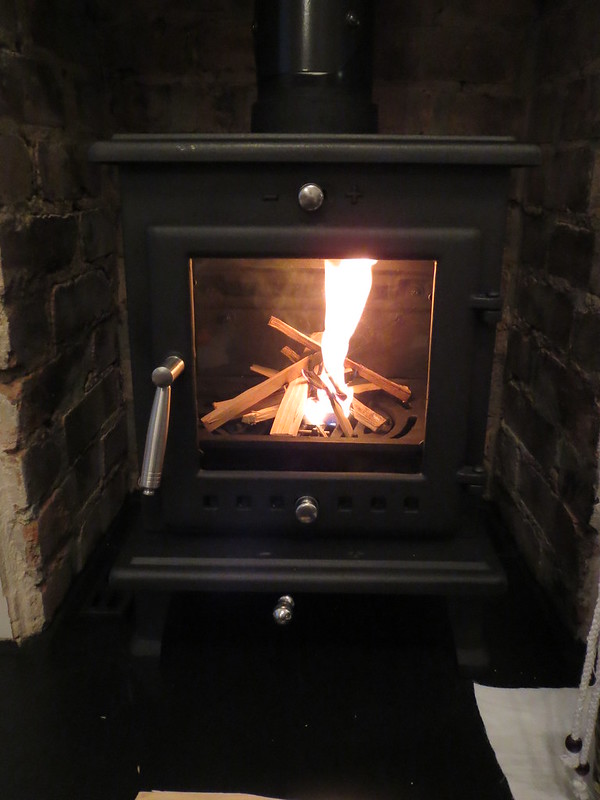
It's been a while, but with the Mrs recuperating and me being busy at work, I've just not had the time to get anything done other than fire cement the vitreous pipework and get the stove tempered with a series of increasing fires. For someone who is a self-confessed firebug, this was difficult to do!
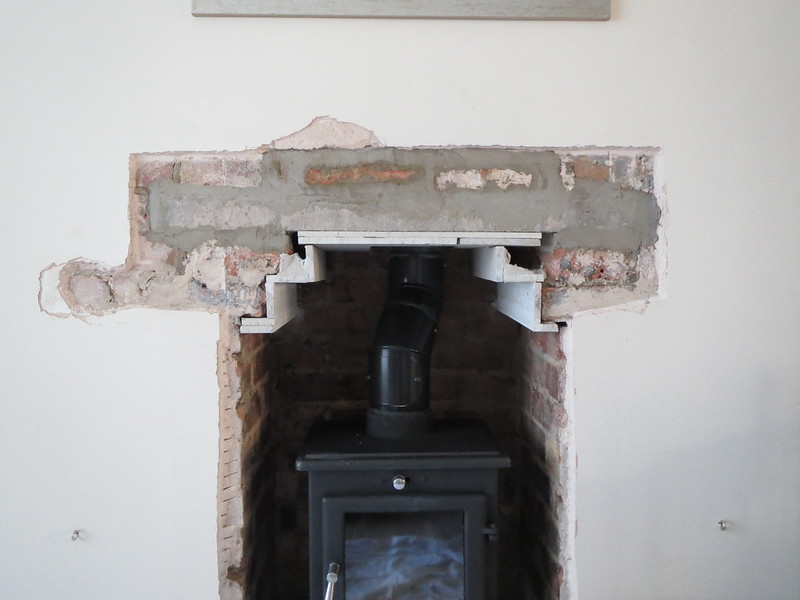
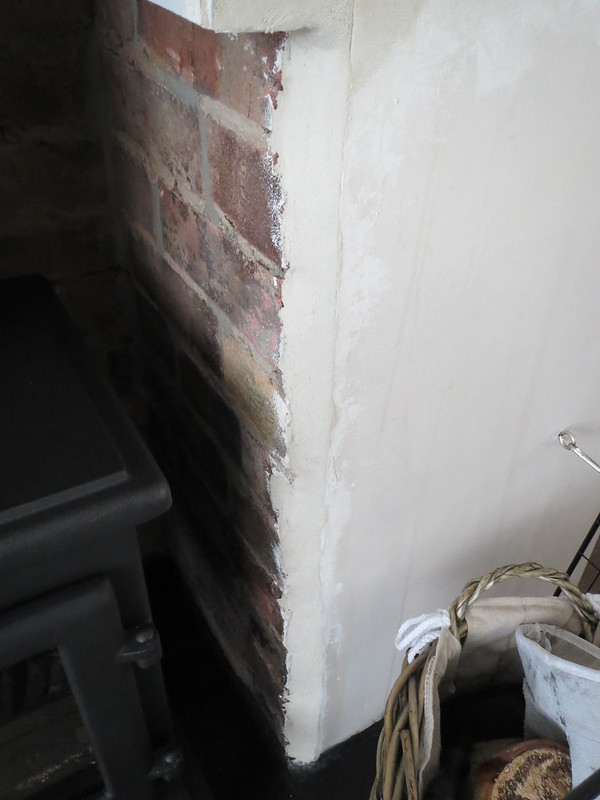
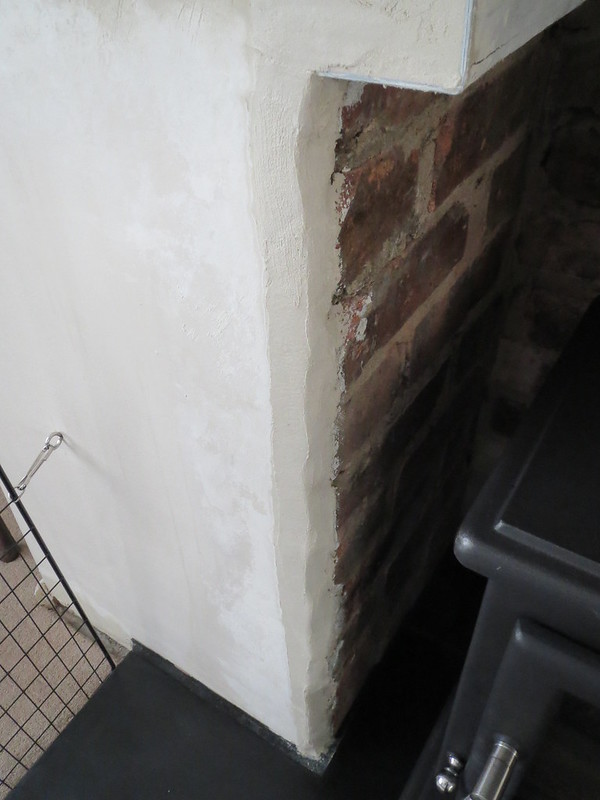
Last weekend though, I did get the Sunday morning to have a go at the plastering. And it's something I've never done before, so I was a little apprehensive. I started off by removing a few loose/hollow sounding bits around the edge of the existing hole:
Then the wall was given two coat of watered down PVA. It maybe should have been just one coat, but it seemed to dry out fairly quickly, and the instructions on the bag of plaster said to wet the wall, so I did. Given that I've never plastered before, and this is a repair patch rather than an entire section of wall, I opted for Wickes One Coat plaster. It mixed easily, but seemed a funny colour. I'm used to plaster being a dark brown/tan sort of colour and this stuff was grey. Not that the colour matters, it just wasn't what I had expected.
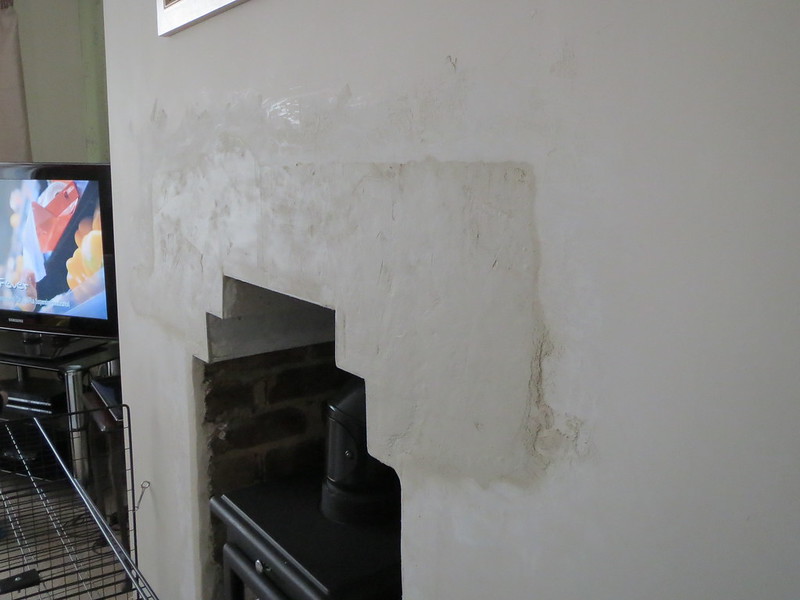
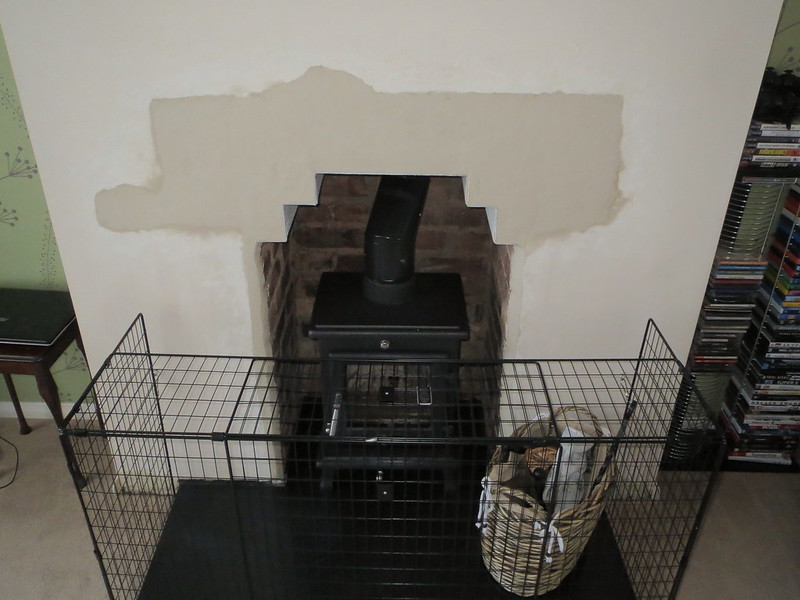
So with the plaster mixed and poured into a bucket, I started with the edge bead around the cement board. This gives edge a hard metal finish that is also straight. Cutting and sticking the stuff in place with plaster was a bit of a fiddle due to the short sections needed, but it was done. I should have taken a photo, but forgot. With the plaster glue drying, I set to with filling the big hole in, starting on the left. To begin with, it seemed fairly easy to do. And building up the depth was going well until I got to the right hand edge and discovered the wall had what now seemed a massive bow in the existing plaster which I hadn't noticed before. I only realised this was the problem when I was struggling to match the levels. I could move the trowel one way and level the plaster, only to go across it again and score it quite deeply. However, I decided to persevere and sand smooth what was left once the plaster had dried. Whilst this photo is of the finished (well as finished as it's going to be for now) plaster, it shows the bow quite well.
With the top bit mostly done and now drying off a little, I made a start on the two narrow sections either side of the recess. Given that the bricks aren't straight, an edge stop bead would look a bit odd and just point out how uneven the brick work is. So I made the decision to attempt a hand formed angle. I doubt this was wise on my first go, but I figure I can always sand it back should I need to. There will be a certain amount of sanding and tidying to do anyway to clean the bricks, so a little more is no real hardship to ensure a smooth surface.
Once the corners were done, the top was given a smoothing over as best I could. This is clearly the bit that takes the skill. I was getting drag marks and bits sticking all over the place, no matter how wet I made the surface. But I did the best I could, and the rest will need sanding back to see how much filler I need! OK, it may have been better to pay someone to do this bit properly, but I'm glad of the experience if nothing else.
And with that it was left to dry. 5 days later and it's almost finished, so I can get the stove lit again. Whilst the surface finish isn't great, I hope to fix that this weekend with some sanding and filling. I also hope to get the metal closure plate sections done, the CO detector properly mounted and then find a pen that writes on metal so I can fix the information plate in place. All of this needs doing as the BCO calls on Thursday to hopefully sign off on it all!
Last weekend though, I did get the Sunday morning to have a go at the plastering. And it's something I've never done before, so I was a little apprehensive. I started off by removing a few loose/hollow sounding bits around the edge of the existing hole:
Then the wall was given two coat of watered down PVA. It maybe should have been just one coat, but it seemed to dry out fairly quickly, and the instructions on the bag of plaster said to wet the wall, so I did. Given that I've never plastered before, and this is a repair patch rather than an entire section of wall, I opted for Wickes One Coat plaster. It mixed easily, but seemed a funny colour. I'm used to plaster being a dark brown/tan sort of colour and this stuff was grey. Not that the colour matters, it just wasn't what I had expected.
So with the plaster mixed and poured into a bucket, I started with the edge bead around the cement board. This gives edge a hard metal finish that is also straight. Cutting and sticking the stuff in place with plaster was a bit of a fiddle due to the short sections needed, but it was done. I should have taken a photo, but forgot. With the plaster glue drying, I set to with filling the big hole in, starting on the left. To begin with, it seemed fairly easy to do. And building up the depth was going well until I got to the right hand edge and discovered the wall had what now seemed a massive bow in the existing plaster which I hadn't noticed before. I only realised this was the problem when I was struggling to match the levels. I could move the trowel one way and level the plaster, only to go across it again and score it quite deeply. However, I decided to persevere and sand smooth what was left once the plaster had dried. Whilst this photo is of the finished (well as finished as it's going to be for now) plaster, it shows the bow quite well.
With the top bit mostly done and now drying off a little, I made a start on the two narrow sections either side of the recess. Given that the bricks aren't straight, an edge stop bead would look a bit odd and just point out how uneven the brick work is. So I made the decision to attempt a hand formed angle. I doubt this was wise on my first go, but I figure I can always sand it back should I need to. There will be a certain amount of sanding and tidying to do anyway to clean the bricks, so a little more is no real hardship to ensure a smooth surface.
Once the corners were done, the top was given a smoothing over as best I could. This is clearly the bit that takes the skill. I was getting drag marks and bits sticking all over the place, no matter how wet I made the surface. But I did the best I could, and the rest will need sanding back to see how much filler I need! OK, it may have been better to pay someone to do this bit properly, but I'm glad of the experience if nothing else.
And with that it was left to dry. 5 days later and it's almost finished, so I can get the stove lit again. Whilst the surface finish isn't great, I hope to fix that this weekend with some sanding and filling. I also hope to get the metal closure plate sections done, the CO detector properly mounted and then find a pen that writes on metal so I can fix the information plate in place. All of this needs doing as the BCO calls on Thursday to hopefully sign off on it all!
Subscribe to:
Posts (Atom)