Since I'm dying of manflu, or possibly something even more deadly, I was only out in the garage this afternoon. But I did manage to make some progress beyond tidying up.
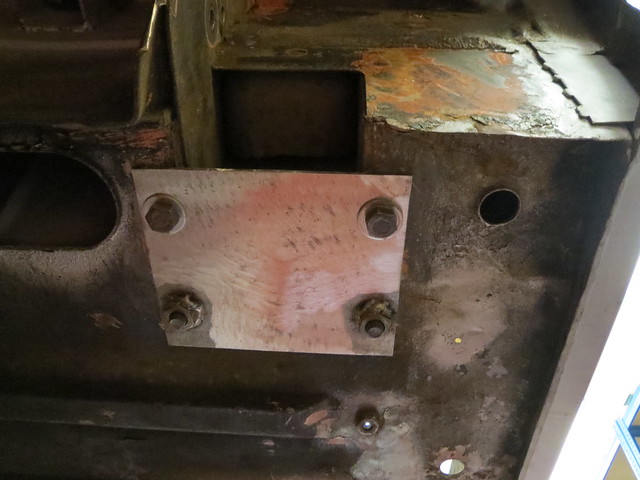
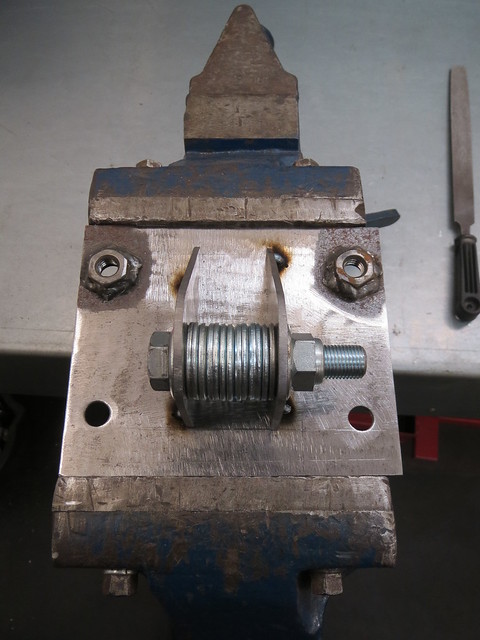
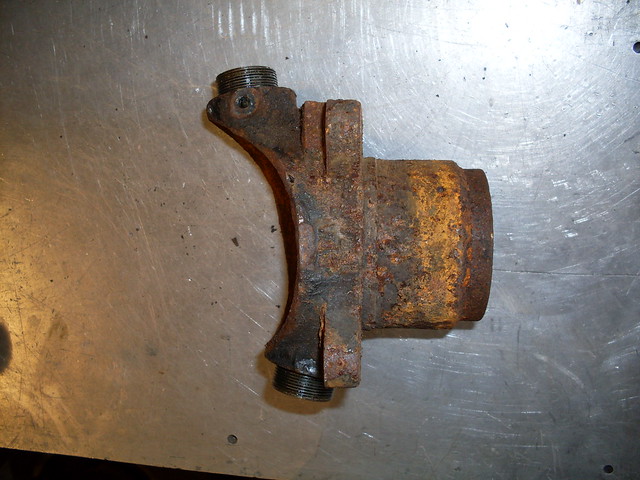
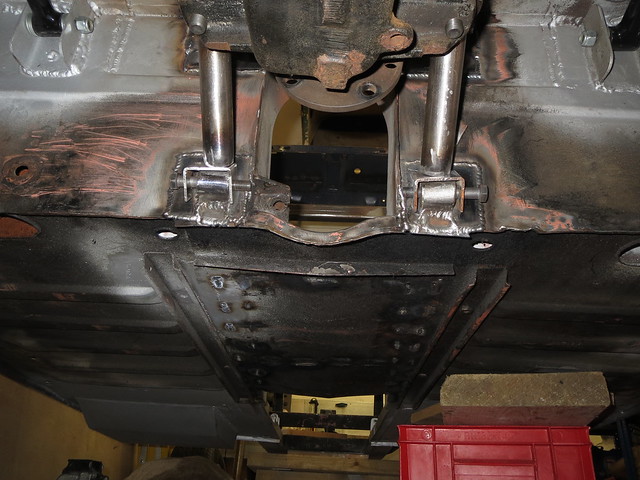
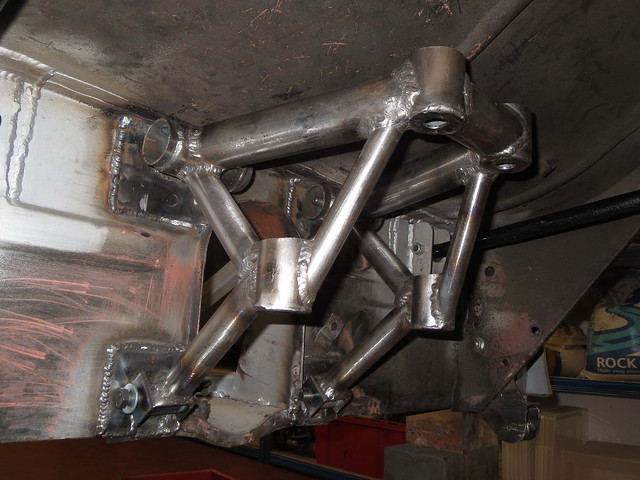
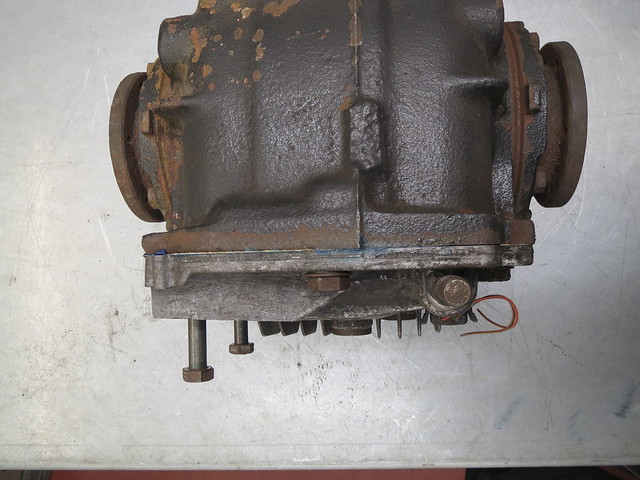
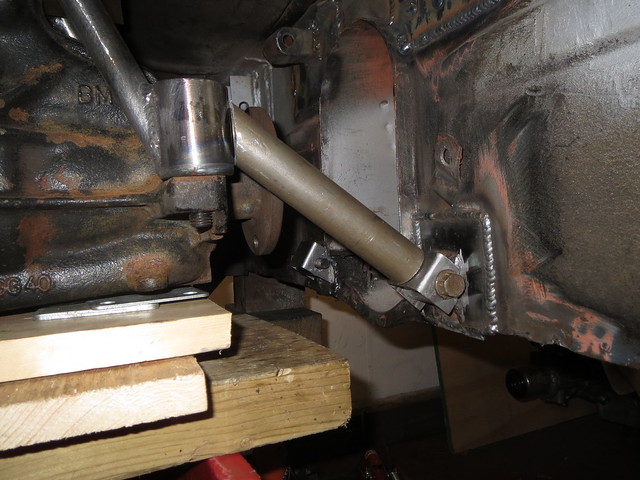
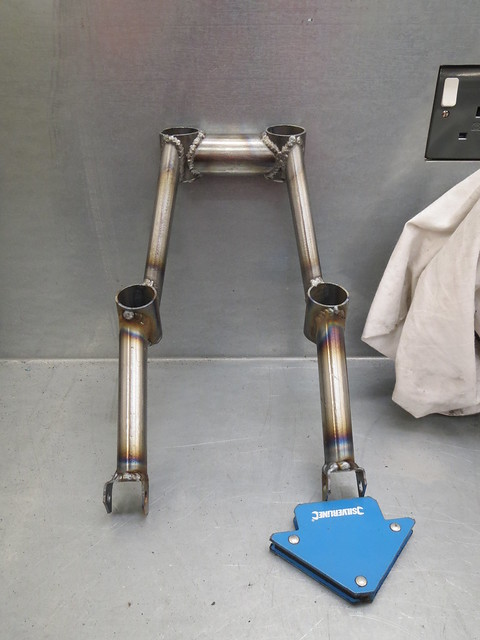
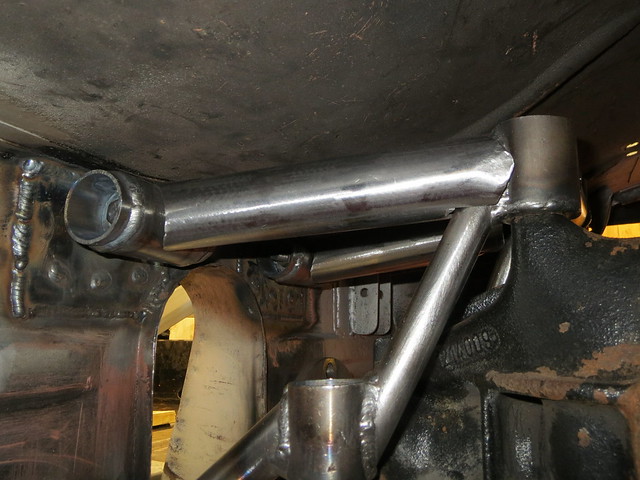
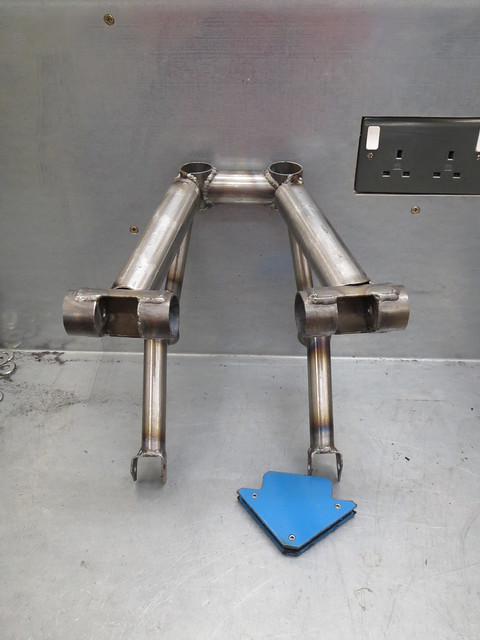
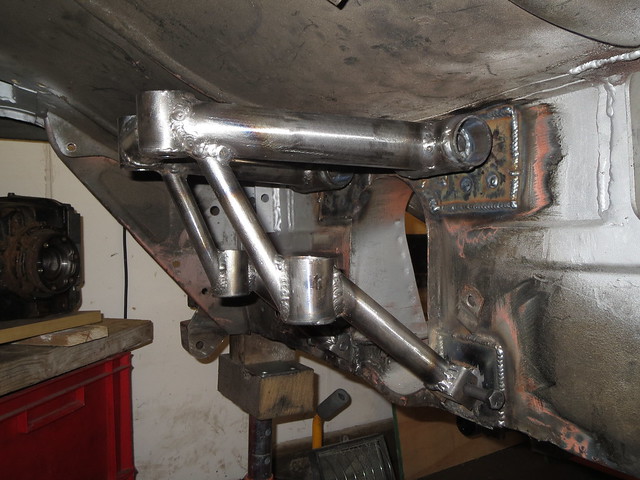
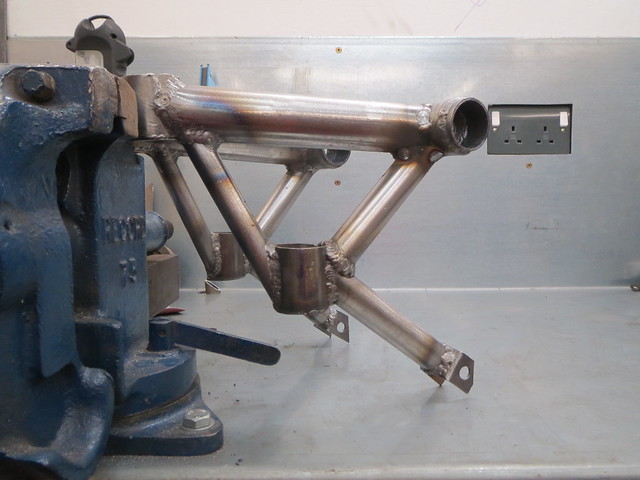
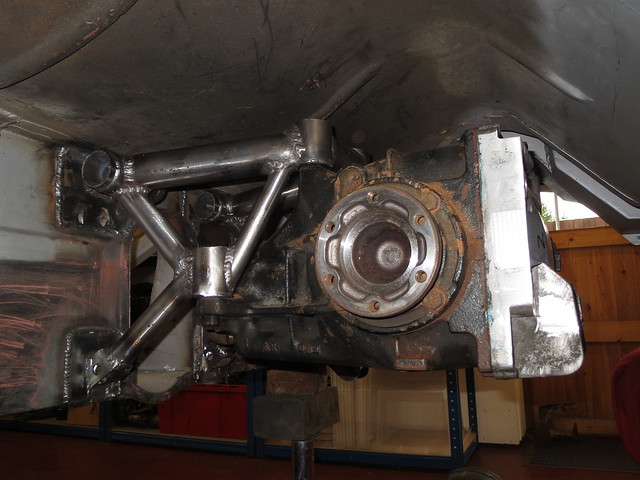
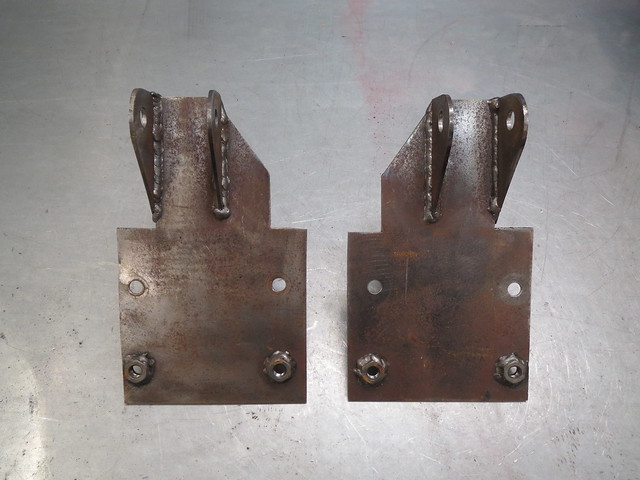
And that progress is on the new A frame for the rear suspension. As I'm changing the front mounts to be a much stiffer and more secure mount, I need to make a new longer A frame to match. The new mounts are based on the existing mounts, but cut down. The idea is to move the mounting brackets so they are in the middle of the bolts, rather than hanging off the shell on the bracket. These are the existing mounts:
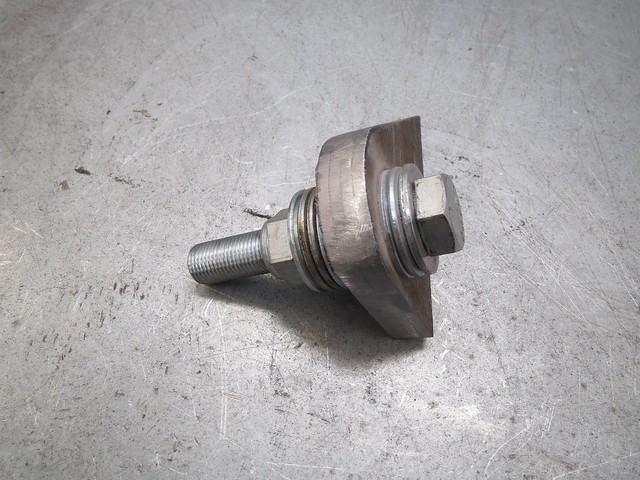
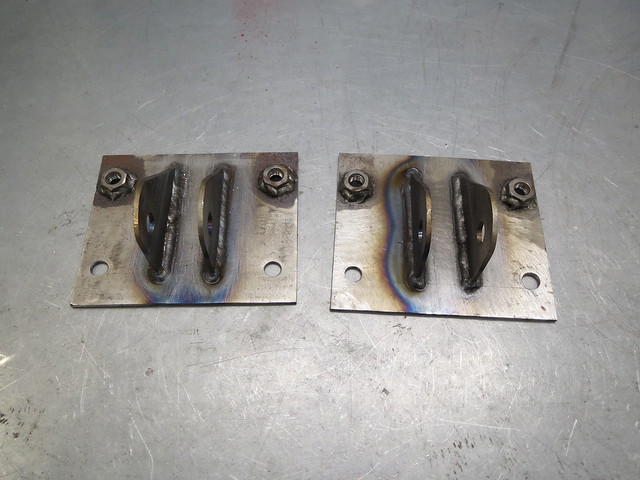
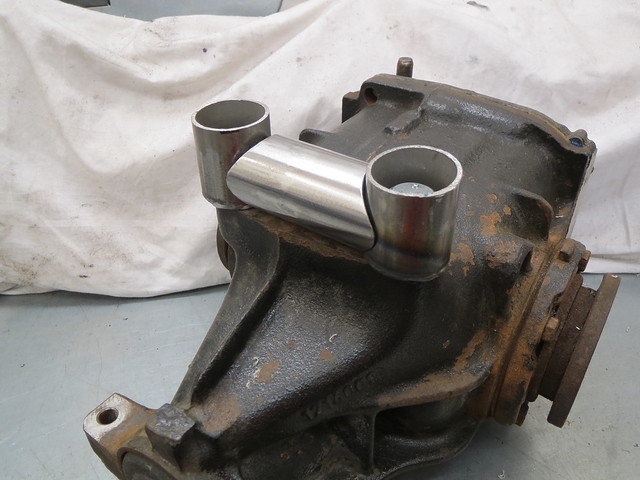
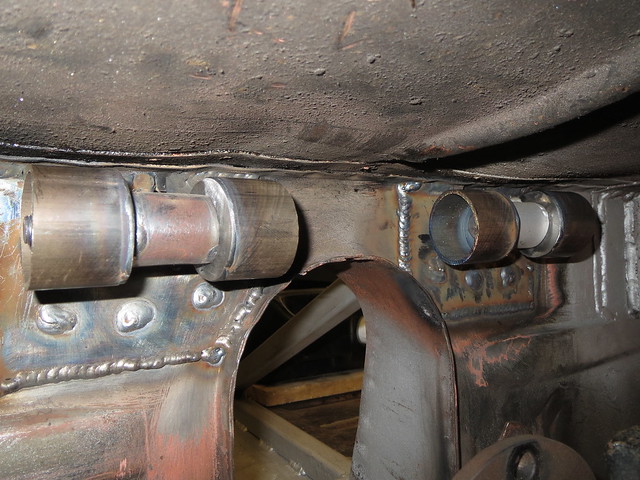
And this is what they look like when cut down to the size I want:
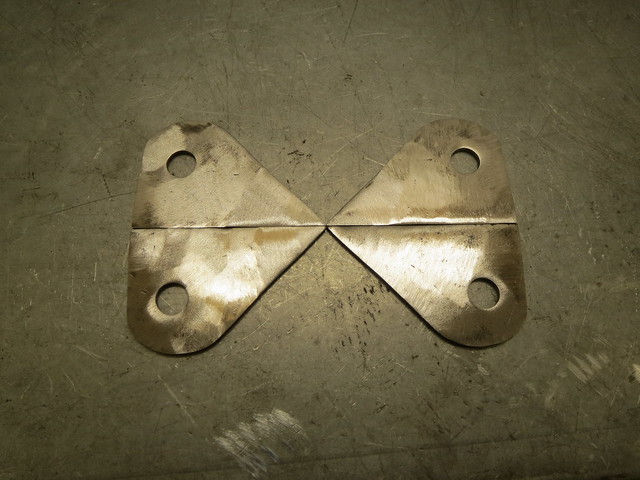
The new brackets are based on a template taken from the existing mounts. All four were roughly cut but accurately drilled before being bolted together for shaping. This ensures all four are the same shape and have the mounting hole in the same place.
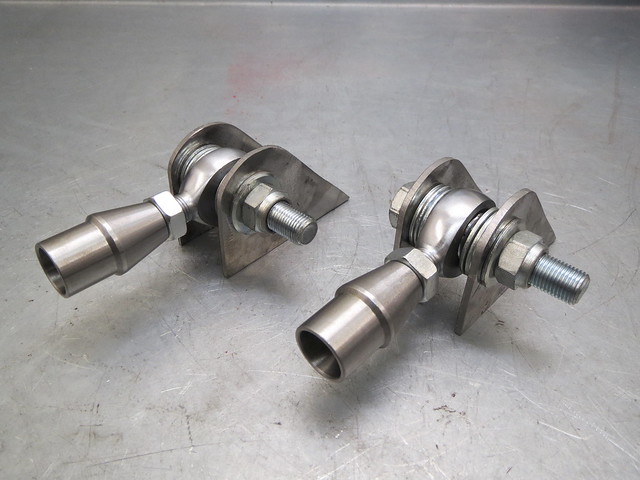
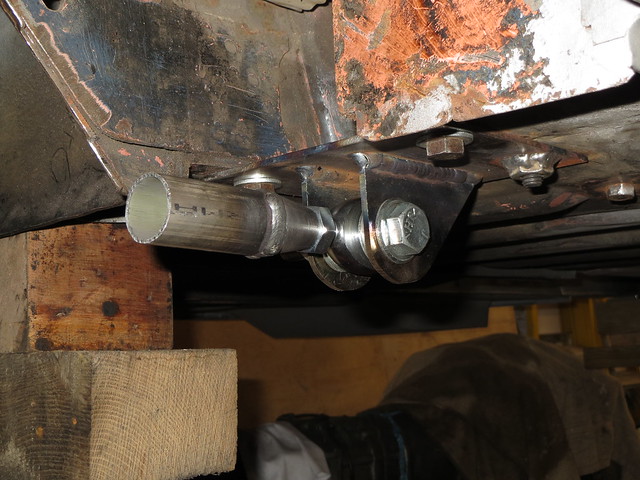
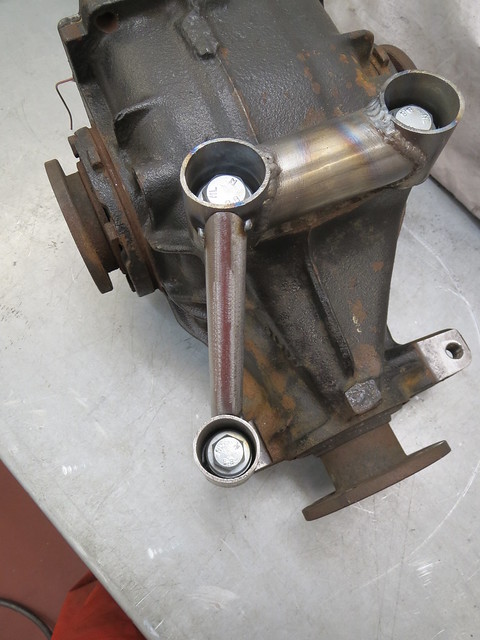
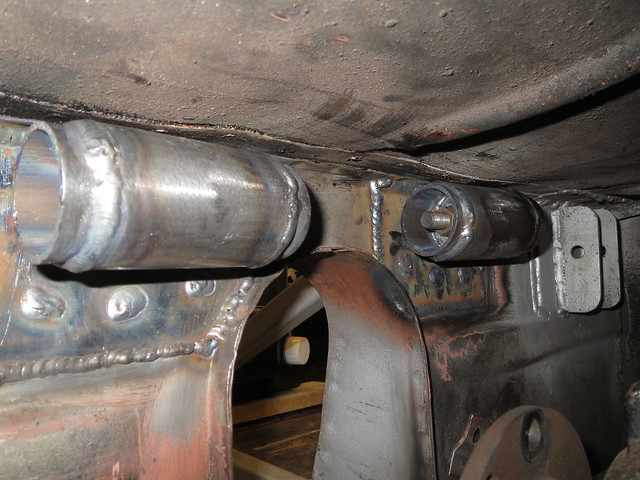
The brackets were then roughly assembled with the rod ends, threaded inserts and spacing washers, to allow a little extra adjustment should it be needed, before being tacked into place:
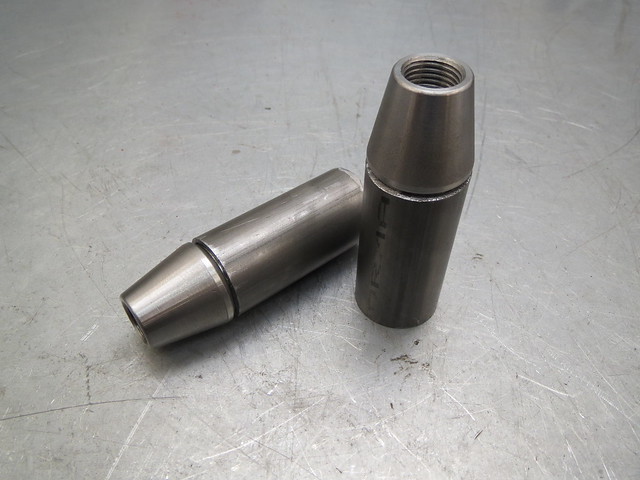
So with the brackets done for now, the threaded inserts needed welding into short sections of CDS. I decided to use these rather than rubber bushings as they're easier to make for a DIYer. Bushings require accurately sized tubing and are often press fit, and I don't have a press. And rod ends also allow a degree of adjustment that bushings just don't have. Plus, they're shiny.
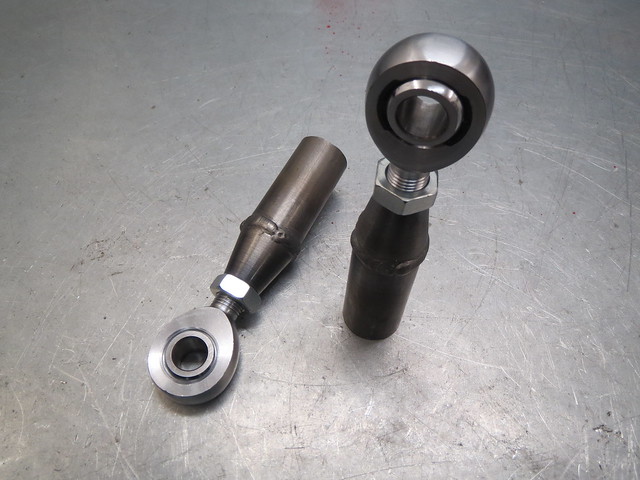
These were then bolted back into the brackets and the whole lot put back on the shell.
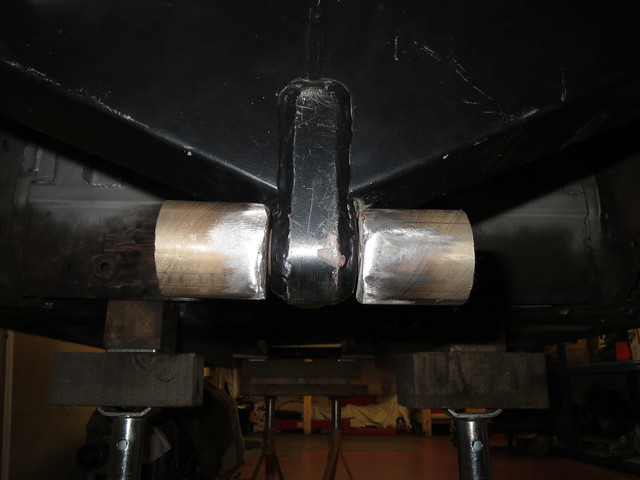
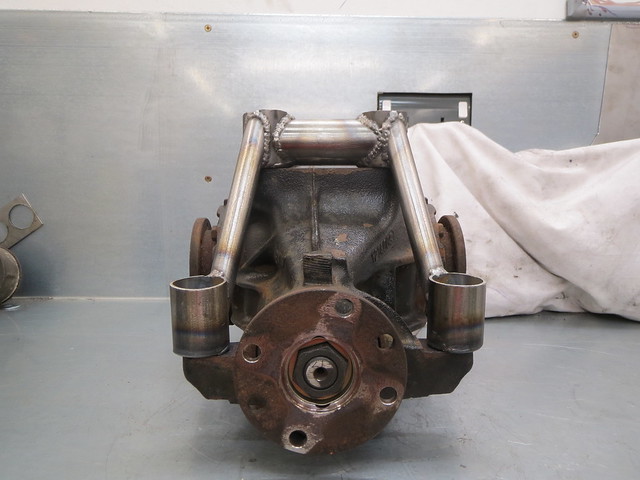
With those done for now, the De-Dion tube mount needed remaking too. The Caterham A frame uses 1 1/4" tubing, but I didn't have any so mine are 1 1/2" instead. The only difference this made was that they needed a slight angle filing on one edge to clear the welds on the main tube.
Following on from a few projects that have been scattered to the winds on various websites, I thought it might be about time I put all the various bits and bobs I do in one place. Welcome the The Workshop.
Search This Blog
Monday, 13 October 2014
Building up to another week off
Since I have some holiday stored up, I'm taking this week off work to make more progress on the Sprite.
In preparation of having the time off, I wanted to get the Mini uprights cleaned up and in primer. I need to get the outer suspension components together so that I can set the wheels correctly in relation to the shell before moving onto making a trial set of wishbones. The easiest way I know of cleaning up old rusty parts is using the power of science.
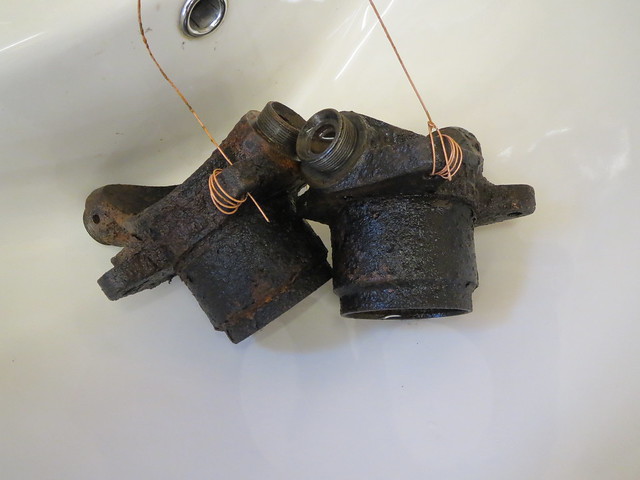
Since they were free, they used to look a little worse for wear, like this:

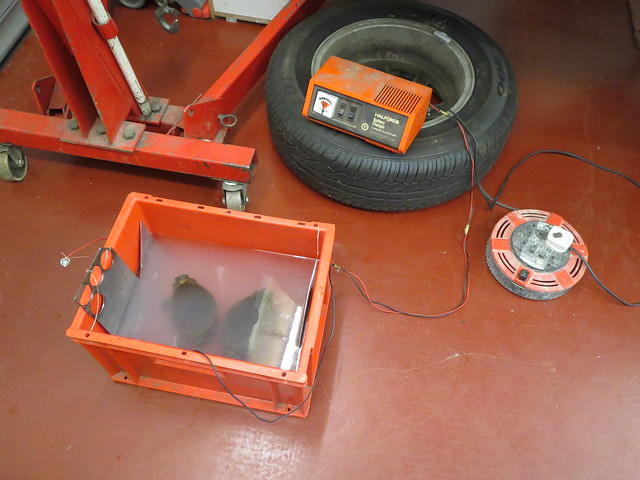
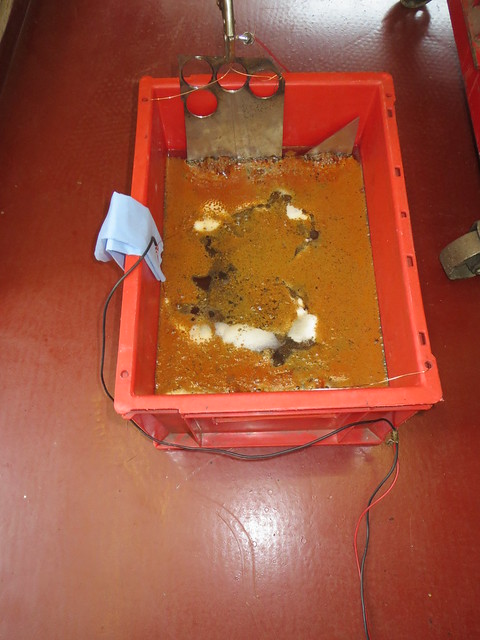
But if you put them in a bucket of water mixed with soda crystals and add a battery charger you can use the electricity to reduce the rust on the surface back to iron. This process takes about half a day for each part in my little plastic tub, but that's about all. It's cheap, a piece of piss to do and makes very little mess. It also leaves any machined surfaces perfectly intact and can remove a fair bit of grease too. This was my initial set up, and they were left in overnight:
Once taken out, they look better. Not great, but better. Ideally, you should surround each part with anodes (the scrap bits of steel), but I only had two usable bits to hand.
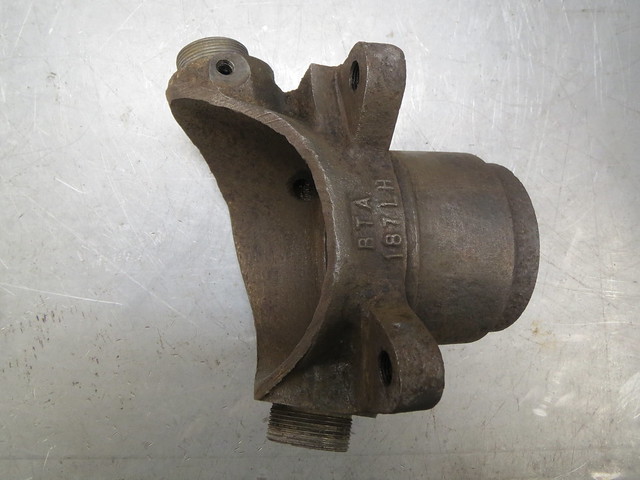
Since they weren't great, I decided to put them back in individually to get them looking better. Once they're given a quick wire brushing to remove any flakes of rust/iron, they look like this:

Not bad for 10-15 minutes work. OK, a blast cleaner would probably do just as well, if not better, but I don't have one of those where as I do have a battery charger and a bucket. This process can be applied to any iron/steel item and the only real limit is the size of the tub and the charger.
IMPORTANT 'Ealth and Safety bit: should you fancy having a go at home, please do. But DO NOT use stainless for the anodes. It makes a rather nasty chemical in the water called [url=http://en.wikipedia.org/wiki/Hexavalent_chromium]hexavalent chromium[/url]. It's mildly carcinogenic and can cause contact dermatitis. Make sure you put the negative wire on the thing to be de-rusted, as getting it wrong makes the part more rusty! Where possible ensure it's done in a ventilated space as the process gives off hydrogen gas in small volumes.
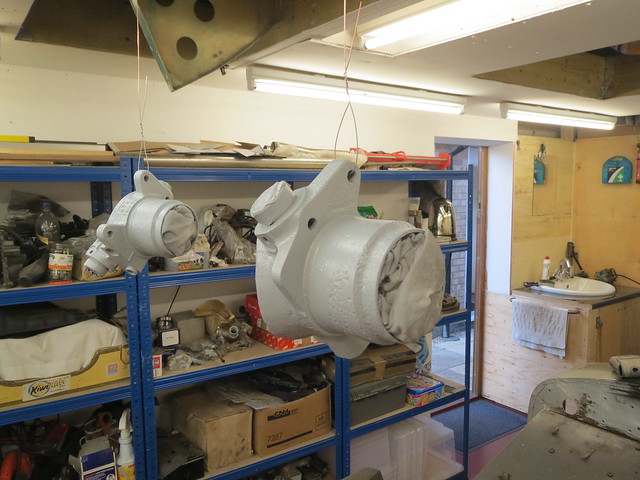
Once they were both clean and dried off, a few coats of engine primer were applied. I'm using that over other stuff as it's supposed to resist temps up to 500F, which should be way above what the uprights see. At some point I'll probably paint them black but they'll only get knocked in the next few weeks, so I don't see the point yet.
In preparation of having the time off, I wanted to get the Mini uprights cleaned up and in primer. I need to get the outer suspension components together so that I can set the wheels correctly in relation to the shell before moving onto making a trial set of wishbones. The easiest way I know of cleaning up old rusty parts is using the power of science.
Since they were free, they used to look a little worse for wear, like this:

But if you put them in a bucket of water mixed with soda crystals and add a battery charger you can use the electricity to reduce the rust on the surface back to iron. This process takes about half a day for each part in my little plastic tub, but that's about all. It's cheap, a piece of piss to do and makes very little mess. It also leaves any machined surfaces perfectly intact and can remove a fair bit of grease too. This was my initial set up, and they were left in overnight:
Once taken out, they look better. Not great, but better. Ideally, you should surround each part with anodes (the scrap bits of steel), but I only had two usable bits to hand.
Since they weren't great, I decided to put them back in individually to get them looking better. Once they're given a quick wire brushing to remove any flakes of rust/iron, they look like this:

Not bad for 10-15 minutes work. OK, a blast cleaner would probably do just as well, if not better, but I don't have one of those where as I do have a battery charger and a bucket. This process can be applied to any iron/steel item and the only real limit is the size of the tub and the charger.
IMPORTANT 'Ealth and Safety bit: should you fancy having a go at home, please do. But DO NOT use stainless for the anodes. It makes a rather nasty chemical in the water called [url=http://en.wikipedia.org/wiki/Hexavalent_chromium]hexavalent chromium[/url]. It's mildly carcinogenic and can cause contact dermatitis. Make sure you put the negative wire on the thing to be de-rusted, as getting it wrong makes the part more rusty! Where possible ensure it's done in a ventilated space as the process gives off hydrogen gas in small volumes.
Once they were both clean and dried off, a few coats of engine primer were applied. I'm using that over other stuff as it's supposed to resist temps up to 500F, which should be way above what the uprights see. At some point I'll probably paint them black but they'll only get knocked in the next few weeks, so I don't see the point yet.
Saturday, 4 October 2014
Record 74 painting
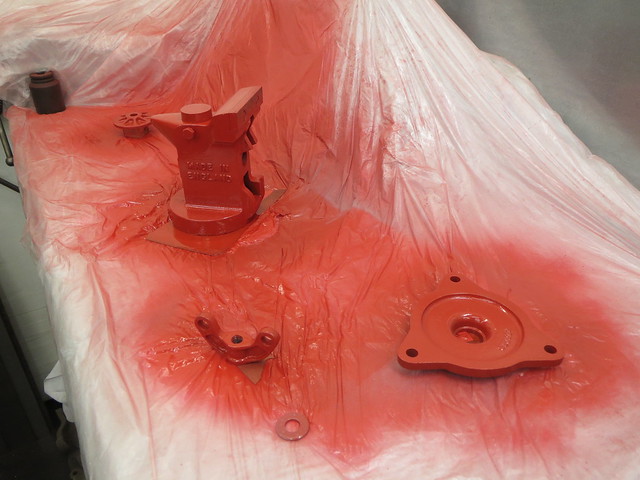
As part of tidying things up a bit of late, I decided it was probably about time that I actually got at least one of the Record 74 Autovices I have back in one piece.
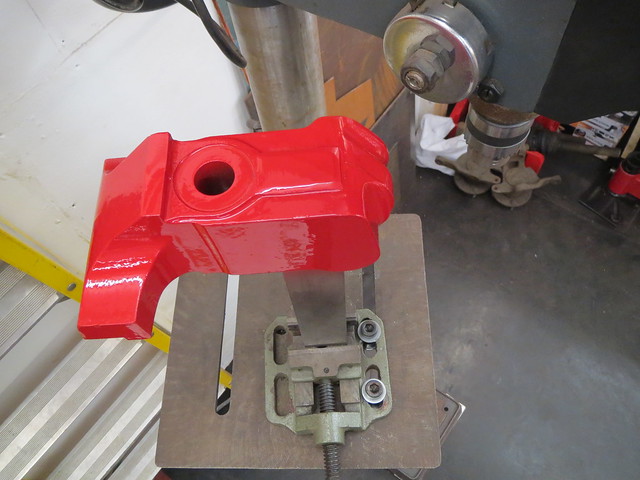
So the one that was in bits has been treated to it's few two coats of Insignia Red enamel. I've no idea if this is the right colour, and chances are it's not, but it's a good match if maybe a bit bright.
The colour in real life is somewhere between the two photos, with it being nearer the red of the second photo. Once this coat has dried, they'll get a third and final coat before I contemplate putting them in the oven when my other half isn't looking to really harden the enamel! I might just have to leave in a box for a few weeks instead though.
So the one that was in bits has been treated to it's few two coats of Insignia Red enamel. I've no idea if this is the right colour, and chances are it's not, but it's a good match if maybe a bit bright.
The colour in real life is somewhere between the two photos, with it being nearer the red of the second photo. Once this coat has dried, they'll get a third and final coat before I contemplate putting them in the oven when my other half isn't looking to really harden the enamel! I might just have to leave in a box for a few weeks instead though.
Diff trimming
Not much going on in the Workshop at the moment, more getting set up ready for a week off soon so I can get stuck in without having to faff about too much. Not that it will stop me faffing about, just that I have less to faff about with.
So the diff fins were cut back roughly even, and then the diff re-fitted to ensure I had the right gap. At some point I will powerfile these round and even, but I couldn't be bothered the other day.
So there is now a 10mm gap between the fins and the diff at full droop, which is plenty. The next thing to do on the rear is to re-do the A frame. I've never been 100% happy with having the mounts hanging off the shell. I'm going to make a longer frame so the chassis mount will be directly under the spring hanger. This will make it much stiffer, and the new frame will have rod ends so I can adjust it more easily too. Being a relatively simple shape, it shouldn't take long to make the new one and the current mount can be cut down to save making new ones entirely from scratch.
So the diff fins were cut back roughly even, and then the diff re-fitted to ensure I had the right gap. At some point I will powerfile these round and even, but I couldn't be bothered the other day.
So there is now a 10mm gap between the fins and the diff at full droop, which is plenty. The next thing to do on the rear is to re-do the A frame. I've never been 100% happy with having the mounts hanging off the shell. I'm going to make a longer frame so the chassis mount will be directly under the spring hanger. This will make it much stiffer, and the new frame will have rod ends so I can adjust it more easily too. Being a relatively simple shape, it shouldn't take long to make the new one and the current mount can be cut down to save making new ones entirely from scratch.
Monday, 22 September 2014
The completed diff cage.
I thought it best to put the final stage in the diff cage up now the fabrication is complete.
The cage had the lower mounts cut off so I could make new thicker ones. Where the first ones were bent pieces of steel, the second versions have bee cut from 2mm thick 40mm box section. This makes them much easier to build as well as being stronger and thicker. Being wider, they will require washers inside them to prevent any crushing, but it also means that I can alter the positioning of the legs slightly too.
with everything bolted in place, the diff was levelled out as it was hanging tail down a touch. This did open a small gap between the legs and the mounts, but nothing wide enough to worry about with MIG welding. And so it was tacked in place on the shell before welding fully on the bench.
So the diff cage was finally completed. With the diff now in it's final place I could refit all the suspension to check for clearance. Before the diff was levelled there was a small gap. With it levelled and bolted in tight, there was no longer any gap.
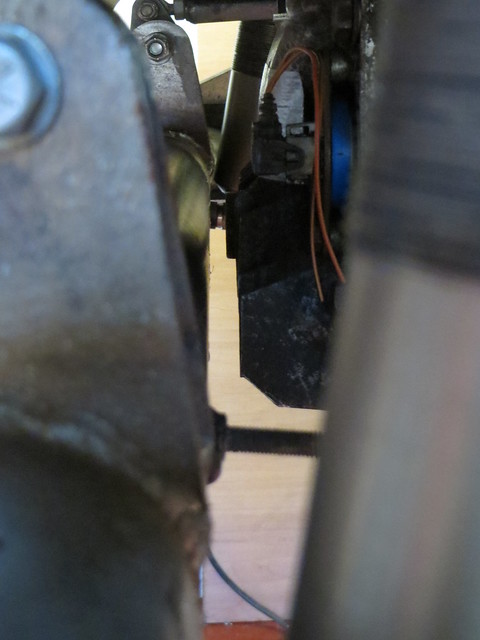
So the final step in fitting the diff is to cut the cooling fins down a touch to create some space. I had expected to shave a little off the outer fins to clear the A frame link, but it looks like I'll be trimming them all back.
The cage had the lower mounts cut off so I could make new thicker ones. Where the first ones were bent pieces of steel, the second versions have bee cut from 2mm thick 40mm box section. This makes them much easier to build as well as being stronger and thicker. Being wider, they will require washers inside them to prevent any crushing, but it also means that I can alter the positioning of the legs slightly too.
with everything bolted in place, the diff was levelled out as it was hanging tail down a touch. This did open a small gap between the legs and the mounts, but nothing wide enough to worry about with MIG welding. And so it was tacked in place on the shell before welding fully on the bench.
So the diff cage was finally completed. With the diff now in it's final place I could refit all the suspension to check for clearance. Before the diff was levelled there was a small gap. With it levelled and bolted in tight, there was no longer any gap.
So the final step in fitting the diff is to cut the cooling fins down a touch to create some space. I had expected to shave a little off the outer fins to clear the A frame link, but it looks like I'll be trimming them all back.
Friday, 19 September 2014
Diff cage
Since this has proven to be more involved and complicated than I had first thought, it gets it's own update.
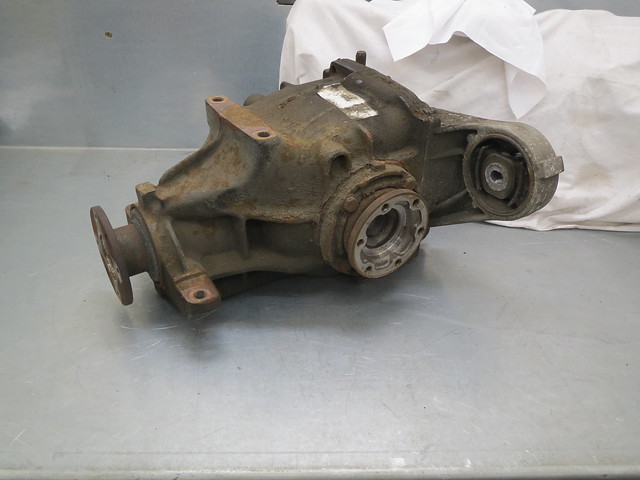
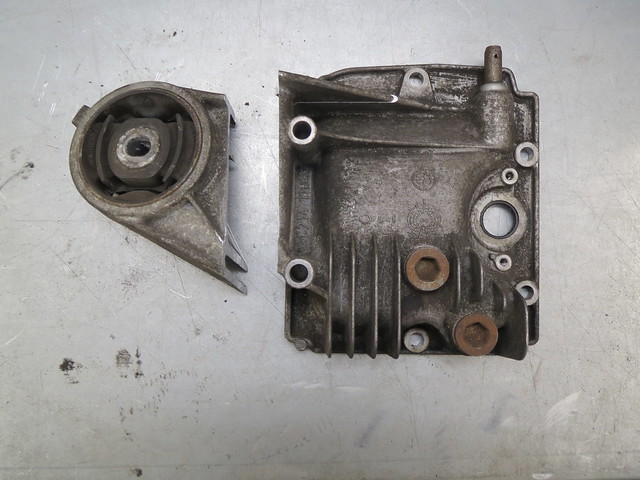
Once the diff was given a quick clean and a wire brush, it was time to start modifying the casings to better suit my needs. As standard the diff has five mounting points. Four that are hard bolted at the front and one large rubber mount on a wing on the rear cover.
Whilst all five mounts are obviously used in the BMW, the rear wing gets in the way for what I want and I've no where to mount it anyway. So the rear cover was taken off, partly so I could clean the diff out and partly so I could cut the cover down without damaging the diff at all.
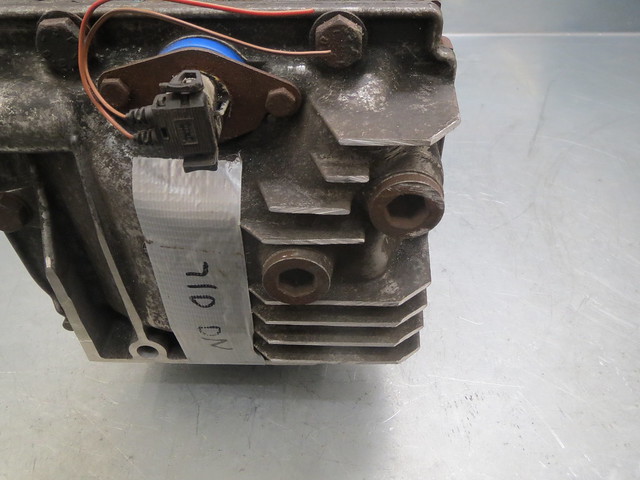
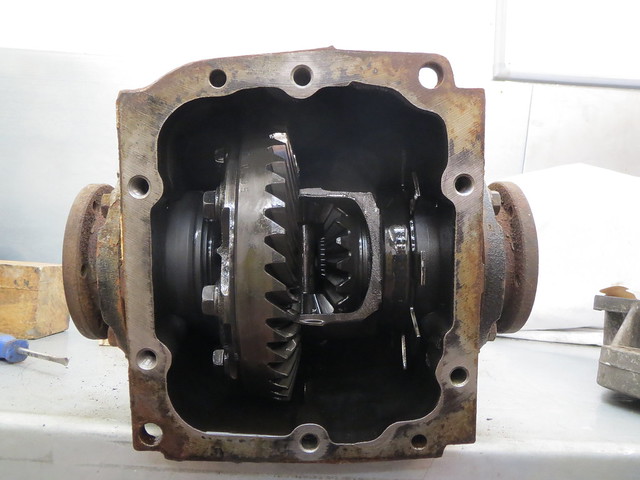
The inside of the diff looks largely as you would expect, but with one minor difference. BMW use the diff to mount the speedo trigger, and as such it has a fan on one side to trigger the sensor. I'm not sure yet if I'll keep this or not, as I may use something on the prop or maybe a front wheel. The diff is easiest as BMW have already done all the R&D for me and the sensor is reliable. The prop gives a better indication of rear wheel speed, as it measures total wheel spin better but will require me to mount a suitable sensor. The front wheels give a better idea of road speed as they don't react to wheel spin, but are easily the hardest to make work.
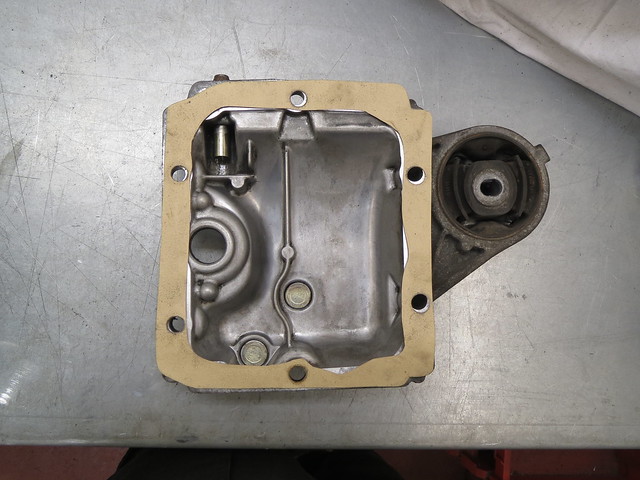
So now to cutting the rear cover down. This was done in a few steps to ensure I didn't over do it or bugger it up! The first step was to clean the cover up and make a new gasket for it and then cut the meat of the wing off.
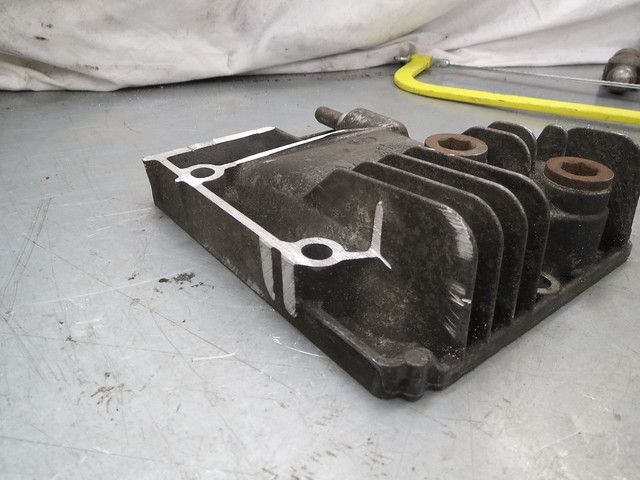
And then the remaining metal was cut down and the two bolt mounts cut back and sanded flat. I did later sand the edge of the cover flat too just to make it more complete.
So now the diff was cut back I could get on with the cradle. The first thing to do was to make the diff side of the frame. This would then allow me to accurately measure up for the tubes to the transmission tunnel mounts. This is a story best told in pictures.
So with the diff side of the cage completed, the diff was positioned against the shell to sort the lower legs.
The next problem was how to match a piece of 1.5" tube against a mount that was about 1.5" wide. My solution was to make the mount wider, but in a way that allowed the extra width to not get in the way.
And that is as far as I've got with it. Due to all the heat from welding, the lower leg mounts have skewed upwards by 4-5mm, so I'll need to cut the lower mounts off and re-do them. But that means I can also make them a touch bigger and stronger, so that's no bad thing.
Once the diff was given a quick clean and a wire brush, it was time to start modifying the casings to better suit my needs. As standard the diff has five mounting points. Four that are hard bolted at the front and one large rubber mount on a wing on the rear cover.
Whilst all five mounts are obviously used in the BMW, the rear wing gets in the way for what I want and I've no where to mount it anyway. So the rear cover was taken off, partly so I could clean the diff out and partly so I could cut the cover down without damaging the diff at all.
The inside of the diff looks largely as you would expect, but with one minor difference. BMW use the diff to mount the speedo trigger, and as such it has a fan on one side to trigger the sensor. I'm not sure yet if I'll keep this or not, as I may use something on the prop or maybe a front wheel. The diff is easiest as BMW have already done all the R&D for me and the sensor is reliable. The prop gives a better indication of rear wheel speed, as it measures total wheel spin better but will require me to mount a suitable sensor. The front wheels give a better idea of road speed as they don't react to wheel spin, but are easily the hardest to make work.
So now to cutting the rear cover down. This was done in a few steps to ensure I didn't over do it or bugger it up! The first step was to clean the cover up and make a new gasket for it and then cut the meat of the wing off.
And then the remaining metal was cut down and the two bolt mounts cut back and sanded flat. I did later sand the edge of the cover flat too just to make it more complete.
So now the diff was cut back I could get on with the cradle. The first thing to do was to make the diff side of the frame. This would then allow me to accurately measure up for the tubes to the transmission tunnel mounts. This is a story best told in pictures.
So with the diff side of the cage completed, the diff was positioned against the shell to sort the lower legs.
The next problem was how to match a piece of 1.5" tube against a mount that was about 1.5" wide. My solution was to make the mount wider, but in a way that allowed the extra width to not get in the way.
And that is as far as I've got with it. Due to all the heat from welding, the lower leg mounts have skewed upwards by 4-5mm, so I'll need to cut the lower mounts off and re-do them. But that means I can also make them a touch bigger and stronger, so that's no bad thing.
August and Septemeber updates!
I'm really not doing well with keeping this blog up to date! Which is going to make this update a bit full.
But first things first. The heater tray was fully welded in, cleaned up and then etch primed. The lower flanges were spot welded from within the foot wells and then cleaned back to hide the welds. The top plate will will be done when I'm ready to get that far. But I'm happy with how this all looks for now and it still allows the engine to fit easily. Or as easily as a 2.5l V6 will in a Sprite!
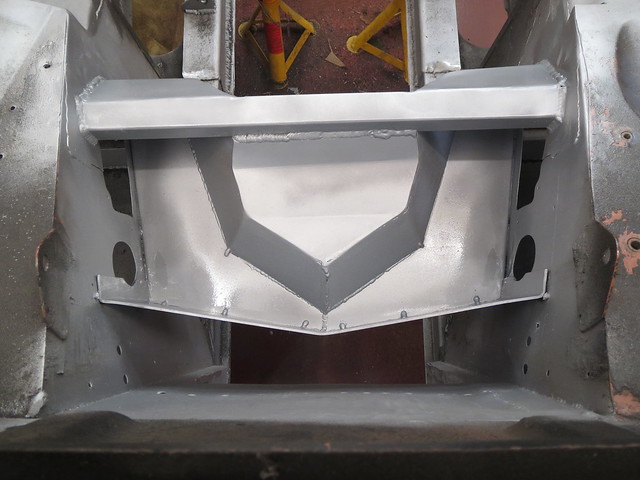
The next step was to get cracking with the rear suspension and get more done on the back end before moving on to the front. So the first thing to do was to actually finish the transmission tunnel off and get the plates fitted to the rear bulkhead face to help strengthen the diff mounts.
I've not got a photo showing all four plates welded as yet, as the bits over the top of the upper mounts hasn't been done. I tried doing one of them, but the very restricted access makes it virtually impossible to see what I'm doing, so those bits can wait until I next roll the shell over.
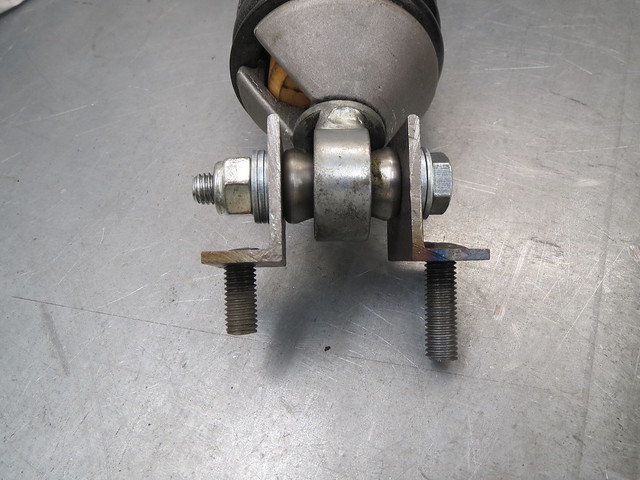
But with the plates as in as they can be for now, I had a look at the suspension itself and the brakes. This first meant getting the coil overs hanging in place so that the linkages would all hang under their own weight. So I made a set of top brackets for the coil overs and got them bolted in place, only to realise that the lower mounts on the coil overs, which I hadn't really looked at before, take a 10mm bolt whilst the De-Dion tube takes a 1/2" bolt. But as a temporary fix, I've removed the misalignment washers so I can at least clamp a 1/2" bolt in place for now. The thread lengths are different on the top mounts so I can fit them more easily as I have to do it with one hand feeding the coil over in from below whilst trying to put a washer and nut on from above. This was I can locate them one thread at a time.
With that done, the rear suspension was now intact at last, and I could get the hubs in place.Only it very quickly became apparent that the disc brake drive shafts and hubs that I have don't fit the De-Dion ears that I got hold of! Arse. I know this isn't a problem with the ears, as the design of them hasn't changed. So following yet more research, it turns out that I should have used the smaller drum brake hubs and drive shafts. So back to Ebay it was!
And once I found a set of shafts and hubs, I could actually get the hubs bolted in place and the callipers on the ears too. Only to find that the brake discs I had been planning on using are too big. Thankfully, this isn't a big problem as the right discs are only £25 or so each, even from Caterham! I can still use the discs I have to measure up for where the wheels fit and what not as they still move the wheel outwards by the same amount.
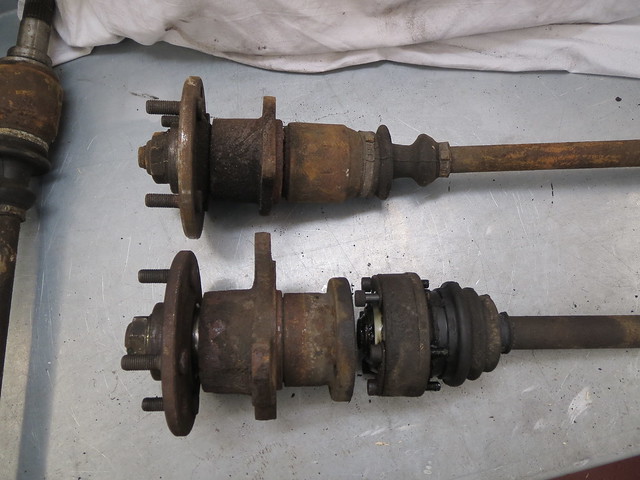
This photo shows the difference between the two types of set ups. The main difference is the width of the CV joint. The drum brake tripod joint is much slimmer. This also means it's lighter, which is a good thing.
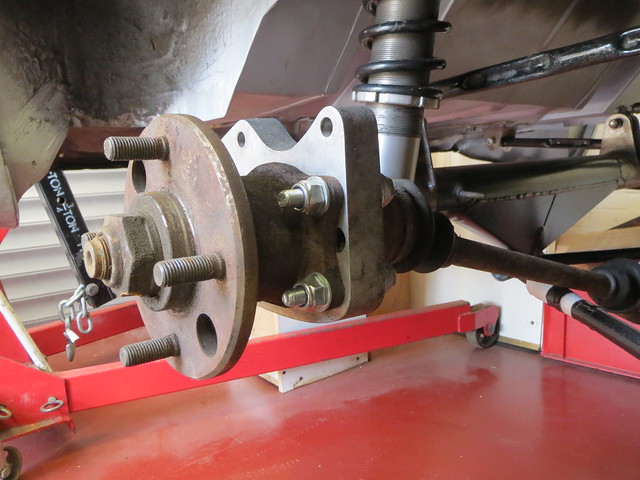
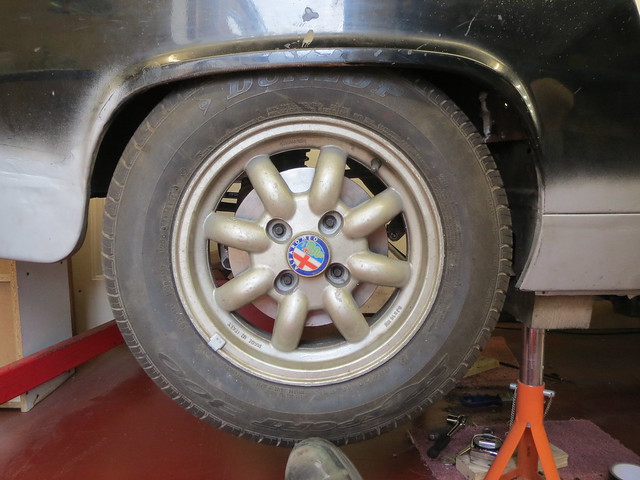
And whilst I know they won't fit, as the tyres are too wide for the arches, I couldn't resist trying a wheel on for size. I quite like the way it looks! Just need to see how much surgery is required to make a square wheel arch shell accept a 185 section tyre.
So following the sense of achievement that seeing a wheel on the car for the first time if four and a half years gave me, I had to spend far more time than I wanted to carefully measuring clearances so I could make a start on fitting the diff. But as that's quite involved, I'll put that into it's own update.
But first things first. The heater tray was fully welded in, cleaned up and then etch primed. The lower flanges were spot welded from within the foot wells and then cleaned back to hide the welds. The top plate will will be done when I'm ready to get that far. But I'm happy with how this all looks for now and it still allows the engine to fit easily. Or as easily as a 2.5l V6 will in a Sprite!
The next step was to get cracking with the rear suspension and get more done on the back end before moving on to the front. So the first thing to do was to actually finish the transmission tunnel off and get the plates fitted to the rear bulkhead face to help strengthen the diff mounts.
I've not got a photo showing all four plates welded as yet, as the bits over the top of the upper mounts hasn't been done. I tried doing one of them, but the very restricted access makes it virtually impossible to see what I'm doing, so those bits can wait until I next roll the shell over.
But with the plates as in as they can be for now, I had a look at the suspension itself and the brakes. This first meant getting the coil overs hanging in place so that the linkages would all hang under their own weight. So I made a set of top brackets for the coil overs and got them bolted in place, only to realise that the lower mounts on the coil overs, which I hadn't really looked at before, take a 10mm bolt whilst the De-Dion tube takes a 1/2" bolt. But as a temporary fix, I've removed the misalignment washers so I can at least clamp a 1/2" bolt in place for now. The thread lengths are different on the top mounts so I can fit them more easily as I have to do it with one hand feeding the coil over in from below whilst trying to put a washer and nut on from above. This was I can locate them one thread at a time.
With that done, the rear suspension was now intact at last, and I could get the hubs in place.Only it very quickly became apparent that the disc brake drive shafts and hubs that I have don't fit the De-Dion ears that I got hold of! Arse. I know this isn't a problem with the ears, as the design of them hasn't changed. So following yet more research, it turns out that I should have used the smaller drum brake hubs and drive shafts. So back to Ebay it was!
And once I found a set of shafts and hubs, I could actually get the hubs bolted in place and the callipers on the ears too. Only to find that the brake discs I had been planning on using are too big. Thankfully, this isn't a big problem as the right discs are only £25 or so each, even from Caterham! I can still use the discs I have to measure up for where the wheels fit and what not as they still move the wheel outwards by the same amount.
This photo shows the difference between the two types of set ups. The main difference is the width of the CV joint. The drum brake tripod joint is much slimmer. This also means it's lighter, which is a good thing.
And whilst I know they won't fit, as the tyres are too wide for the arches, I couldn't resist trying a wheel on for size. I quite like the way it looks! Just need to see how much surgery is required to make a square wheel arch shell accept a 185 section tyre.
So following the sense of achievement that seeing a wheel on the car for the first time if four and a half years gave me, I had to spend far more time than I wanted to carefully measuring clearances so I could make a start on fitting the diff. But as that's quite involved, I'll put that into it's own update.
Subscribe to:
Posts (Atom)