Well that took all of 10, maybe 15minutes with my questions. But the upshot is the BCO is happy with the install and will be back this time next week to sign off on the full install.
I've got a few things to do, but they're things I either expected or haven't done yet. They are
1, Fit a CO detector. Got one waiting to go.
2, Fit the information plate. Now I know what they want on it, that'll be done later.
3, Make and fit the closure plate plates. I've got the sheet metal, but wasn't going to risk fitting or making them before today.
4, Plaster the chimney breast. It needn't be finished or painted, but it's needed as part of the fire protection.
5, Seal the stove to the vitreous pipe. The BCO is happy with just cement for this, but I may fit a bit of fire rope just for my usual belt and braces approach.
So those things will be done over this week and weekend, ready for 11am next Tuesday when the man comes to sign off on everything. And they expect that to take 10-15 minutes too!
Tuesday, 14 January 2014

Sunday, 12 January 2014
Flue fitting and the view from my roof.
Well Saturday came around, and the wet weather went on it's way too. So with my brother on hand with a set of roofing ladders, it was time to set to with fitting the flue.
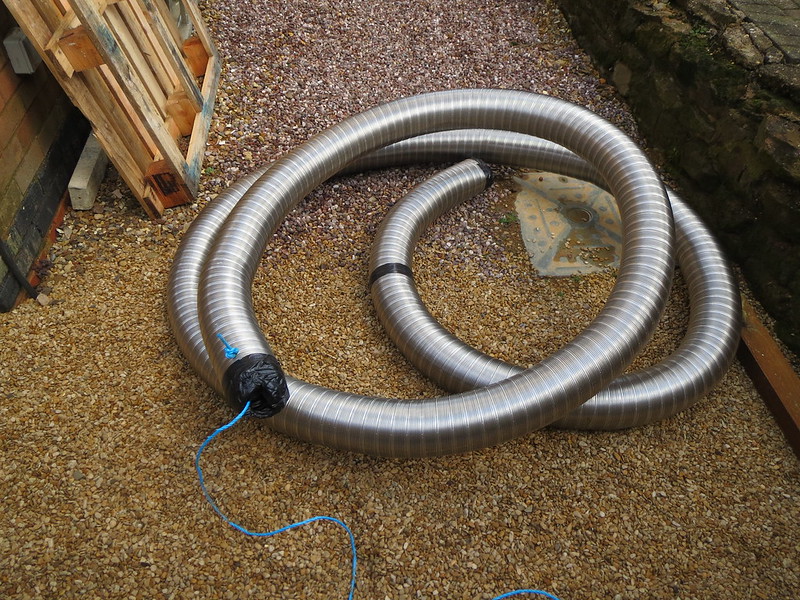
The first thing to do was unwrap the flue and have a look at it. It's a 316 grade 5" DURE-FLUE liner as I don't intend burning much, if any, coal. Given that I forgot the nosecone, one end was slotted and taped up to form something resembling a cone and a hole drilled in the liner for some of BT's finest draw rope. 9M of liner doesn't look like much when sat on the driveway.

So with the liner ready, tools in hand and the ladders set up, I was off up to the ridge line and chimney pot. There was a bird guard fitted recently by the local stove shop, so I knew the pot would be good for the all-in-one cowl I had. This is the view from up on the roof before I started work.


So once I had stopped nosing into the neighbours garden's and otherwise admiring the view, it was time to start feeding the liner down the chimney. We'd uncoiled it on the ground, and I had then dragged it up by the draw rope. Thankfully I'm not fussed by heights so thought nothing much of standing on the ridge, holding the stack with one hand and playing about with the liner with the free hand. I suspect Mr HSE would have had a fit, but never mind!
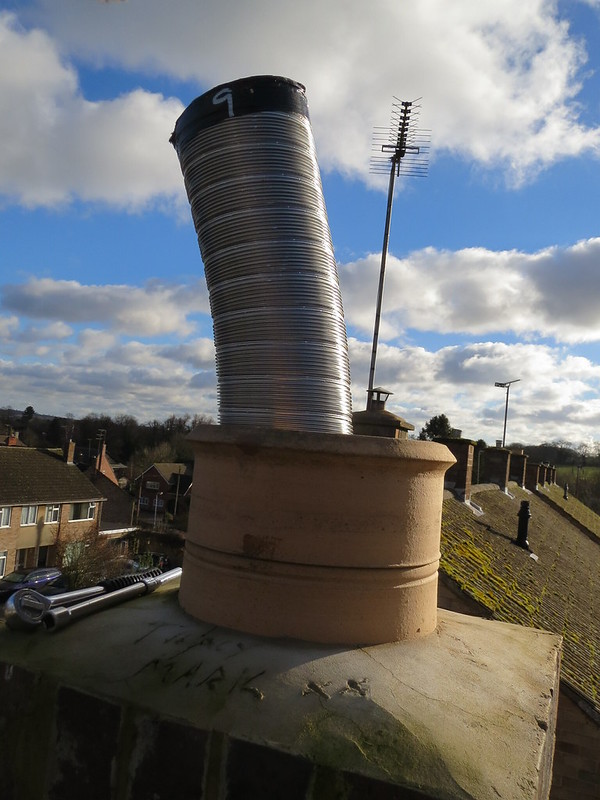
I had feared that the liner wouldn't go down, would jam, tear or any number of things would go wrong. Turns out to have been quite the opposite. Feeding the liner down took all of 5 minutes and it only got caught for a few moments about a metre and a half in. Otherwise it almost feel in under it's own weight! This is what I was left with at the chimney end, and also the reason I ordered 9m when I think 8 would've done.

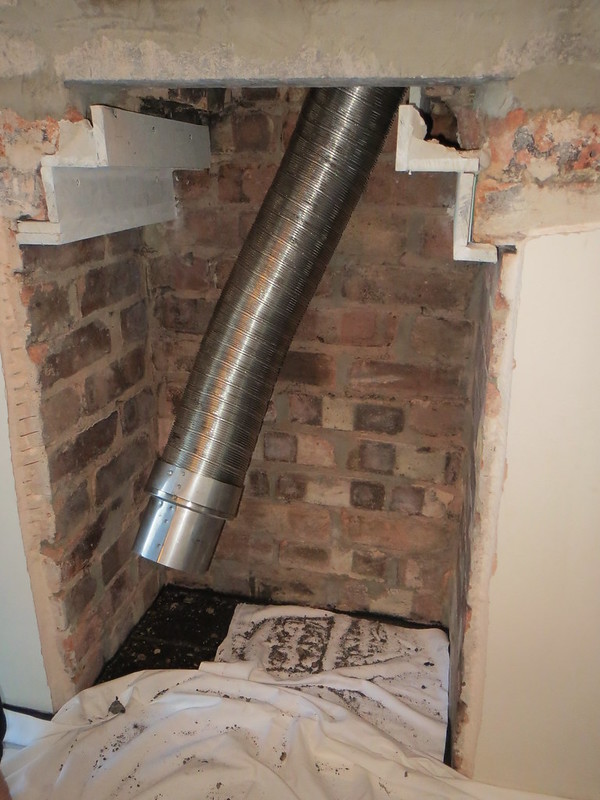
This was the fireplace end once we'd attached the adaptor. Plenty of liner left over, as there's nothing worse than ordering what you think it enough, only to find it 6" short. Also note that the liner will clear a lot of bits out of the chimney when you feed it down. The liner is ridged and much stiffer than a sweeps' brush so may knock mortar snots off too.

So from there we set to with getting the vitreous pipes sorted out too. Whilst the BCO wants to inspect the flue, I was told I could fit the other pipes too so long as the inspector can get at all the joints. This is why I had to alter the closure plate, but more of that in a bit.
Given that there will always be some wiggling about and altering of the joints as you go, the vitreous pipes were screwed together and the adaptor fitted and fire cemented too. It doesn't go off for hours so you have time to fit the flue into position without cracking any joints.

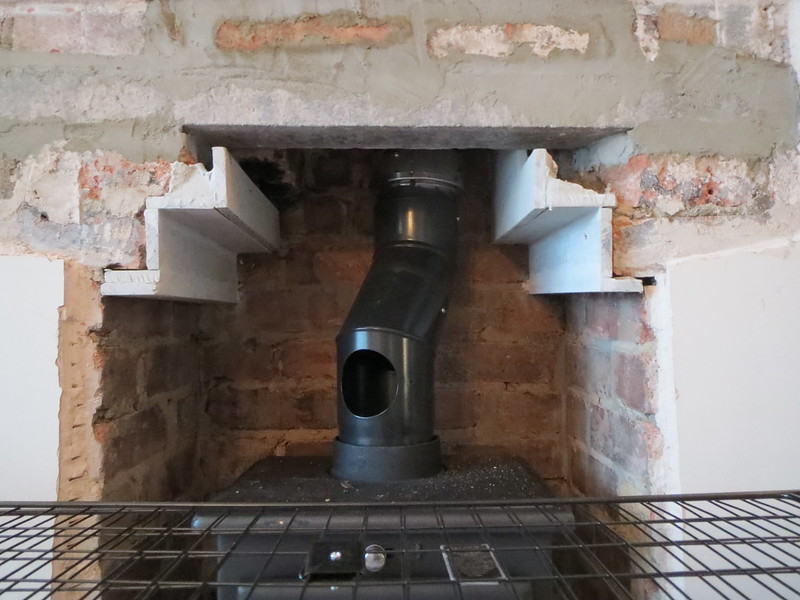
And then the only way of knowing if you've got it right is to fit the stove into place. It's not fitted to the pipes or sealed as yet, but without it you can't gauge the height or final position of the pipework within the chimney so I don't see how it can be done any other way. Especially given that my chimney tracks to the right, so it turned out I had to twist the pipework that way too. Well, it was that or try to knock four more bricks out of the stack without making a mess of things again. The photo was taken later on, when I had the fire guard back in place. I would've preferred it to be straight up, but I don't mind it being twisted to one side either.

Now the bottom end was sat right, I could get back to the roof to trim the liner and fit the cowl. Once up there, I was faced with this much spare liner, some lovely sunshine and blue skies:

I had a few choices of how to trim the liner: angle grinder with a 1mm cutting disc, a hacksaw or tin snips of one form or another. I ended up using a hacksaw as the grinder is massive overkill for something so thin (as well as a bit dodgy on a ridge, even for me) and the tin snips can be awkward to use when you can't get all the way round what you're cutting. Cutting it with the saw took maybe 30 seconds, so don't worry about time when it comes to this stage! The cowl is then a bit of a PITA to fit as you cut the liner to the top of the pot. But you need it sticking out to get the securing band done up. So I ended up stood on the ridge trying to pull a few inches of the liner up to get access. Eventually, I got it done but not with out scratching the back of both hands to bits on the sharp liner, the pot and cowl edges. There's no need to do the fancy folding with the securing straps, but I feel it looks more professional than just leaving them hanging. In an effort to prevent draughts, I have also sealed the cowl to the chimney pot.
Another thing to note at this point is how slippery the liner can be. It's already acting as a flue and channelling warm, damp air from the house. And by the time that air gets to the top, it has cooled and the water condensed on the liner.

As far as the liner goes, that's it fitted and all done. Well, I think so and I hope the BCO will agree on Tuesday too! The only other thing to do was the closure plate. I should really have fitted this at an earlier stage before arguing the liner and vitreous pipes into place, but I forgot in all the excitement of fitting the liner. So a slight change was made to it so I could fit it round the pipework. The hole has also been enlarged to act as an inspection hatch and will be covered over with a pair of thin metal plates. One will sit each side of the pipe so they can be easily removed in the future. I'll make these one I know the BCO is happy with this.

So that's it for now. The next update depends upon what the BCO thinks and what advice he has for me. Hopefully, it'll be good news!
The first thing to do was unwrap the flue and have a look at it. It's a 316 grade 5" DURE-FLUE liner as I don't intend burning much, if any, coal. Given that I forgot the nosecone, one end was slotted and taped up to form something resembling a cone and a hole drilled in the liner for some of BT's finest draw rope. 9M of liner doesn't look like much when sat on the driveway.
So with the liner ready, tools in hand and the ladders set up, I was off up to the ridge line and chimney pot. There was a bird guard fitted recently by the local stove shop, so I knew the pot would be good for the all-in-one cowl I had. This is the view from up on the roof before I started work.
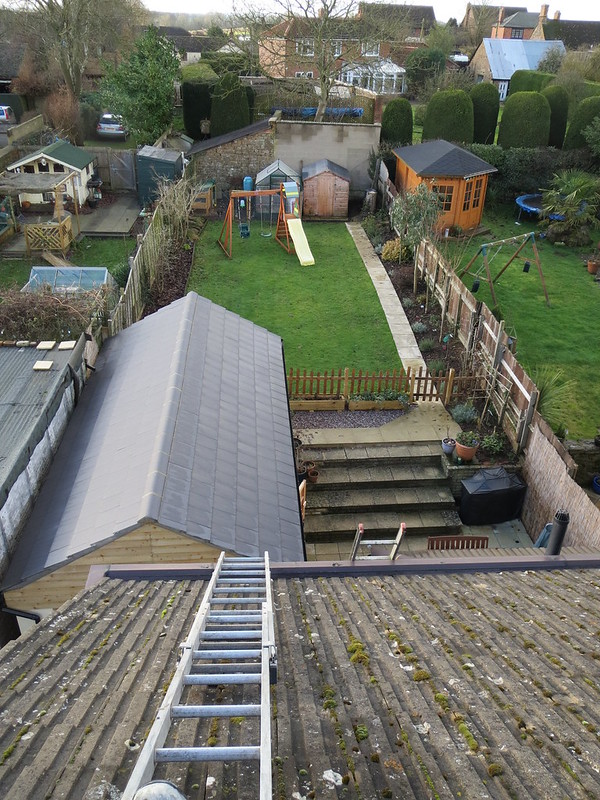
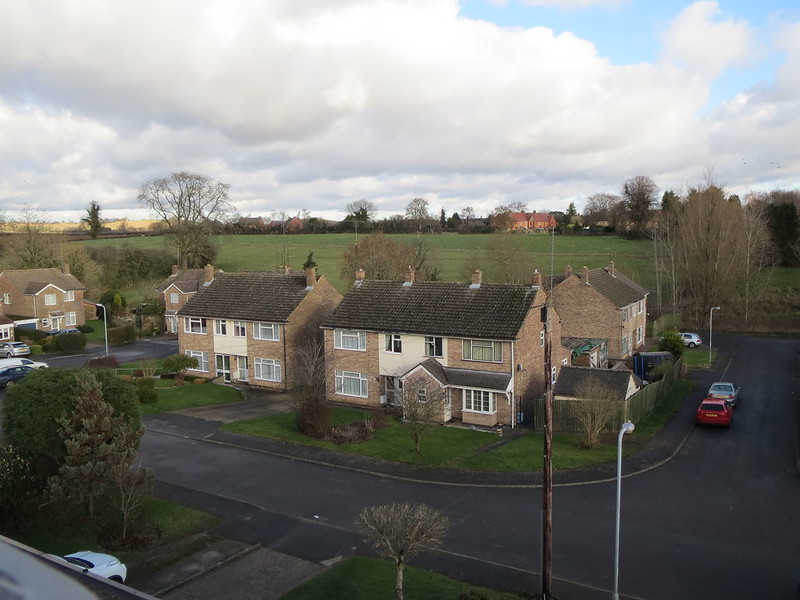
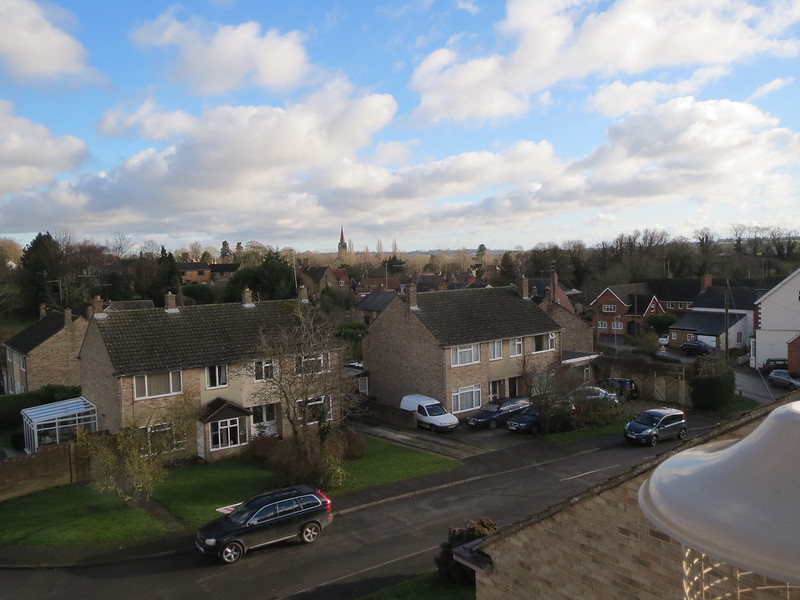
So once I had stopped nosing into the neighbours garden's and otherwise admiring the view, it was time to start feeding the liner down the chimney. We'd uncoiled it on the ground, and I had then dragged it up by the draw rope. Thankfully I'm not fussed by heights so thought nothing much of standing on the ridge, holding the stack with one hand and playing about with the liner with the free hand. I suspect Mr HSE would have had a fit, but never mind!
I had feared that the liner wouldn't go down, would jam, tear or any number of things would go wrong. Turns out to have been quite the opposite. Feeding the liner down took all of 5 minutes and it only got caught for a few moments about a metre and a half in. Otherwise it almost feel in under it's own weight! This is what I was left with at the chimney end, and also the reason I ordered 9m when I think 8 would've done.
This was the fireplace end once we'd attached the adaptor. Plenty of liner left over, as there's nothing worse than ordering what you think it enough, only to find it 6" short. Also note that the liner will clear a lot of bits out of the chimney when you feed it down. The liner is ridged and much stiffer than a sweeps' brush so may knock mortar snots off too.
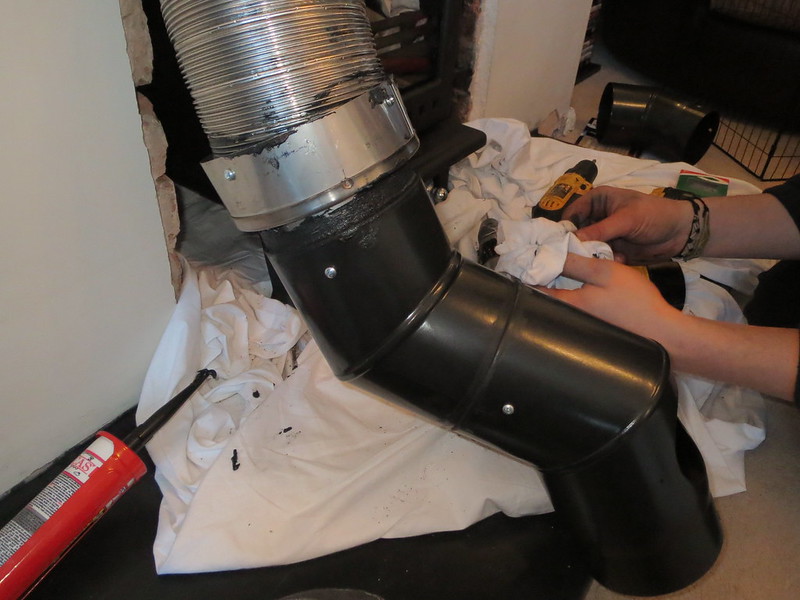
So from there we set to with getting the vitreous pipes sorted out too. Whilst the BCO wants to inspect the flue, I was told I could fit the other pipes too so long as the inspector can get at all the joints. This is why I had to alter the closure plate, but more of that in a bit.
Given that there will always be some wiggling about and altering of the joints as you go, the vitreous pipes were screwed together and the adaptor fitted and fire cemented too. It doesn't go off for hours so you have time to fit the flue into position without cracking any joints.
And then the only way of knowing if you've got it right is to fit the stove into place. It's not fitted to the pipes or sealed as yet, but without it you can't gauge the height or final position of the pipework within the chimney so I don't see how it can be done any other way. Especially given that my chimney tracks to the right, so it turned out I had to twist the pipework that way too. Well, it was that or try to knock four more bricks out of the stack without making a mess of things again. The photo was taken later on, when I had the fire guard back in place. I would've preferred it to be straight up, but I don't mind it being twisted to one side either.
Now the bottom end was sat right, I could get back to the roof to trim the liner and fit the cowl. Once up there, I was faced with this much spare liner, some lovely sunshine and blue skies:
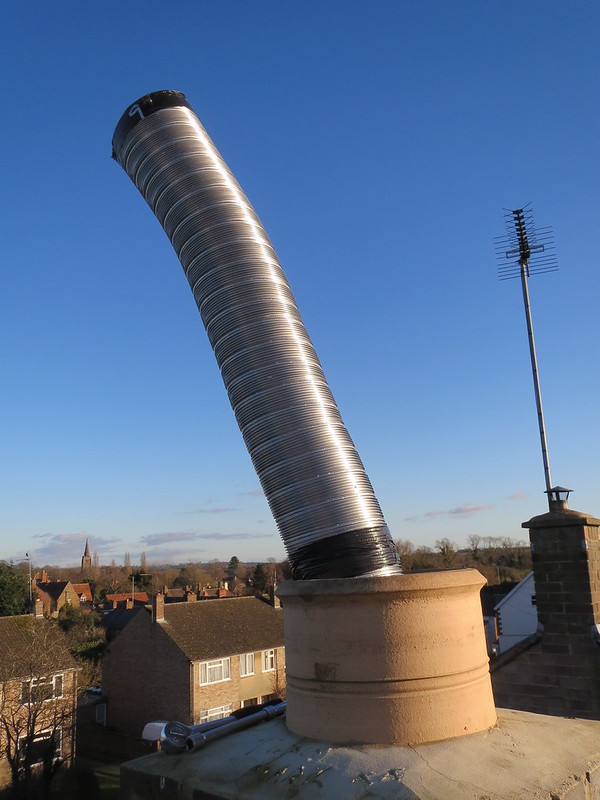
I had a few choices of how to trim the liner: angle grinder with a 1mm cutting disc, a hacksaw or tin snips of one form or another. I ended up using a hacksaw as the grinder is massive overkill for something so thin (as well as a bit dodgy on a ridge, even for me) and the tin snips can be awkward to use when you can't get all the way round what you're cutting. Cutting it with the saw took maybe 30 seconds, so don't worry about time when it comes to this stage! The cowl is then a bit of a PITA to fit as you cut the liner to the top of the pot. But you need it sticking out to get the securing band done up. So I ended up stood on the ridge trying to pull a few inches of the liner up to get access. Eventually, I got it done but not with out scratching the back of both hands to bits on the sharp liner, the pot and cowl edges. There's no need to do the fancy folding with the securing straps, but I feel it looks more professional than just leaving them hanging. In an effort to prevent draughts, I have also sealed the cowl to the chimney pot.
Another thing to note at this point is how slippery the liner can be. It's already acting as a flue and channelling warm, damp air from the house. And by the time that air gets to the top, it has cooled and the water condensed on the liner.
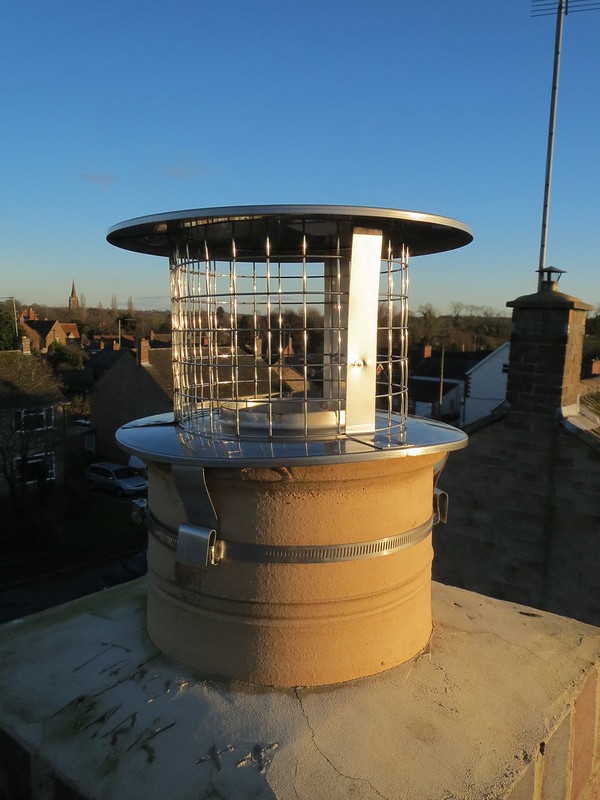
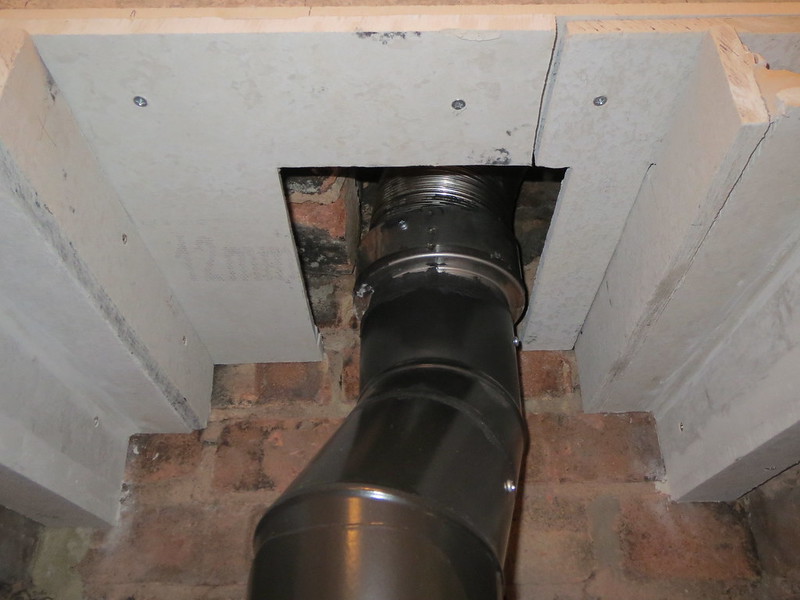
As far as the liner goes, that's it fitted and all done. Well, I think so and I hope the BCO will agree on Tuesday too! The only other thing to do was the closure plate. I should really have fitted this at an earlier stage before arguing the liner and vitreous pipes into place, but I forgot in all the excitement of fitting the liner. So a slight change was made to it so I could fit it round the pipework. The hole has also been enlarged to act as an inspection hatch and will be covered over with a pair of thin metal plates. One will sit each side of the pipe so they can be easily removed in the future. I'll make these one I know the BCO is happy with this.
So that's it for now. The next update depends upon what the BCO thinks and what advice he has for me. Hopefully, it'll be good news!
Thursday, 9 January 2014
Stove and wood have arrived!!
Wooo, much excitement yesterday.
I spent the morning working from home, and awaiting the delivery of the stove and all it's bits. I was like a child at Christmas, twitching the study curtains at every passing vehicle, just in case it was the delivery man.
And finally it was! I wasn't sure what to expect, or just how big the pile would actually be. Turns out, not that big after all. The stove sits on the pallet, the liner coiled round it and over the boxes of vitreous pipe bits. I should really have taken a photo at this stage, but I had to unwrap it all to check it was OK before signing for the pallet. The other pleasant surprise is just how light the liner is. At 9M long, I had feared it would be a bit of a weight to try either shoving up the chimney or dragging up onto the roof. Thankfully, it weighs about half of what my son does, about half an 18 month old child, or 5-6Kgs. So hardly anything at all. Although I did notice I had forgotten to order a nose cone for the liner, which I may live to regret. I'm sure I can fashion something from all the stuff knocking about in the garage though.
Once I had the bits and liner in the garage, I moved the stove into the house. Whilst it doesn't feel as heavy as I thought it would, now I've thought about it, 65Kgs is going to a right pain to position carefully within the fireplace once the flue's built up. I just hope the liner is as springy as I imagine it to be so I've got some wriggle room on it.
And now I've cleaned some of the overspill of black grout off the brickwork, this is the stove sat in the recess where it will be finally fitted. At this point I'm glad I didn't go for a bigger stove, as I think this fits just right. It fits with a 4"/100mm gap to either side and a 5"/125mm gap to the rear.

The vitreous enamel pipe that comes off the top of the stove is also a good fit. The second 45 deg bend sits just below the closure plate, so by the time I have the third bend in place it'll look just right. The third bend is to aim the adaptor straight up the chimney, as it leans off to the right. I may not need this bit if the liner will turn enough, but I've got the bits should it be needed. I also think it was wise to go off the top of the stove, as a rear T piece would mean it sat a good few inches further forward, which would look odd. As it is, it just sticks out from the recess with a good 14 1/2"/375mm gap to the front edge of the hearth. Building Regs require a minimum of 225mm to the door.

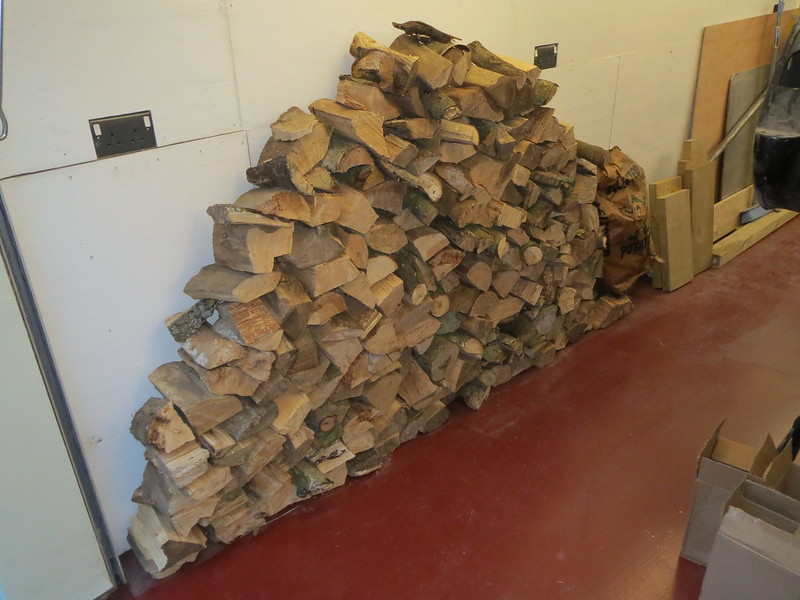
The other thing that surprised me is just how big the all-in-one cowl is. It's not far off the size of the damn stove! I also had a delivery of wood turn up late in the day, which was a builder's bag or 0.75m3 of wood for £45. It's wood rather than logs, but it's still at least 25% cheaper than the other local places. It's now stacked in the garage whilst I think about building a wood store.

I spent the morning working from home, and awaiting the delivery of the stove and all it's bits. I was like a child at Christmas, twitching the study curtains at every passing vehicle, just in case it was the delivery man.
And finally it was! I wasn't sure what to expect, or just how big the pile would actually be. Turns out, not that big after all. The stove sits on the pallet, the liner coiled round it and over the boxes of vitreous pipe bits. I should really have taken a photo at this stage, but I had to unwrap it all to check it was OK before signing for the pallet. The other pleasant surprise is just how light the liner is. At 9M long, I had feared it would be a bit of a weight to try either shoving up the chimney or dragging up onto the roof. Thankfully, it weighs about half of what my son does, about half an 18 month old child, or 5-6Kgs. So hardly anything at all. Although I did notice I had forgotten to order a nose cone for the liner, which I may live to regret. I'm sure I can fashion something from all the stuff knocking about in the garage though.
Once I had the bits and liner in the garage, I moved the stove into the house. Whilst it doesn't feel as heavy as I thought it would, now I've thought about it, 65Kgs is going to a right pain to position carefully within the fireplace once the flue's built up. I just hope the liner is as springy as I imagine it to be so I've got some wriggle room on it.
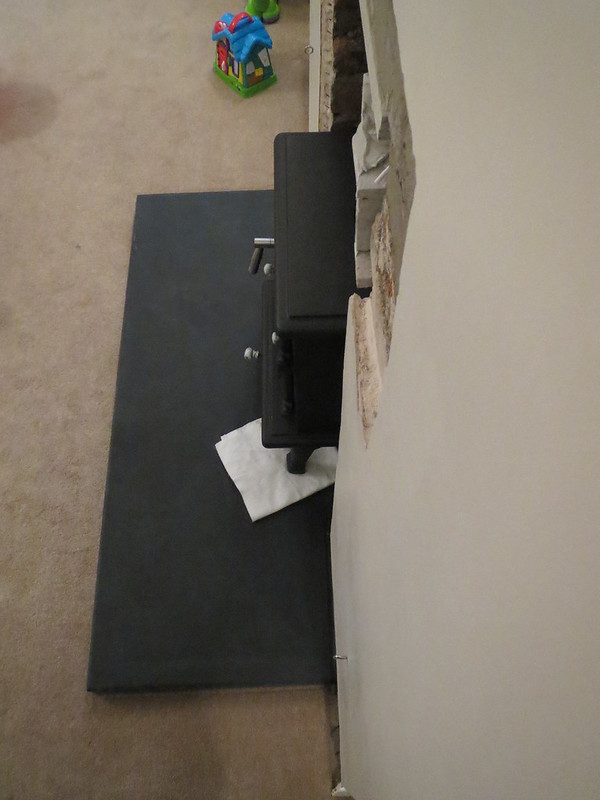
And now I've cleaned some of the overspill of black grout off the brickwork, this is the stove sat in the recess where it will be finally fitted. At this point I'm glad I didn't go for a bigger stove, as I think this fits just right. It fits with a 4"/100mm gap to either side and a 5"/125mm gap to the rear.

The vitreous enamel pipe that comes off the top of the stove is also a good fit. The second 45 deg bend sits just below the closure plate, so by the time I have the third bend in place it'll look just right. The third bend is to aim the adaptor straight up the chimney, as it leans off to the right. I may not need this bit if the liner will turn enough, but I've got the bits should it be needed. I also think it was wise to go off the top of the stove, as a rear T piece would mean it sat a good few inches further forward, which would look odd. As it is, it just sticks out from the recess with a good 14 1/2"/375mm gap to the front edge of the hearth. Building Regs require a minimum of 225mm to the door.
The other thing that surprised me is just how big the all-in-one cowl is. It's not far off the size of the damn stove! I also had a delivery of wood turn up late in the day, which was a builder's bag or 0.75m3 of wood for £45. It's wood rather than logs, but it's still at least 25% cheaper than the other local places. It's now stacked in the garage whilst I think about building a wood store.
Sunday, 5 January 2014
Boxing in finished and grouting sorted too
Following on from my trial fit of all the boxing in boards, I made a slight change of plan and managed to screw the two horizontal boards into place too. The bricks were just about thick and strong enough to take a rawl plug. But I did still use loads of dri-wall adhesive anyway, as it seemed daft not to since I'd already bought a 10Kg bag of the stuff.
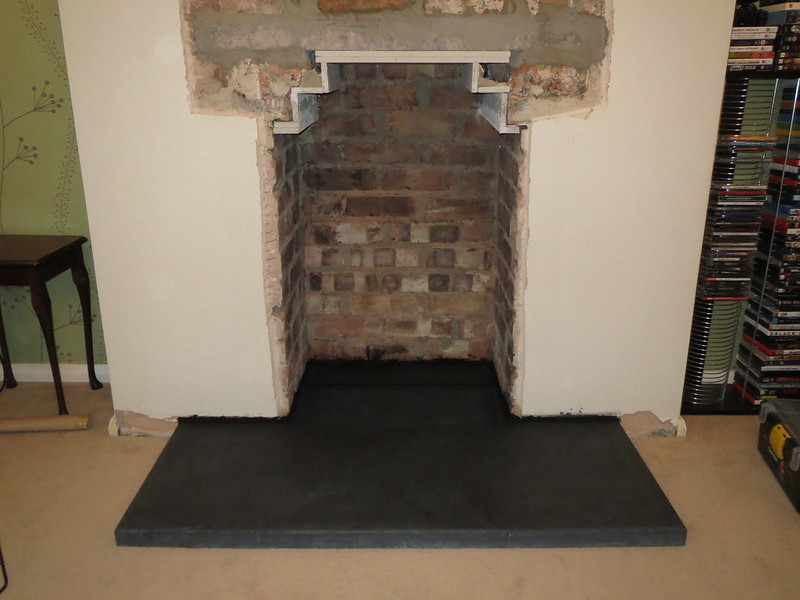
So with the adhesive mixed, and the holes drilled I stuck it all back together again. I also used a little of the adhesive as filler between the panels were I could and it now looks like this:


Whilst it still needs a touch of caulk in places and then the adhesive sanding flat, I'm quite pleased with how it's gone. It's even stopped the fireplace whistling for now too!
So with the adhesive drying, my attention turned to the grouting. This is not something I've been looking forward too, as I dislike pointing, grouting and other fiddly activities like that. I also wasn't sure how the black cement dye would work and what it would stain. But it needed doing, so I mixed a small tub of mortar and chucked in what I suspect was far too much dye. But it did indeed turn the mortar black, along with the bucket, the trowel and my hands. Thankfully, it turns out it does wash off. Equally, it turns out to not stain slate either. That's the thing that had me most worried, that I would end up applying it, only to later clean it back to find the slate stained a funny colour.
But my worrying was for nowt as it turns out. The grout went in easily when my little helper wasn't in the way, and it cleaned up just as easily too. To keep things as neat as I could, I did end up having to almost paint a border along the mortar joints in places to keep it all even. The stains on the plaster will get sanded back and painted over later.

The lines look a touch wavy in the photo as the grout hadn't fully dried yet, and wet slate goes black. But overall, I'm quite happy with it.

The next update won't be for a few days as I'm now awaiting the delivery of the stove, flue liner and other bits and bobs. I also need to contact Building Control to arrange that side of things. So hopefully, I'll soon have a fitted functioning stove.
So with the adhesive mixed, and the holes drilled I stuck it all back together again. I also used a little of the adhesive as filler between the panels were I could and it now looks like this:
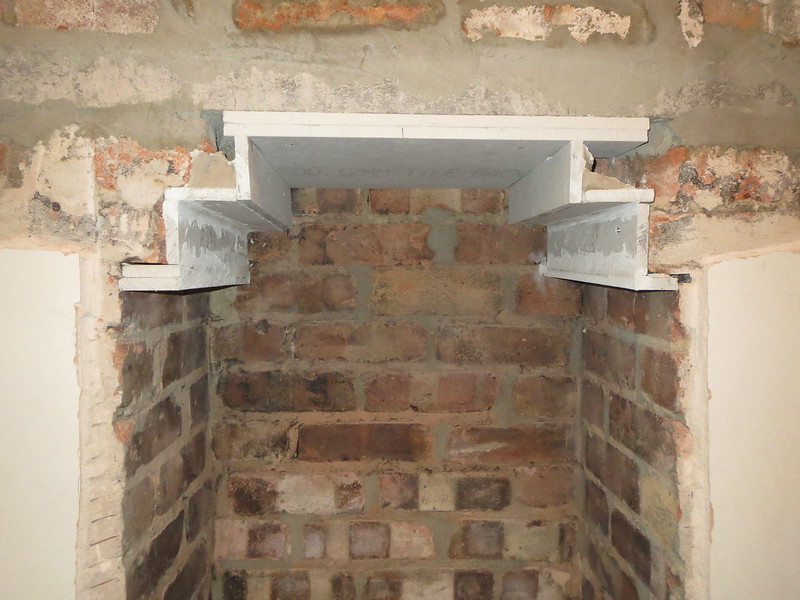
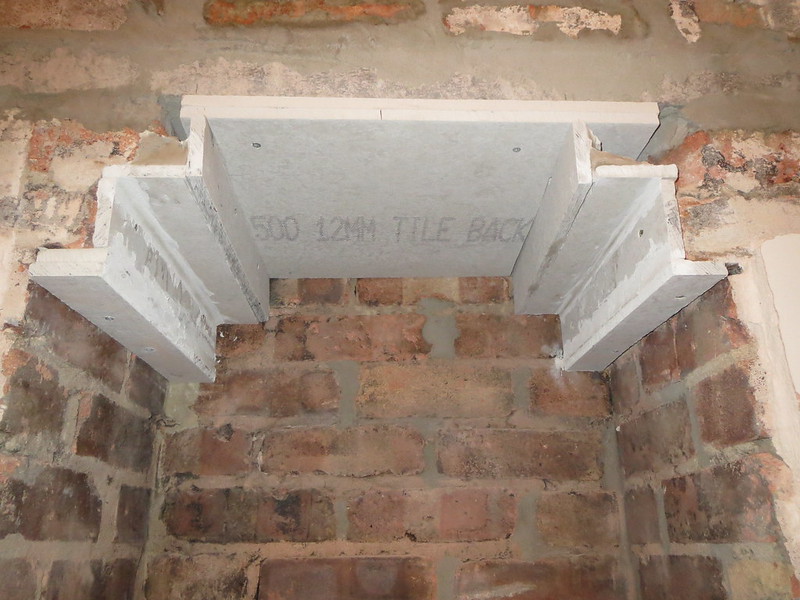
Whilst it still needs a touch of caulk in places and then the adhesive sanding flat, I'm quite pleased with how it's gone. It's even stopped the fireplace whistling for now too!
So with the adhesive drying, my attention turned to the grouting. This is not something I've been looking forward too, as I dislike pointing, grouting and other fiddly activities like that. I also wasn't sure how the black cement dye would work and what it would stain. But it needed doing, so I mixed a small tub of mortar and chucked in what I suspect was far too much dye. But it did indeed turn the mortar black, along with the bucket, the trowel and my hands. Thankfully, it turns out it does wash off. Equally, it turns out to not stain slate either. That's the thing that had me most worried, that I would end up applying it, only to later clean it back to find the slate stained a funny colour.
But my worrying was for nowt as it turns out. The grout went in easily when my little helper wasn't in the way, and it cleaned up just as easily too. To keep things as neat as I could, I did end up having to almost paint a border along the mortar joints in places to keep it all even. The stains on the plaster will get sanded back and painted over later.
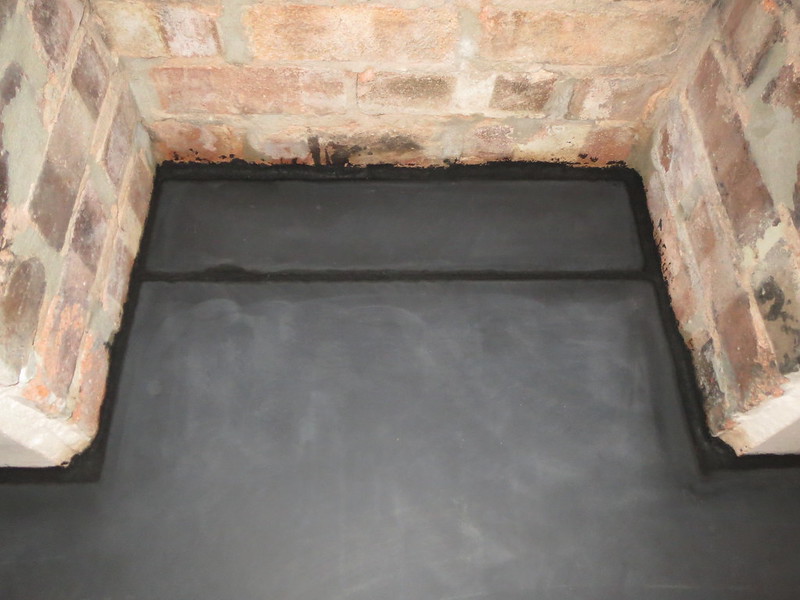
The lines look a touch wavy in the photo as the grout hadn't fully dried yet, and wet slate goes black. But overall, I'm quite happy with it.
The next update won't be for a few days as I'm now awaiting the delivery of the stove, flue liner and other bits and bobs. I also need to contact Building Control to arrange that side of things. So hopefully, I'll soon have a fitted functioning stove.
Thursday, 2 January 2014
Boxing in or puzzle building as I shall now call it
There are time I wish I had a nice regular recess into which I could fit a stove. I did have slightly romantic images in my head of finding a nice brick arch or evenly staggered bricks that I could leave exposed to add a nice solid touch to the stove fit.
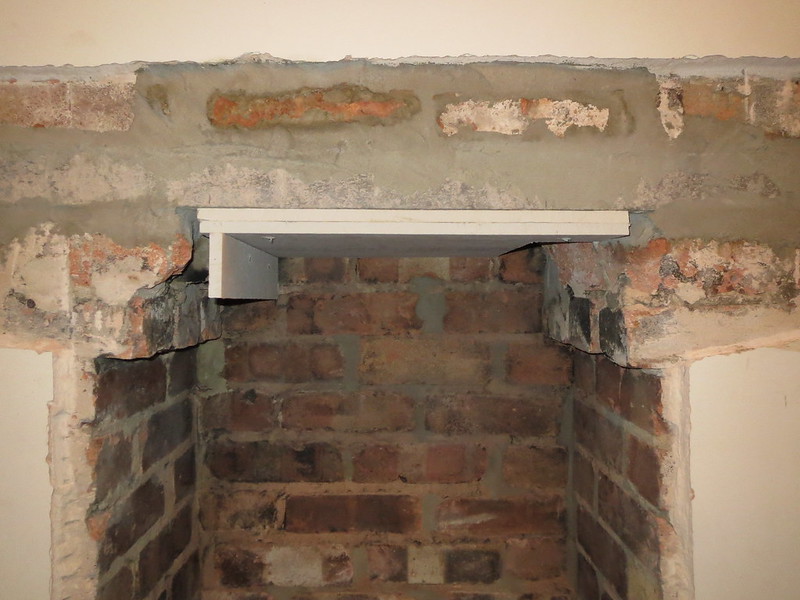
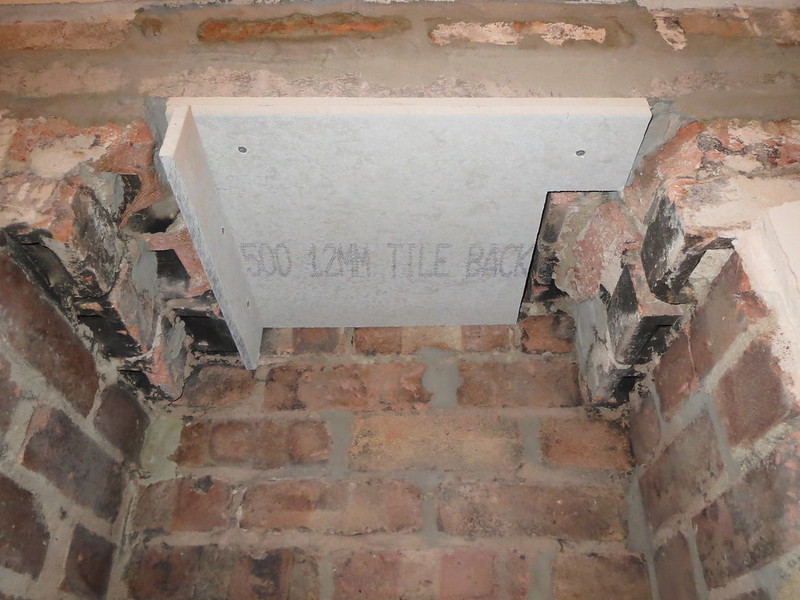
Instead I find bashed about old bricks that need boxing in somehow. I knew this was always going to be a bit of a pain, but not quite as much as it's turned out to be. Since the bricks aren't flat or square, I have to cut and size each section as I go. I started at the top, with the closure plate, and then moved down the sides. This is the plate and first bit:


And from there I carried on down either side until I had this:


The idea is to make each side match fairly closely and to be even at the bottom. Since the chimney was built on a Friday, or looks as if it was, the lower edges are 1/2" off level. This means I will have to re-cut the left hand board to allow a bigger dollop of adhesive behind the last board. At the moment it's all just hanging in place as the vertical bits are screwed to the wall, and they then hold the horizontal bits up whilst the adhesive goes off.
Until the stove arrives, and it's now been ordered, I'm not going to risk cutting the closure plate. If I get it wrong it's not the end of the world as I'll just make another, but it's best left until I have everything in place.
Instead I find bashed about old bricks that need boxing in somehow. I knew this was always going to be a bit of a pain, but not quite as much as it's turned out to be. Since the bricks aren't flat or square, I have to cut and size each section as I go. I started at the top, with the closure plate, and then moved down the sides. This is the plate and first bit:
And from there I carried on down either side until I had this:
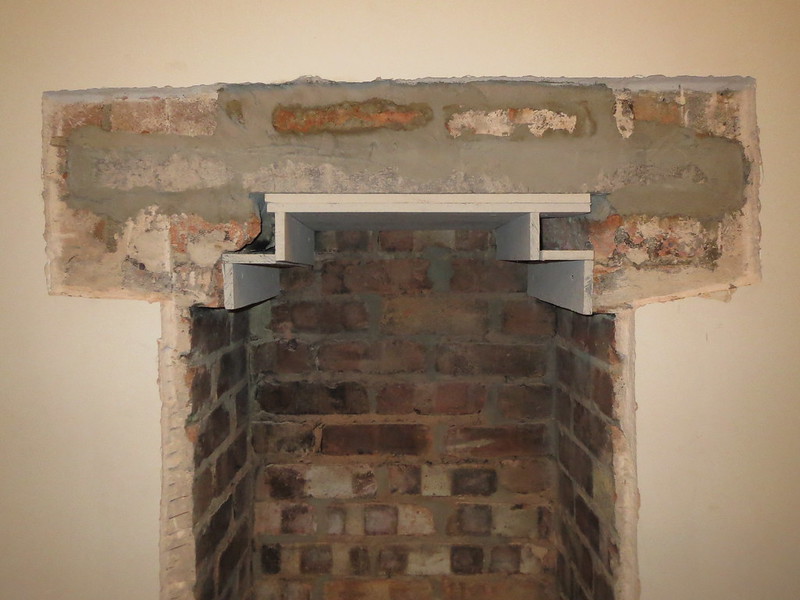
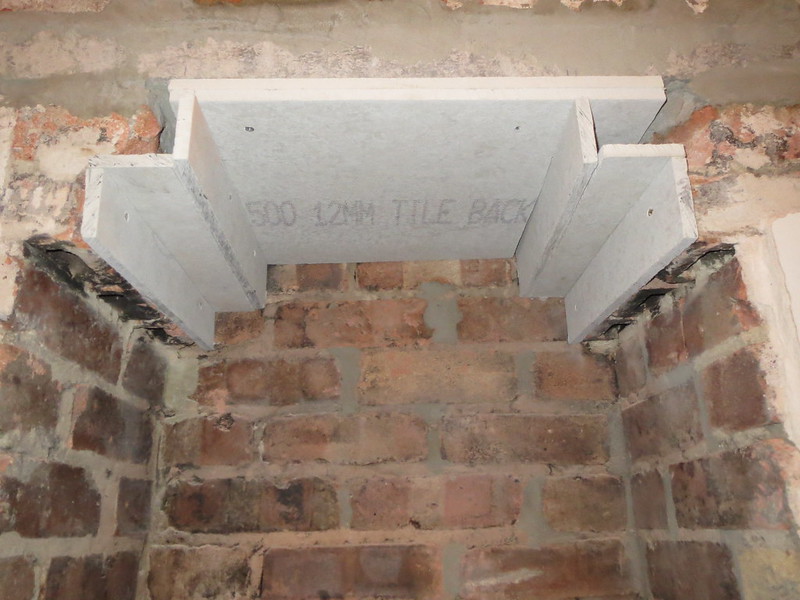
The idea is to make each side match fairly closely and to be even at the bottom. Since the chimney was built on a Friday, or looks as if it was, the lower edges are 1/2" off level. This means I will have to re-cut the left hand board to allow a bigger dollop of adhesive behind the last board. At the moment it's all just hanging in place as the vertical bits are screwed to the wall, and they then hold the horizontal bits up whilst the adhesive goes off.
Until the stove arrives, and it's now been ordered, I'm not going to risk cutting the closure plate. If I get it wrong it's not the end of the world as I'll just make another, but it's best left until I have everything in place.
Tuesday, 31 December 2013
Laying the hearth
As hoped, I did win the auction on Ebay for a rather large black slate hearth. It's 1200mm long, almost 850mm deep and 45mm thick so quite a big lump of slate. Whilst not the cheapest option, at £112 it's also a fair deal. I was looking at using 25mm thick slate slabs, but I'm glad I managed to get the thicker slab now it's in.
There's thankfully nothing wrong with it, the lady just ordered the wrong size. Just as thankfully, it's just about perfect for my recess. I say just about, as I did have to take 10mm off the rear section to get it to fit. But it turns out that cutting slate is actually quite easy with a 9" saw. Very dusty as slate is a mud stone, but easy.
The first thing to do was to lay the slab on the floor and use it as a template for cutting the carpet. Ideally, you'd just roll the carpet out the way all together, but that meant emptying half the lounge and since it was 6pm, I didn't much fancy that. So I just worked round it.

With the floor clear I could lay the hearth in place and make sure it fitted just as I wanted. Which is just as well, as I had forgotten to include the grout lines when measuring up. So the slab was a perfect fit if there were no gaps. However, by the time there was a 10mm gap between the two sections, and a 10mm gap to the chimney breast, the front slab was too far out. Which wasn't a major issue, it just meant lugging it back outside and cutting it down a touch. And I do mean lugging it. I could just about lift the slab on my own, but not in a controlled way, that's what mates are for.
So once it was cut down, the two sections were laid in place to ensure a good fit. As always, measure twice, cut once. I think it looks rather good!

Now the hearth is a good fit, with the right size gaps for grouting, the new carpet gripper rails were cut and nailed into place. The hearth will sit 10mm or so up from the floor so any carpet can be slid under it to keep the edge neat and tidy.
With the mortar mixed (in the dark), it was time to be brave and lay the hearth. The rear section was laid and levelled first, with the front done second. However, I just couldn't get the front to drop enough to match the height of the rear section, despite standing my 15St 7Lb on it. Rather than lift and redo the mortar for the front, the rear piece was lifted out and raised up by a couple of mm. Thankfully, the bed under the front was stiff enough to take my weight to do this quickly.
So this was the hearth as of this morning. It sounds dry, as there's a good solid knock to it but I'll be leaving it at least another day to be sure before I sort the edges out.

And that's the main bits of the recess done. There's the boxing in at the top to do and the plastering to do or get done but those are cosmetic things rather than anything structural. The only issue this gives me is with the grouting along the chimney breast. I have a choice of either grouting it now, and then plastering down to it later, or the other way round and leave the grouting for later. I'm currently thinking about doing the grouting first as that will then give the plaster a good clean edge to run to. It also gives me something I can do now, rather than waiting which I'm not very good at.
There's thankfully nothing wrong with it, the lady just ordered the wrong size. Just as thankfully, it's just about perfect for my recess. I say just about, as I did have to take 10mm off the rear section to get it to fit. But it turns out that cutting slate is actually quite easy with a 9" saw. Very dusty as slate is a mud stone, but easy.
The first thing to do was to lay the slab on the floor and use it as a template for cutting the carpet. Ideally, you'd just roll the carpet out the way all together, but that meant emptying half the lounge and since it was 6pm, I didn't much fancy that. So I just worked round it.

With the floor clear I could lay the hearth in place and make sure it fitted just as I wanted. Which is just as well, as I had forgotten to include the grout lines when measuring up. So the slab was a perfect fit if there were no gaps. However, by the time there was a 10mm gap between the two sections, and a 10mm gap to the chimney breast, the front slab was too far out. Which wasn't a major issue, it just meant lugging it back outside and cutting it down a touch. And I do mean lugging it. I could just about lift the slab on my own, but not in a controlled way, that's what mates are for.
So once it was cut down, the two sections were laid in place to ensure a good fit. As always, measure twice, cut once. I think it looks rather good!
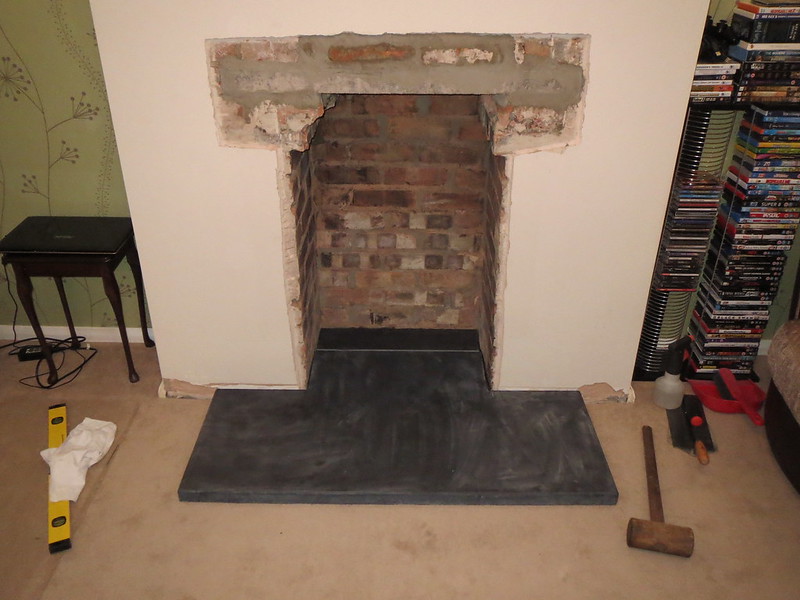
Now the hearth is a good fit, with the right size gaps for grouting, the new carpet gripper rails were cut and nailed into place. The hearth will sit 10mm or so up from the floor so any carpet can be slid under it to keep the edge neat and tidy.
With the mortar mixed (in the dark), it was time to be brave and lay the hearth. The rear section was laid and levelled first, with the front done second. However, I just couldn't get the front to drop enough to match the height of the rear section, despite standing my 15St 7Lb on it. Rather than lift and redo the mortar for the front, the rear piece was lifted out and raised up by a couple of mm. Thankfully, the bed under the front was stiff enough to take my weight to do this quickly.
So this was the hearth as of this morning. It sounds dry, as there's a good solid knock to it but I'll be leaving it at least another day to be sure before I sort the edges out.
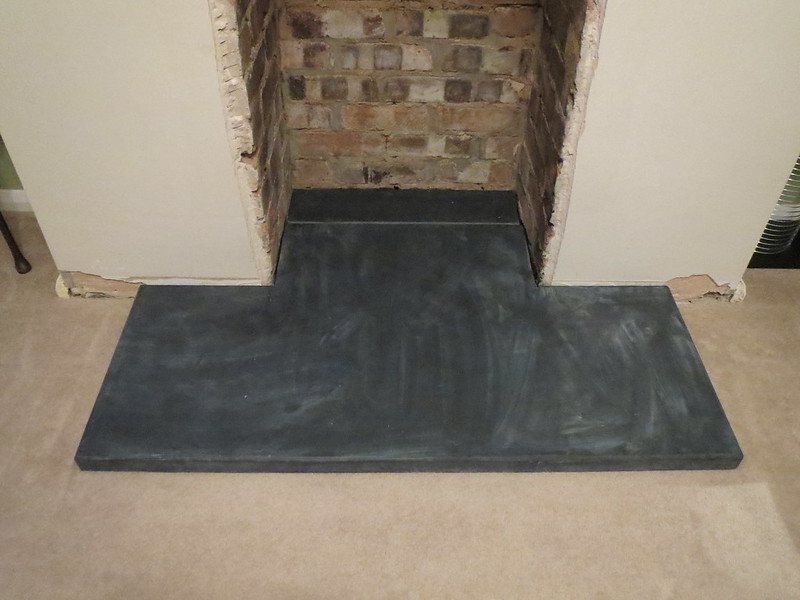
And that's the main bits of the recess done. There's the boxing in at the top to do and the plastering to do or get done but those are cosmetic things rather than anything structural. The only issue this gives me is with the grouting along the chimney breast. I have a choice of either grouting it now, and then plastering down to it later, or the other way round and leave the grouting for later. I'm currently thinking about doing the grouting first as that will then give the plaster a good clean edge to run to. It also gives me something I can do now, rather than waiting which I'm not very good at.
Saturday, 28 December 2013
Just about done building!
Since Christmas Eve I have managed to get most of the "building work" side of the fireplace recess done. The lintel was levelled and mortared in, and then the gap above it bricked back in too. Turns out it's fairly messy fitting lintels as you end up trying to push mortar into small holes or slots only to miss with a reasonable amount of it. Or at least, that's how I ended up doing. But it's in and was then left overnight to go off.

With the lintel dry, I could now make a start on raking out any loose mortar and re-pointing what I felt needed doing in the recess. My aim wasn't to make it look brand new. The house is too old for that, but not old enough to go for a full rustic or aged effect either. So if the mortar was sound but lumpy it stayed. If it was loose or so dry it crumbled it was raked out and replaced. Once the pointing was done I had a good chunk of mortar left over, so I added some ballast I had left over and laid it into the bottom of the fireplace to bring the level up. It's not totally level, but it doesn't need to be, as the hearth will sit on a 5-10mm bed of mortar which will take up any unevenness.

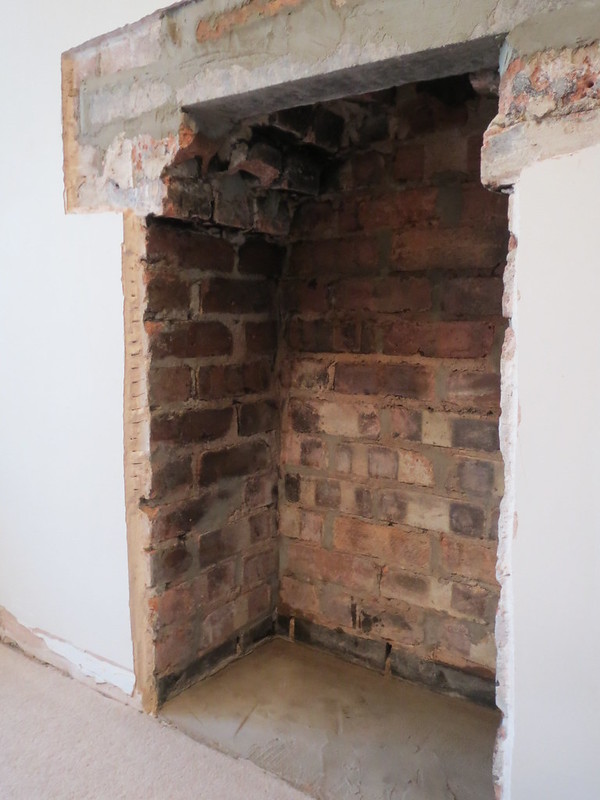
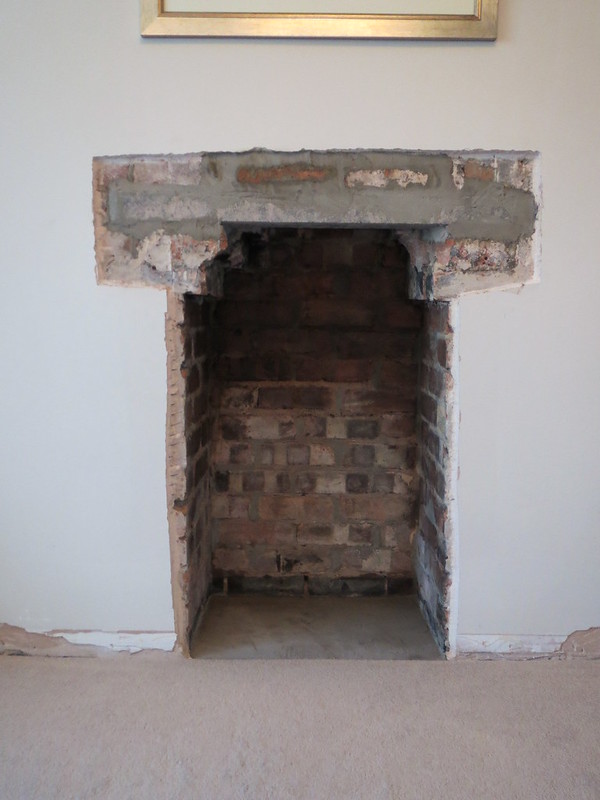
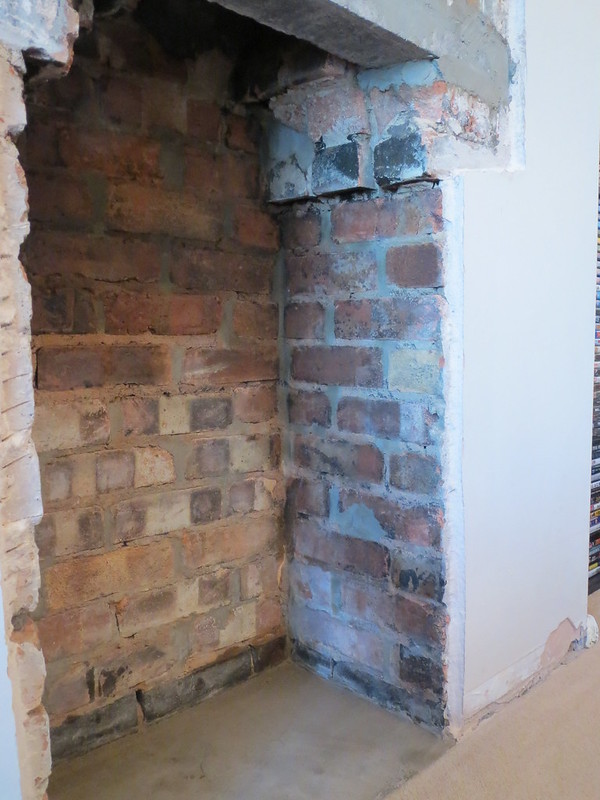
And then I had to wait overnight again for the mortar to go off before I could make a start on cleaning the bricks and remaining mortar. Thankfully, most of it could be done with just a wire brush. I had heard horror stories about trying to clean soot from bricks, but apparently foaming bathroom cleaner is the way to go. So with Mr Muscle in hand, I set too. Turns out that a rag and a small garden spray bottle of water is just as effective, and much cheaper! The below photos show the finished article not long after I had done the cleaning, so the upper sections are still damp and appear darker than the rest. I'm hoping they'll even out once dry.


And that is about it for now. I'm currently looking about for a hearth, and I may have found one that someone has had cut to size, but then realised they'd ordered it wrong. Thankfully, it's just about perfect for what I need. The only other thing I need to do is to cut and fit the concrete boards to cover over the bricks that step in from the vertical line under the lintel. For now I'm planning on leaving this until I get the flue liner, but The Boss may decide before then that she wants it all to look a bit tidier. Fitting the boards will close off the chimney temporarily, so should also stop any draughts.
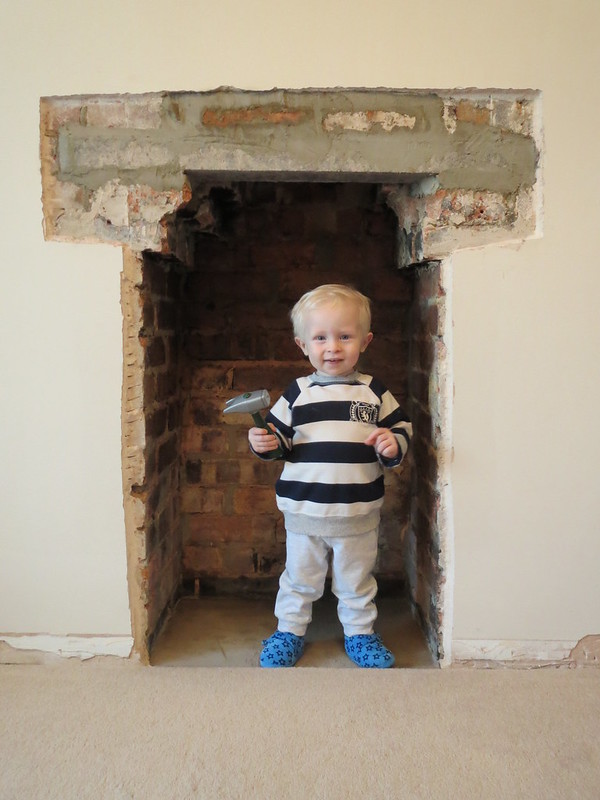
One final thing, a quick photo of Daddy's little helper, as he has been supervising throughout.

All being well, the next update should involve the fitting of the hearth.
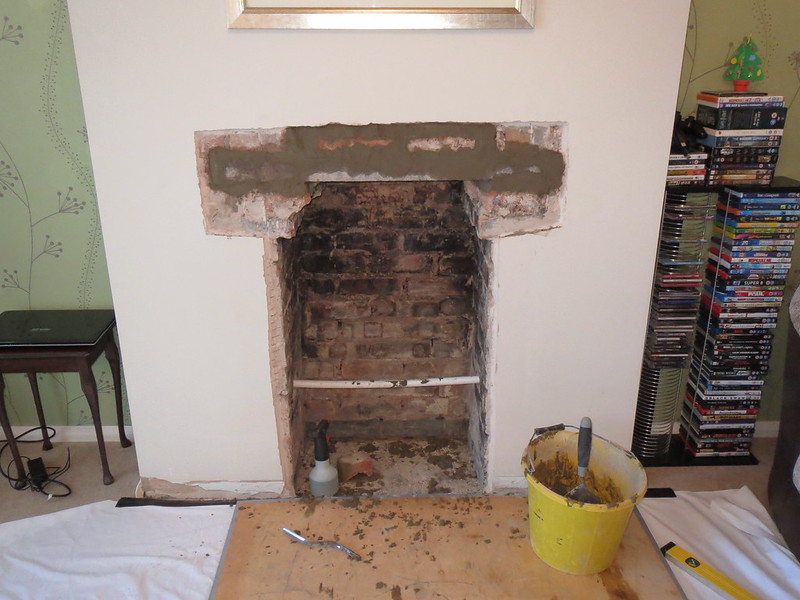
With the lintel dry, I could now make a start on raking out any loose mortar and re-pointing what I felt needed doing in the recess. My aim wasn't to make it look brand new. The house is too old for that, but not old enough to go for a full rustic or aged effect either. So if the mortar was sound but lumpy it stayed. If it was loose or so dry it crumbled it was raked out and replaced. Once the pointing was done I had a good chunk of mortar left over, so I added some ballast I had left over and laid it into the bottom of the fireplace to bring the level up. It's not totally level, but it doesn't need to be, as the hearth will sit on a 5-10mm bed of mortar which will take up any unevenness.
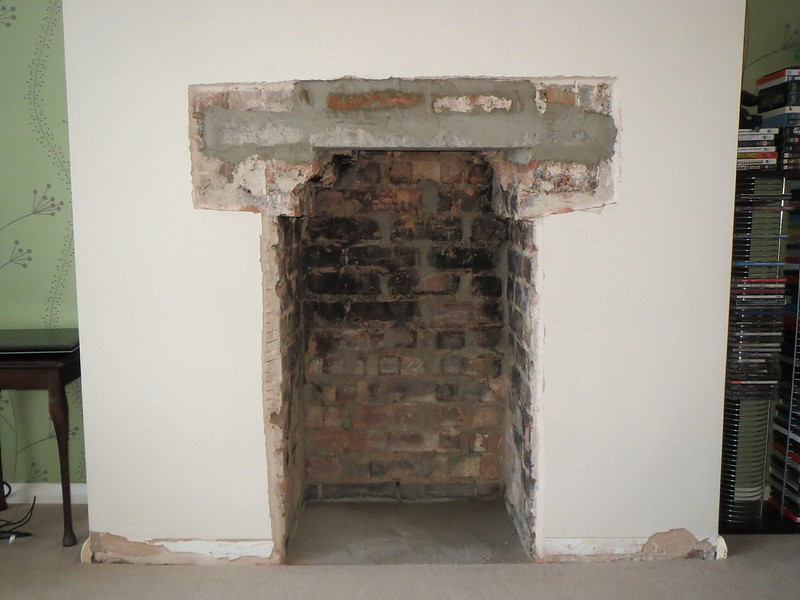
And then I had to wait overnight again for the mortar to go off before I could make a start on cleaning the bricks and remaining mortar. Thankfully, most of it could be done with just a wire brush. I had heard horror stories about trying to clean soot from bricks, but apparently foaming bathroom cleaner is the way to go. So with Mr Muscle in hand, I set too. Turns out that a rag and a small garden spray bottle of water is just as effective, and much cheaper! The below photos show the finished article not long after I had done the cleaning, so the upper sections are still damp and appear darker than the rest. I'm hoping they'll even out once dry.
One final thing, a quick photo of Daddy's little helper, as he has been supervising throughout.
All being well, the next update should involve the fitting of the hearth.
Subscribe to:
Posts (Atom)